The 0.001-Second Standoff: Unmasking the Mystery of Slow-Motion Electricity (Self-Induction Experiment)
I’m Kuwako Ken, your science trainer—where every day is an experiment.
Have you ever heard the word “amanojaku”—someone who instinctively does the opposite of what they’re told? Believe it or not, there’s a component in the world of electricity that behaves just like that. It’s called a coil.
The moment you turn a switch on, it resists: “Don’t let the current flow!”
Turn the switch off, and it clings stubbornly: “Don’t stop the current!”
In this article, we’ll use a modern sensor to uncover the coil’s resistance happening in mere milliseconds—something far too fast for the naked eye to ever catch.
A Contrary Component? The Mystery of Self-Induction
When you include a coil in an electric circuit, the current doesn’t instantly jump when you turn the switch on or off. Instead, it changes gradually. This phenomenon is known as self-induction.
When current suddenly flows through a coil, the magnetic field inside it changes rapidly. The coil “dislikes” this abrupt change and generates a reverse electromotive force to counteract it. It’s almost like inertia in the world of electricity.
You’ll find this in textbooks, but because it happens so quickly, it’s nearly impossible to observe with ordinary ammeters or voltmeters—the needle barely has time to move.
So this time, we used a high-precision sensor, the EasySense V-Hub, to make this fleeting moment visible. A Go Direct current sensor is also a great option.
The Science Recipe: Preparing the Experiment
To capture invisible electrical behavior, you need the right tools.
Things you’ll need
• 3 resistors (20Ω each)
• A coil (0.05H)
• A switch (a push switch works best)
• Breadboard and jumper wires
• 2 AA batteries (3.0V) with a battery holder
• EasySense V-Hub
• Current sensor (100mA or 1A range)

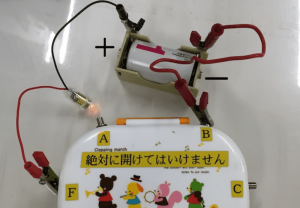
EasySense V-HUB
Let’s Begin! Visualizing Self-Induction
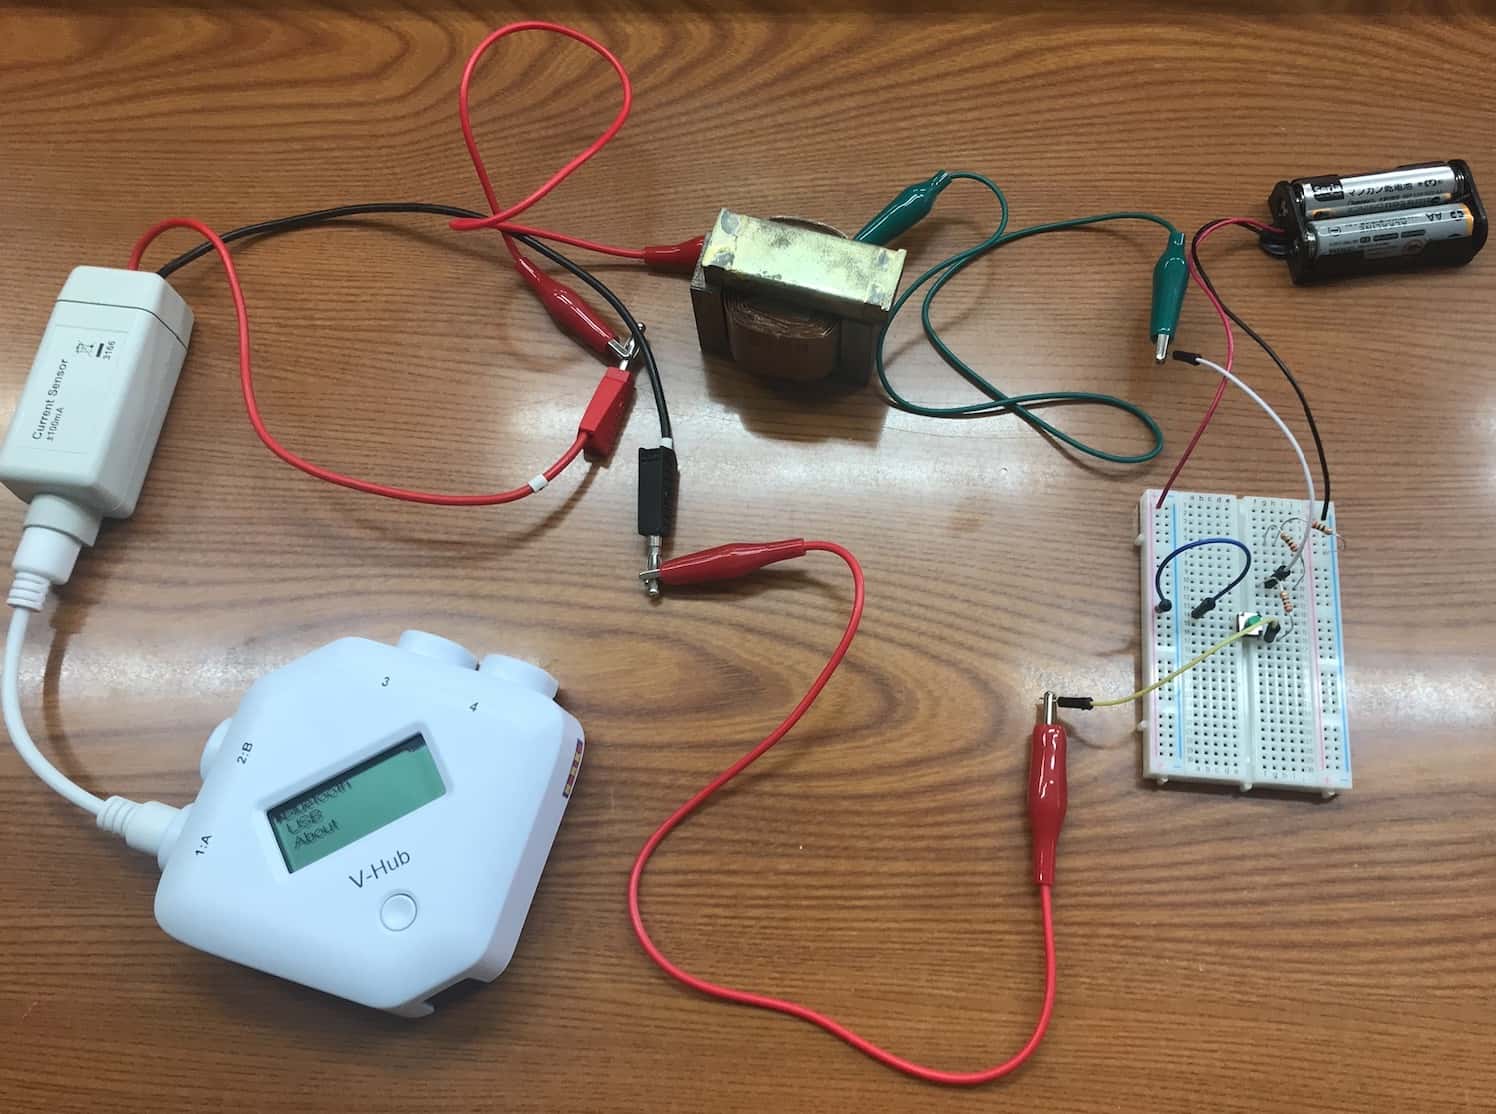
① First, build the circuit as shown below. The key is to insert the EasySense current sensor where you would normally place an ammeter. 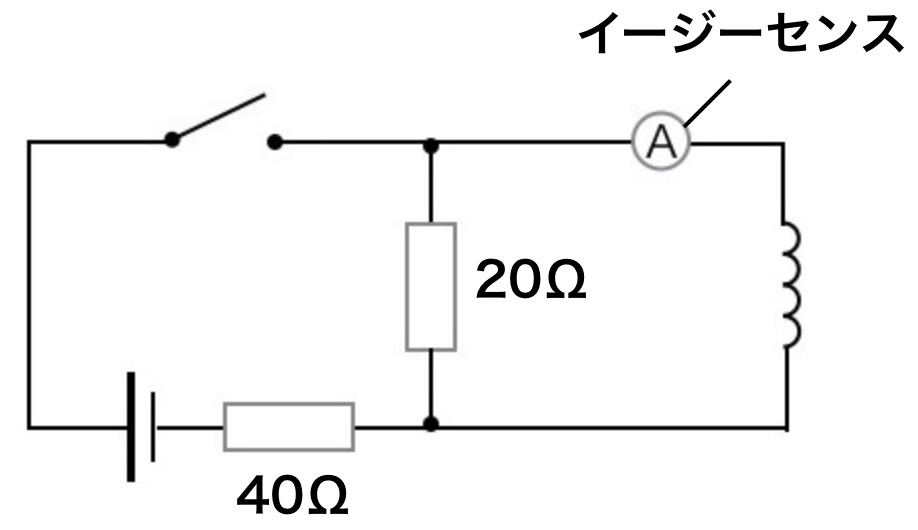
We used a breadboard to assemble the circuit. It’s easy to plug and unplug components—an essential tool for experiments.
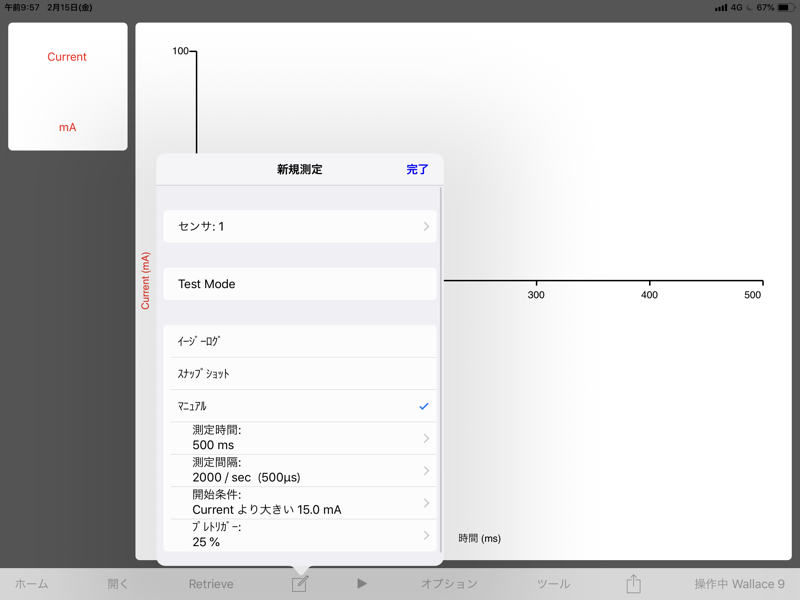
② Next, configure the EasySense settings so you don’t miss that split-second change.
• Measurement time: 500 ms (0.5 seconds)
• Sampling interval: 2000/500 μs
• Trigger: Start recording when current exceeds 15 mA (with 25% pre-trigger)
This trigger setting is crucial. By capturing moments just before and after the switch is pressed, you can perfectly observe how the current rises.
③ Once everything is ready, press the push switch and record the data.
The Results: A Coil’s Stubborn Personality
Take a look at the graph. The vertical axis shows current (mA), and the horizontal axis shows time. 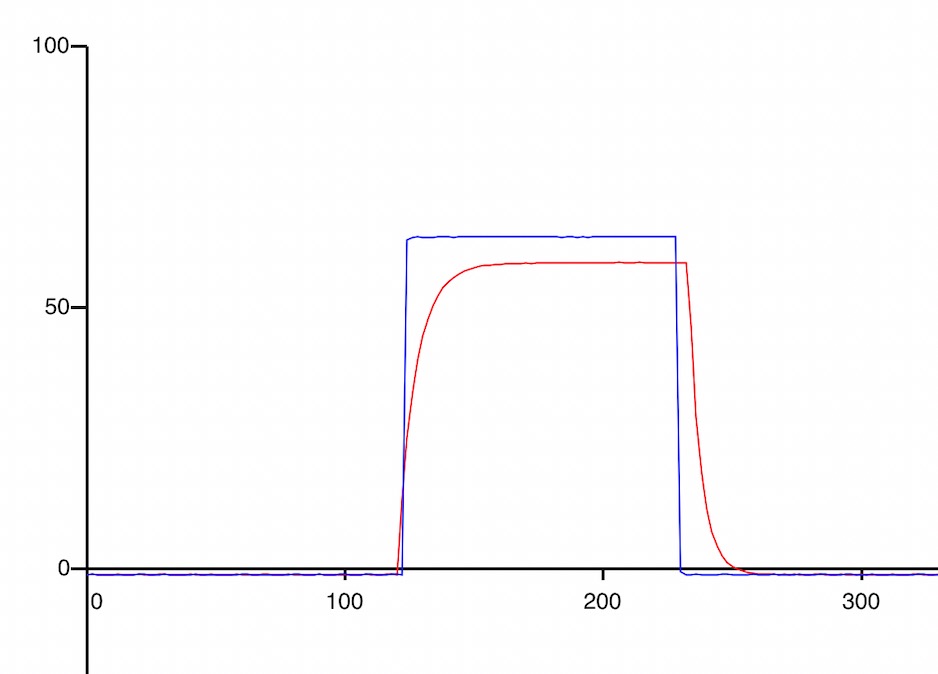
The blue line represents the case without a coil (just resistors). The current shoots up almost vertically the moment the switch is turned on.
Now compare that to the red line, which shows the circuit with a coil. The current increases gradually, forming a gentle slope. This is clear evidence that the coil generates a reverse electromotive force, resisting sudden changes—essentially saying, “No sudden currents allowed!”
The slight difference in maximum values may come from the coil’s own small resistance (from its copper wire). Encountering these “real-world deviations from theory” is part of what makes experiments so fascinating.
Going Deeper: The Moment You Turn It Off
The story doesn’t end when you turn the switch on. Try placing the current sensor in the position shown in the next circuit diagram. 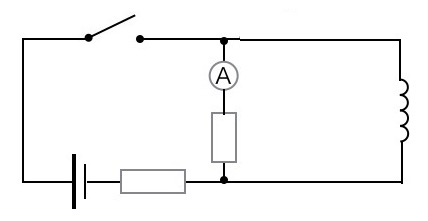
This time, cut the current by switching it off suddenly. The coil reacts by trying to keep the current flowing in the same direction, almost as if it’s shouting, “Don’t stop!”
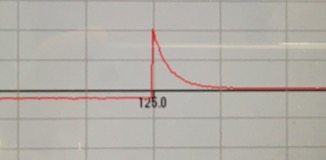
This is why you sometimes see sparks when turning off a switch. A coil really hates change.
There are many more fascinating behaviors—like electrical oscillations when combined with capacitors. With sensors acting as your “eyes,” you can explore the hidden drama of electricity that usually goes unseen.
Contact & Requests
Let’s bring the wonder of science closer to everyday life. I share easy and fun experiments you can try at home, along with helpful tips. Feel free to explore more!
• The content from this blog is now available as a book. Learn more here
• About Kuwako Ken, the creator: click here
• For requests (writing, lectures, workshops, TV supervision/appearances, etc.): click here
• Get updates on new articles via X
![]() Science Idea Channel features experiment videos!
Science Idea Channel features experiment videos!
NEW 分解問題集 理科
- 7月21日発売!『高校入試 分解問題集 理科』(学研)…難しい問題も小さな問題に分解することで、問題を解くことができます。そんな分解の技術が身につくように深く関わりを持って作りました。
7月のイチオシ実験!
夏でプシュッと爽やか実験!

テレビ番組監修・イベント等のお知らせ
- 7月18日(土)「TIF presents ONE SONG FES. 」(フジテレビ)
- 7月18日(土) 教員向け実験講習会「ナリカカサイエンスアカデミー」
- 7月23日(木)科学監修 19:00〜 THE突破ファイル(日本テレビ)
- 7月30日(水) 監修したテレビ番組放送予定
- 12月26日(土) ナリカサイエンスアカデミー(教員向け実験講習会)開催
書籍のお知らせ
- 『大人のための高校物理復習帳』(講談社)…一般向けに日常の物理について公式を元に紐解きました。特設サイトでは実験を多数紹介しています。※増刷がかかり6刷となりました(2026/02/01)

- 『きめる!共通テスト 物理基礎 改訂版』(学研)… 高校物理の参考書です。イラストを多くしてイメージが持てるように描きました。授業についていけない、物理が苦手、そんな生徒におすすめです。特設サイトはこちら。

各種SNS(更新情報をお届け!)
【日本語】X(Twitter)/instagram/Facebook 【英語】BlueSky/Threads
Explore
- 楽しい実験…お子さんと一緒に夢中になれるイチオシの科学実験を多数紹介しています。また、高校物理の理解を深めるための動画教材も用意しました。
- 理科の教材… 理科教師をバックアップ!授業の質を高め、準備を効率化するための選りすぐりの教材を紹介しています。
- Youtube…科学実験等の動画を配信しています。
- 科学ラジオ …科学トピックをほぼ毎日配信中!AI技術を駆使して作成した「耳で楽しむ科学」をお届けします。
- 講演 …全国各地で実験講習会・サイエンスショー等を行っています。
- About …「科学のネタ帳」のコンセプトや、運営者である桑子研のプロフィール・想いをまとめています。
- お問い合わせ …実験教室のご依頼、執筆・講演の相談、科学監修等はこちらのフォームからお寄せください。