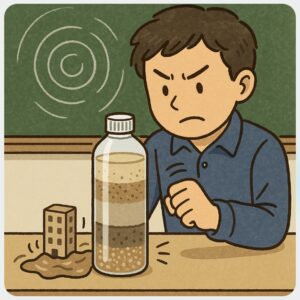
“What’s a Longitudinal Wave?” Explained Instantly! Learn the Basics of Waves and the Secrets Behind Japan’s Earthquake Alerts with a Spring!
I’m Ken Kuwako, your Science Trainer. Every day is an experiment!
Doable with a Dime-Store Toy! The Longitudinal Wave Science Experiment that Captivates Students
“You can hear sound, but have you ever seen what it actually looks like?” “We hear about ‘P-waves’ in earthquake news. They say it’s the small tremor that arrives first, but what exactly is this type of wave?”
These are common questions that pop up when students learn about “waves” in science class. That’s right—among all waves, the one that’s hardest to visualize is the Longitudinal Wave. Transverse waves, like ocean ripples or the waves you create by shaking a rope, are easy to understand because the direction of the wave travel is perpendicular (at a right angle) to the direction of the vibration. They’re visually straightforward.
However, the Longitudinal Wave—the true identity of sound and the seismic P-wave (Primary wave/Initial tremor)—moves in the same direction (parallel) as the vibration.
When you explain that “air particles vibrate back and forth…” students often just get a big question mark above their heads. How can we make this “invisible wave” tangible and understandable?
Don’t worry! In fact, you can easily visualize the longitudinal wave using that familiar toy available at any Japanese “Dagashi-ya” (dime store) or a 100-yen shop! In this article, we’ll introduce the simple recipe for the “Easy Longitudinal Wave Experiment”—a guaranteed hit both in the classroom and at home. With just a little bit of ingenuity, the world of science will instantly become more accessible!
◆ What You’ll Need
• Slinkies (plastic or metal) … 2-3 pieces • Vinyl tape
Recommendations: • Plastic Slinkies (Lighter and easy to handle, but the wave moves fast) • Metal Slinkies (Slightly heavier, making the wave move slower and easier to observe)
Plastic Slinkies are available at dime stores and 100-yen shops, but metal ones can be purchased on Amazon and other sites. Narika also sells them (a coiled spring for wave experiments, but it costs 5,000 yen).
◆ Experiment Setup and Key Tips
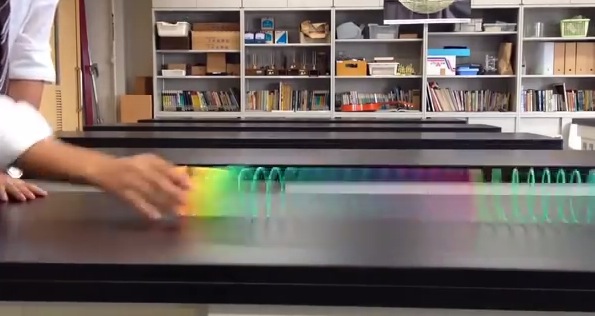
Connect 2 to 3 Slinkies: Use vinyl tape to firmly connect the Slinkies together. The trick is to secure them tightly so they don’t shift, as a loose connection will prevent the wave from transmitting properly. Set Up in a Wide Space: Stretch the spring out straight on the floor or on a long table. Having a few students hold the ends is also fine.
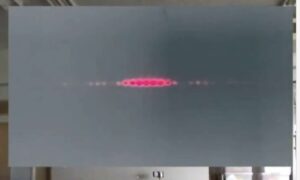
Generate the Longitudinal Wave: Quickly push and pull the spring back and forth from one end. You will see a wave of compression and rarefaction travel down the spring. At this moment, you should see alternating sections where the coils are compressed (dense) and expanded (rare/sparse). The sight of these compressed sections zooming down the entire length of the spring is the very essence of the longitudinal wave!
Be sure to check out this video to see the satisfying way the wave transmits!
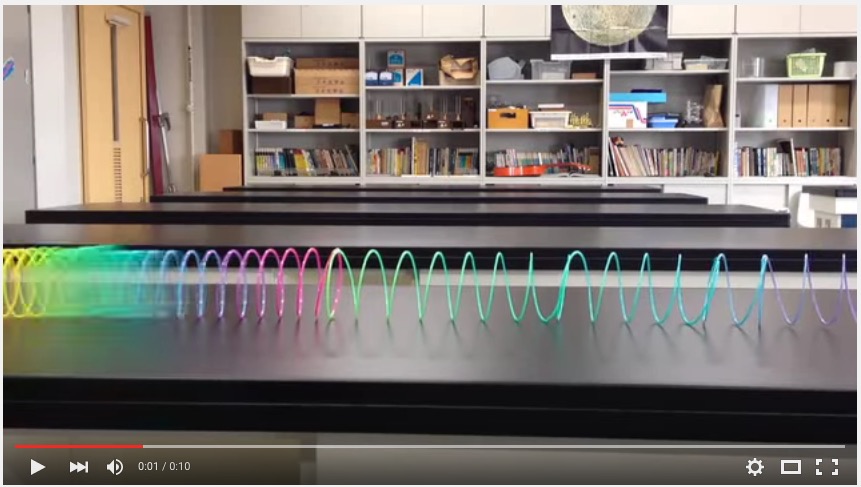

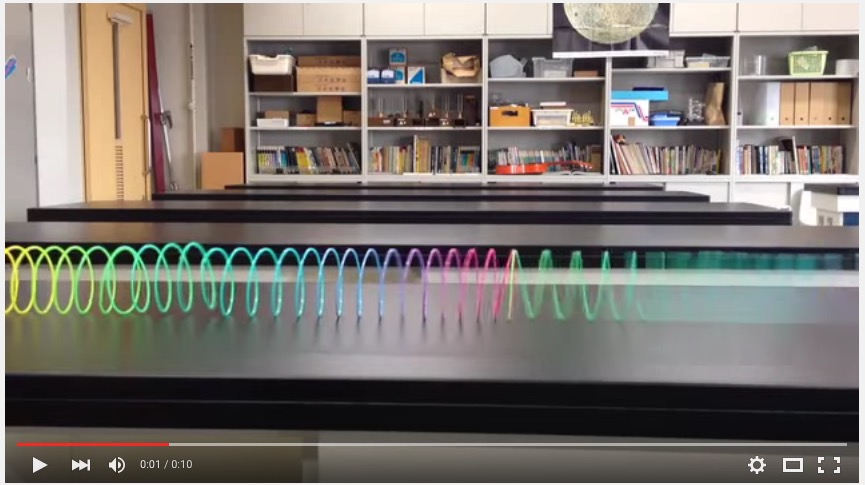
How was that? Compared to a transverse wave (up-and-down motion), you can see that the individual parts of the spring are vibrating in the same direction as the wave is traveling. This difference in the direction of the medium’s (the substance that transmits the wave) vibration is the key point that fundamentally distinguishes the properties of waves.
◆ Longitudinal Waves Are All Around Us!
The longitudinal wave you observed in this experiment has deep connections to our daily lives.
1. Earthquakes and “P-waves and S-waves”
When an earthquake occurs, longitudinal and transverse waves are generated simultaneously and travel through the ground. These are:
- Longitudinal Wave = P-wave (Primary wave / Initial tiny tremor) … Travels fast and causes small, rattling shakes.
- Transverse Wave = S-wave (Secondary wave / Main large tremor) … Travels slower and causes large, swaying shakes.
Because the P-wave (Longitudinal Wave) is faster, it arrives first. The system that catches this “The P-wave has arrived!” information and warns us, “A strong tremor (S-wave) is coming soon!” is the mechanism behind the ‘Earthquake Early Warning System.’ The same wave you saw traveling in the Slinky is a key piece of information that protects our lives.
2. The True Identity of “Sound”
Furthermore, our “voices” and “music” are also longitudinal waves traveling through the air. Imagine the “compressed (dense)” parts of the Slinky experiment as areas where air molecules are squeezed tightly together (high-pressure areas). The propagation of these “dense” and “sparse” waves through the air vibrates the eardrum inside our ears, which is how we perceive “sound.”
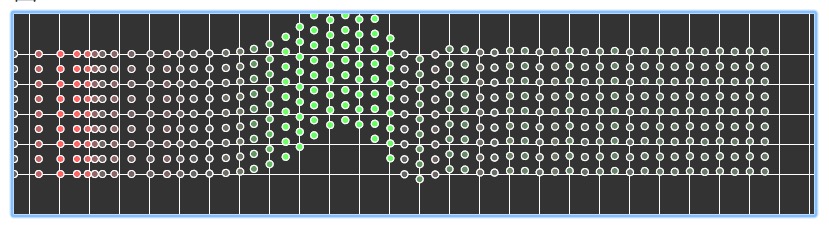
You can also perform a digital experiment on this site, which provides simulations of longitudinal and transverse waves. Be sure to try it out!
◆ Tips for Classroom Use
• Review Transverse Waves beforehand! This will make the difference between the two types of waves clearer, deepening the learning experience.
• Try slow-motion video! Especially with a metal Slinky, you can use your smartphone’s slow-motion feature to meticulously observe how the wave propagates.
• Connect it to “Sound is a Longitudinal Wave!” Relating the experiment to how sound travels (a longitudinal wave in the air) immediately boosts the understanding of the entire unit.
◆ The Dime Store: A Goldmine of “Science Seeds”
Besides Slinkies, dime stores are packed with all kinds of science gadgets, like unpoppable soap bubbles (the jelly kind), plastic propellers (like a bamboo copter), and snap-pops. You might think, “I don’t have a traditional dime store nearby!” but these shops are now often found inside shopping centers.
For example, there are stores like Fuurindo in Aeon Malls. Think of the dime store as a “Mini Science Museum.” Hidden within each inexpensive toy are fundamental laws of physics: the Slinky is “Waves,” the bamboo copter is “Lift,” and the snap-pops are “Chemical Reactions.” Why not grab your allowance, take your kids, and go on a hunt for these “Science Seeds”?
Grasping the concept of longitudinal waves is not just about theory, but about the experience of “seeing and feeling” it. This is your chance to make students who struggle with science say, “I get it! This is fun!” The preparation is simple, and the cost is minimal. Doesn’t it excite you that you can dive into the essence of science with just dime-store-level tools? Be sure to try the “Longitudinal Wave with a Spring” challenge in your next class.
If you want to create a longer version, please see this article as well.
Contact and Commission Details
Let’s bring the wonders and fun of science closer to you! This blog provides easy-to-understand summaries of fun, at-home science experiments and their tips. Feel free to browse around! • The contents of The Science Idea Notebook have been published as a book. Details here. • About the administrator, Ken Kuwako, click here. • For various commissions (writing, lectures, experiment classes, TV supervision, appearances, etc.), click here. • Article updates are posted on X!
![]() We are posting experiment videos on the Science Idea Channel!
We are posting experiment videos on the Science Idea Channel!
NEW 分解問題集 理科
- 7月21日発売!『高校入試 分解問題集 理科』(学研)…難しい問題も小さな問題に分解することで、問題を解くことができます。そんな分解の技術が身につくように深く関わりを持って作りました。
7月のイチオシ実験!
夏でプシュッと爽やか実験!

テレビ番組監修・イベント等のお知らせ
- 7月18日(土)「TIF presents ONE SONG FES. 」(フジテレビ)
- 7月18日(土) 教員向け実験講習会「ナリカカサイエンスアカデミー」
- 7月23日(木)科学監修 19:00〜 THE突破ファイル(日本テレビ)
- 7月30日(水) 監修したテレビ番組放送予定
- 12月26日(土) ナリカサイエンスアカデミー(教員向け実験講習会)開催
書籍のお知らせ
- 『大人のための高校物理復習帳』(講談社)…一般向けに日常の物理について公式を元に紐解きました。特設サイトでは実験を多数紹介しています。※増刷がかかり6刷となりました(2026/02/01)

- 『きめる!共通テスト 物理基礎 改訂版』(学研)… 高校物理の参考書です。イラストを多くしてイメージが持てるように描きました。授業についていけない、物理が苦手、そんな生徒におすすめです。特設サイトはこちら。

各種SNS(更新情報をお届け!)
【日本語】X(Twitter)/instagram/Facebook 【英語】BlueSky/Threads
Explore
- 楽しい実験…お子さんと一緒に夢中になれるイチオシの科学実験を多数紹介しています。また、高校物理の理解を深めるための動画教材も用意しました。
- 理科の教材… 理科教師をバックアップ!授業の質を高め、準備を効率化するための選りすぐりの教材を紹介しています。
- Youtube…科学実験等の動画を配信しています。
- 科学ラジオ …科学トピックをほぼ毎日配信中!AI技術を駆使して作成した「耳で楽しむ科学」をお届けします。
- 講演 …全国各地で実験講習会・サイエンスショー等を行っています。
- About …「科学のネタ帳」のコンセプトや、運営者である桑子研のプロフィール・想いをまとめています。
- お問い合わせ …実験教室のご依頼、執筆・講演の相談、科学監修等はこちらのフォームからお寄せください。