The Science Thriller: The Magical Ammonia Fountain and the 1-in-3 Chance of Success!
I’m Kuwako Ken, a Science Trainer. Every day is an experiment.
A bright red fountain erupting inside a flask… Have you heard of the magical “Ammonia Fountain Experiment”? Many of you might have seen it demonstrated in a science class. This beautiful phenomenon is actually a compact, fascinating science experiment that utilizes “a surprising property” of ammonia gas.
This time, I’ll share the gripping, dramatic results from when I took on the Ammonia Fountain Experiment, and reveal the scientific secrets hidden behind its stunning beauty!
Taking on the Ammonia Fountain Experiment! What was the Dramatic 1 Win, 2 Loss Result?
Hello everyone! Today, I challenged myself with one of the most popular science demonstrations: the “Ammonia Fountain Experiment”!
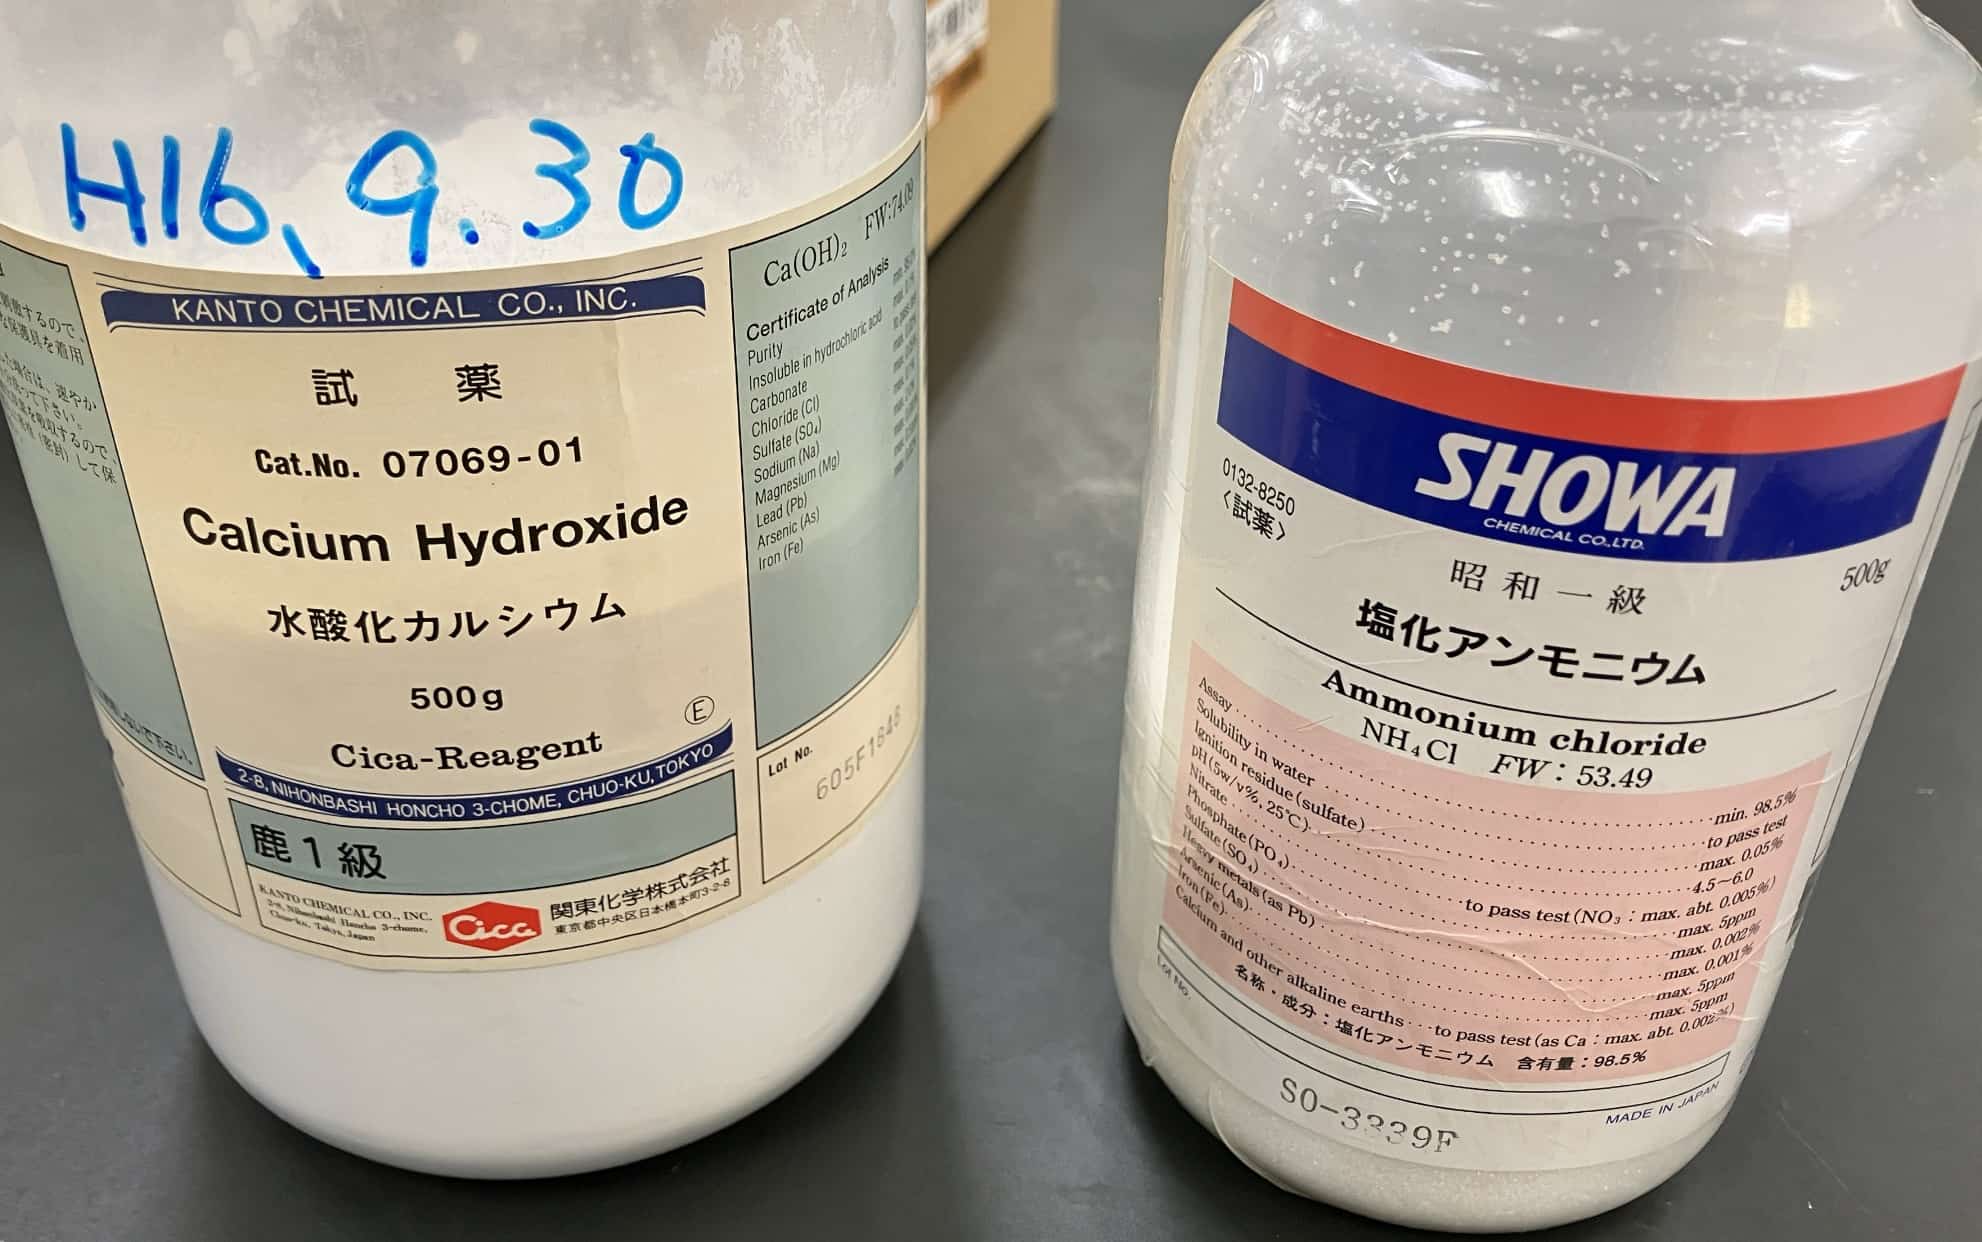
The preparation for the experiment is simple. We mix and heat two types of white powders, ammonium chloride (NH
4
Cl) and calcium hydroxide (Ca(OH)
2
), to generate ammonia gas (NH
3
). The chemical reaction equation looks like this:
2NH₄Cl + Ca(OH)₂ ⟶ 2NH₃ + CaCl₂ + 2H₂O
Using about 3g each of the ammonium chloride and calcium hydroxide in this reaction should theoretically generate about 1.3L of ammonia. With this much gas, I was confident it would work! Here are the chemical structures of the substances involved in the reaction.
The Experimental Method and the ‘Secret’ to Success
There are a few key points necessary to succeed with the ammonia fountain experiment.
1. Mix the Chemicals
Measure 3g each of ammonium chloride and calcium hydroxide and mix them well. Always wear safety goggles during this step.
2. Generate and Collect the Ammonia
Put the mixed chemicals into a test tube and gently heat them with a Bunsen burner. Collect the generated ammonia gas in a dry round-bottom flask. There are three key points here!
- Ensure good ventilation: Ammonia has a strong, irritating odor and is dangerous if inhaled in high concentrations.
- Slightly lower the mouth of the test tube: This chemical reaction also produces water (H
2
O). If the mouth of the test tube is not lowered, the generated water can flow back to the heated area, risking the test tube cracking. - Collect the ammonia correctly: Ammonia is lighter than air. Therefore, it should be collected using the downward displacement of air method, with the mouth of the flask pointing downwards. A key trick for success is inserting the glass tube deep into the flask and collecting the gas by pushing the air out of the flask.
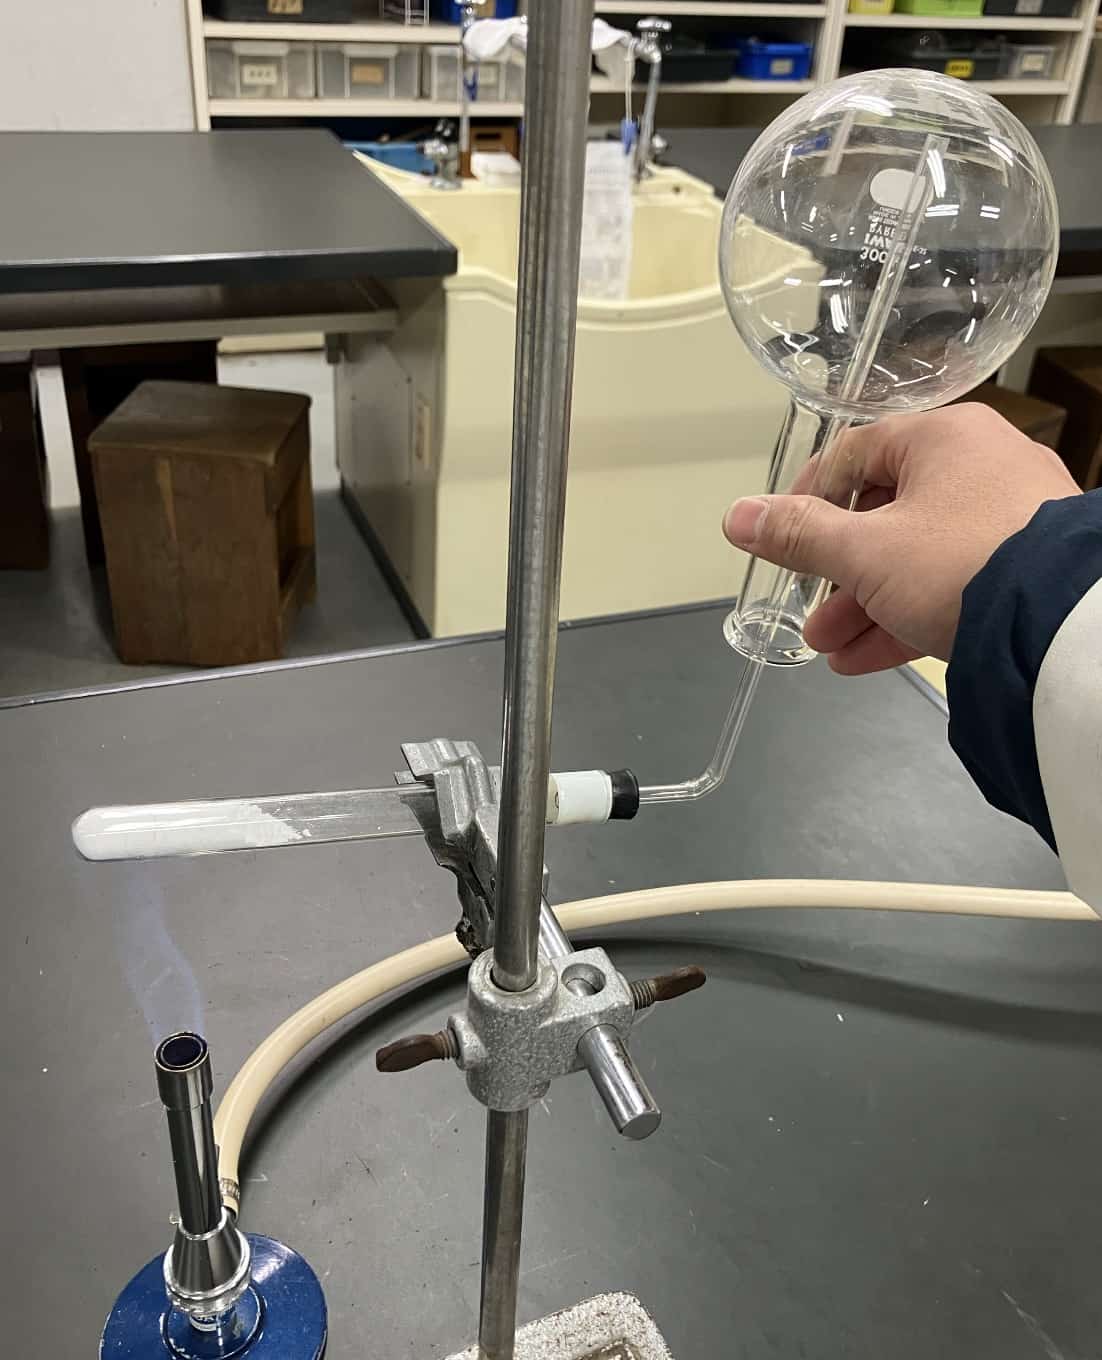 The trick is to bring the tip of the tube to the upper part of the round-bottom flask when collecting the gas. Imagine filling the flask from the top down. Also, using a larger flask increases the probability of success!
3. Be Careful of the Pungent Odor!
When checking the ammonia odor, keep your face away from the test tube and use your hand to waft the smell toward your nose. Never inhale it directly.
The Results… A Dramatic 1 Win, 2 Losses!
I had succeeded twice in the preliminary tests and felt completely confident, thinking, “Oh, I’ve got this!” But when it came time for the actual lesson… The result was a dramatic 1 win and 2 losses! We failed twice and succeeded only once. We shared the frustration with the students, realizing, “Experiments don’t always go by the book…” However, the joy of that one successful moment was unparalleled! The classroom erupted in a huge cheer of “Oooh!”
The Moment of Success! The Mystery of the Beautiful Red Fountain
Here is what the successful experiment looked like!
The sight of the water being sucked up into the flask and spreading out as a beautiful pink fountain is always breathtaking. But doesn’t it make you wonder:
“Why does plain water turn pink?”
“And why does the water get sucked up by itself in the first place?”
The secret is hidden in the amazing properties of ammonia. Ammonia has the characteristic of being “extremely soluble in water.” When you inject just a small amount of water using the dropper attached to the flask’s mouth (this is the ‘primer water’), the ammonia gas inside the flask instantly dissolves into that water. As the gas dissolves into the liquid, the pressure inside the flask drops suddenly. Since the external pressure (atmospheric pressure) remains the same, a large pressure difference is created between the outside and the inside of the flask. To equalize this pressure difference, the water in the beaker is pushed by the atmospheric pressure and is forcefully sucked up into the flask. That is the true nature of the ‘fountain.’
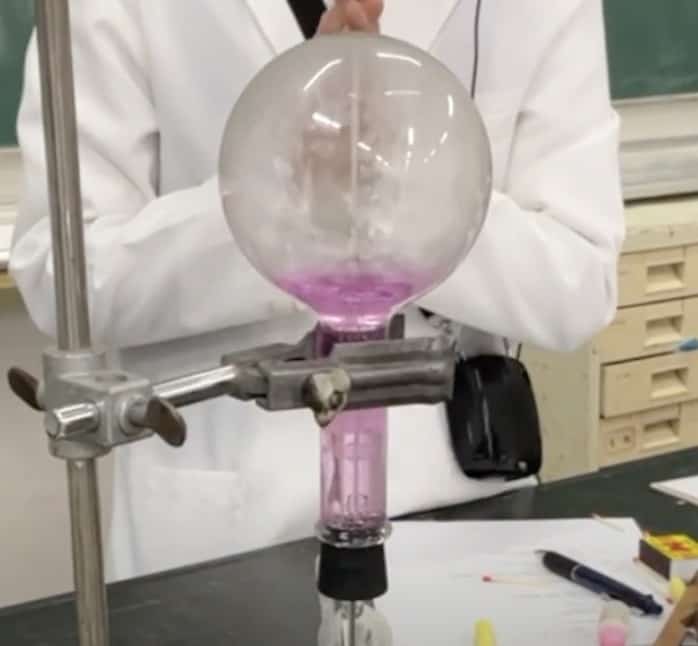
And the mystery of the pink color? This is because we mixed an indicator called “phenolphthalein solution” into the water in the beaker beforehand. Phenolphthalein has the property of turning a vivid pink color when it reacts with an alkaline liquid. Since water with dissolved ammonia becomes “ammonia water” and exhibits alkalinity, the sucked-up water is beautifully dyed pink.
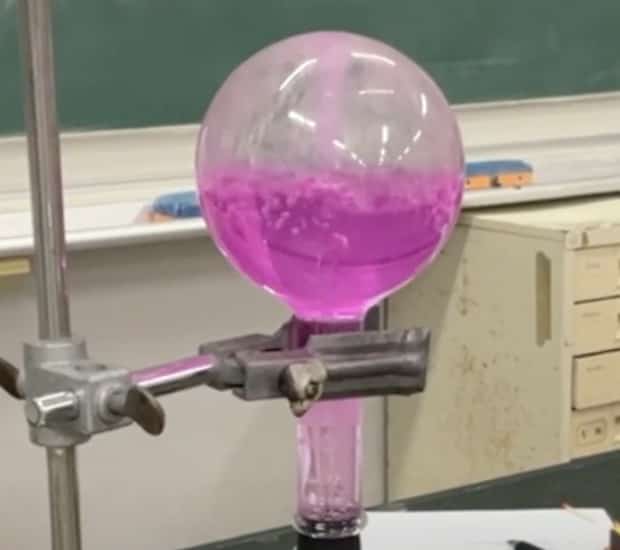
By the way, the fountain stops eventually because the pressure difference between the inside and outside decreases as the flask fills up with water. This is yet another piece of evidence that scientific laws are always at work.
The Thrill of Experiments Lies in ‘Unpredictable Drama’!
The reasons for our failures this time were: in the first attempt, we didn’t generate enough ammonia, and in the second attempt, when trying to warm the ammonia water directly, the heat was too strong. Clearly, careful preparation is vital in everything we do. However, whether you succeed or fail, every result leads to learning. The process of thinking, “Why didn’t it work?” and “How can I succeed next time?” might just be the most fascinating part of science. Our 1 win, 2 losses result was definitely an experience of science’s unpredictable drama.
Want to Know More? Advanced Applications of the Ammonia Fountain
This video is also very easy to understand for demonstrating to students.
I also found this interesting experiment video. In a typical fountain experiment, a dropper is used to inject the primer water, but this video doesn’t use one. Just by placing the tube in the water, the ammonia slowly dissolves into the water, and the fountain eventually starts automatically. It’s sure to amaze your audience if you use it as a demonstration!
The ammonium chloride used in this experiment also creates beautiful crystals in the next unit’s ‘recrystallization’ experiment. Learning that a single substance is involved in various scientific phenomena is one of the fascinations of chemistry.
Contact and Requests
Bring the wonders and fun of science closer to you! I’ve clearly compiled fun science experiments you can do at home and the tricks for them. Feel free to search around!
・The content of my Science Idea Book is now available as a book. Find out more here
・For information about the administrator, Kuwako Ken, click here
・For various requests (writing, lectures, experiment classes, TV supervision/appearances, etc.), click here
・Article updates are being distributed on X!
![]() We are distributing experiment videos on the Science Idea Channel!
We are distributing experiment videos on the Science Idea Channel!
NEW 分解問題集 理科
- 7月21日発売!『高校入試 分解問題集 理科』(学研)…難しい問題も小さな問題に分解することで、問題を解くことができます。そんな分解の技術が身につくように深く関わりを持って作りました。
7月のイチオシ実験!
夏でプシュッと爽やか実験!

テレビ番組監修・イベント等のお知らせ
- 7月18日(土)「TIF presents ONE SONG FES. 」(フジテレビ)
- 7月18日(土) 教員向け実験講習会「ナリカカサイエンスアカデミー」
- 7月23日(木)科学監修 19:00〜 THE突破ファイル(日本テレビ)
- 7月30日(水) 監修したテレビ番組放送予定
- 12月26日(土) ナリカサイエンスアカデミー(教員向け実験講習会)開催
書籍のお知らせ
- 『大人のための高校物理復習帳』(講談社)…一般向けに日常の物理について公式を元に紐解きました。特設サイトでは実験を多数紹介しています。※増刷がかかり6刷となりました(2026/02/01)

- 『きめる!共通テスト 物理基礎 改訂版』(学研)… 高校物理の参考書です。イラストを多くしてイメージが持てるように描きました。授業についていけない、物理が苦手、そんな生徒におすすめです。特設サイトはこちら。

各種SNS(更新情報をお届け!)
【日本語】X(Twitter)/instagram/Facebook 【英語】BlueSky/Threads
Explore
- 楽しい実験…お子さんと一緒に夢中になれるイチオシの科学実験を多数紹介しています。また、高校物理の理解を深めるための動画教材も用意しました。
- 理科の教材… 理科教師をバックアップ!授業の質を高め、準備を効率化するための選りすぐりの教材を紹介しています。
- Youtube…科学実験等の動画を配信しています。
- 科学ラジオ …科学トピックをほぼ毎日配信中!AI技術を駆使して作成した「耳で楽しむ科学」をお届けします。
- 講演 …全国各地で実験講習会・サイエンスショー等を行っています。
- About …「科学のネタ帳」のコンセプトや、運営者である桑子研のプロフィール・想いをまとめています。
- お問い合わせ …実験教室のご依頼、執筆・講演の相談、科学監修等はこちらのフォームからお寄せください。