Warning: Safety First! 13 Essential Keys to Mastering the “Iron & Sulfur” Experiment (Preventing Hydrogen Sulfide Risk)
I’m Kuwako Ken, the Science Trainer. Every day is an experiment.
【This article is also available as a radio episode!】
If you’ve ever visited a hot spring town, you probably know that strange smell drifting through the air. Kind of like rotten eggs… yet somehow oddly comforting. That smell comes from hydrogen sulfide. Since I grew up in Gunma Prefecture, famous for its hot springs, the scent actually feels nostalgic to me.
One of the classic middle school science experiments in Japan involves mixing iron and sulfur and heating them together. It’s not only a beautiful demonstration of chemical reactions, but also a rare chance for students to experience chemistry with all five senses. They see the glowing reaction, smell the gas produced, and truly feel that matter is changing into something completely new.
Unfortunately, in recent years, accidents related to this experiment have been reported across Japan. Just searching “hydrogen sulfide accident” brings up alarming stories. Sometimes a student ignores instructions and pours in far too much hydrochloric acid. That single mistake can escalate into a major safety issue, and in some cases even puts the future of hands-on science classes at risk.
<Examples of reported accidents>
・Possible hydrogen sulfide exposure at a junior high school in Edogawa, Tokyo — five students became ill(Asahi Shimbun)(2026/05/15)
・Is the hydrogen sulfide experiment still necessary? Repeated emergency transports raise concerns(Mainichi Shimbun)(2025/6/19)
https://youtu.be/QwMtCDEYjjs?si=wWNO55szEuiigQEE
Even so, I still believe this experiment is worth doing.
The moment iron and sulfur react and begin glowing red is unforgettable. Students remember it for years.

And the experience of learning “this smell means danger” could someday protect their lives at a hot spring, construction site, or other real-world setting. That’s exactly why the experiment must be carried out carefully, correctly, and safely.
This experiment is meaningful and educational for both students and science teachers. But if safety cannot be guaranteed, it should not be done.
In this article, I’ll share the 13 safety checkpoints that I review every year before teaching this lesson. At the end, I’ve also included the actual safety instruction slides I use in class. Feel free to use them however you like.
Before every lesson, I personally run the experiment multiple times in advance. Thankfully, I’ve avoided major accidents so far, but I always approach this experiment with a healthy sense of caution.
※ I often receive messages asking, “Can I use these photos or slides in my own classes?” Absolutely. Everything posted here is free to use. I hope it helps make science lessons safer, more effective, and more exciting.
Experiment Procedure
Advance preparation and ventilation <Safety starts before class even begins>
Before the lesson, let the school nurse and homeroom teacher know that you’ll be conducting this experiment. If anything unexpected happens, quick coordination becomes much easier. Students should also be reminded ahead of time to bring lab coats and safety goggles.
And don’t forget the ventilation fan.
On experiment day, teachers are usually overwhelmed with setup and student management. You remember to open the windows… but forget to turn on the fan. It happens surprisingly often. That’s why it’s best to make turning on the ventilation system part of your pre-class routine.
Checkpoint 0: Inform the school nurse and homeroom teacher beforehand.
Checkpoint 1: Turn on the ventilation fan before class starts so you won’t forget later.
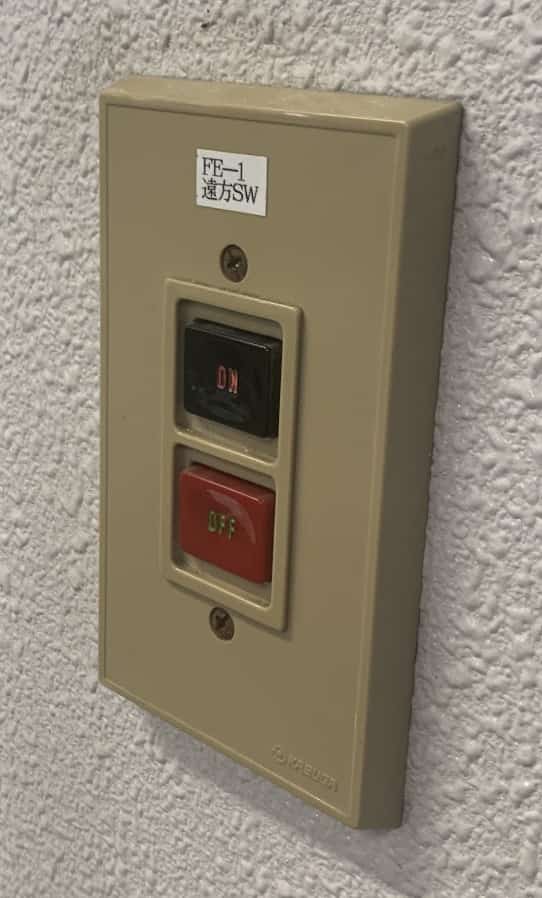
The ventilation switch in our science room
Step 1: Thoroughly mix iron filings and sulfur(7.0 g iron, 4.0 g sulfur)
To finish the experiment within a standard 50-minute class, it’s best for the teacher to prepare the measurements ahead of time.
If there’s too much sulfur, sulfur vapor is more likely to form, so accurate measurement directly affects safety.
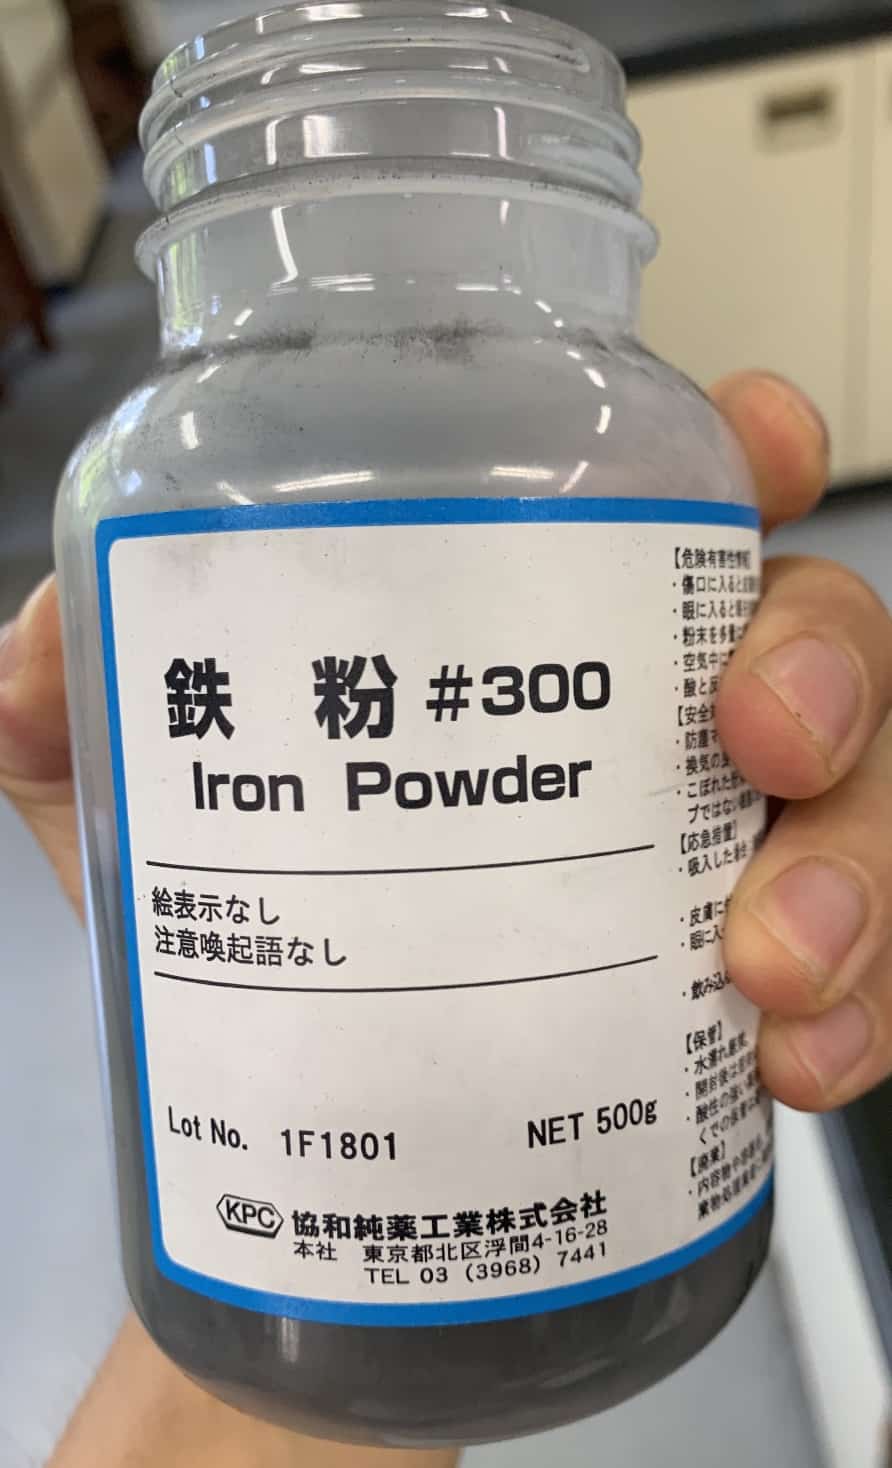
The particle size of the iron filings also matters. Coarse 60-mesh iron sometimes reacts poorly. Use 100 mesh or finer. In this experiment, I used 300-mesh iron powder.
Why does this matter? Smaller particles mean more surface area where iron and sulfur can touch, making the reaction smoother and more stable.
Checkpoint 2: Use iron powder that is at least 100 mesh!
Rakuten: 300-mesh iron powder
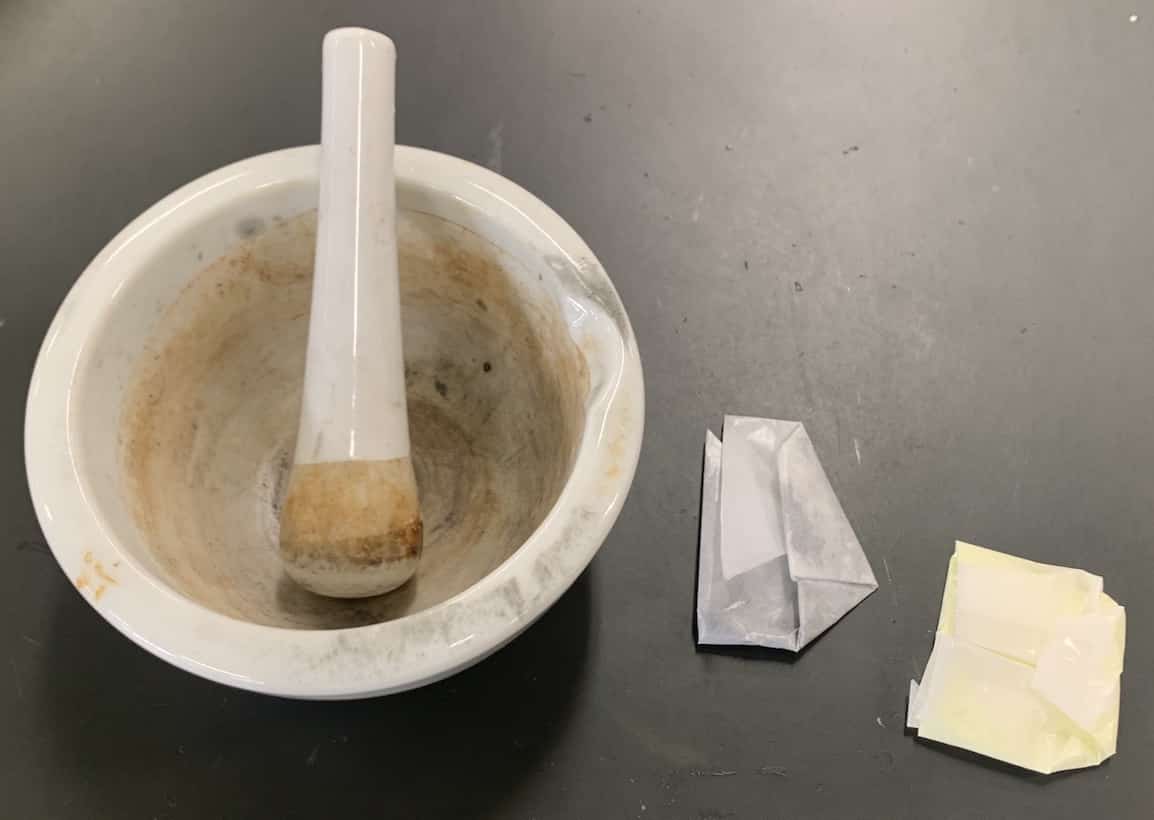
Place the iron and sulfur in a mortar and mix thoroughly.
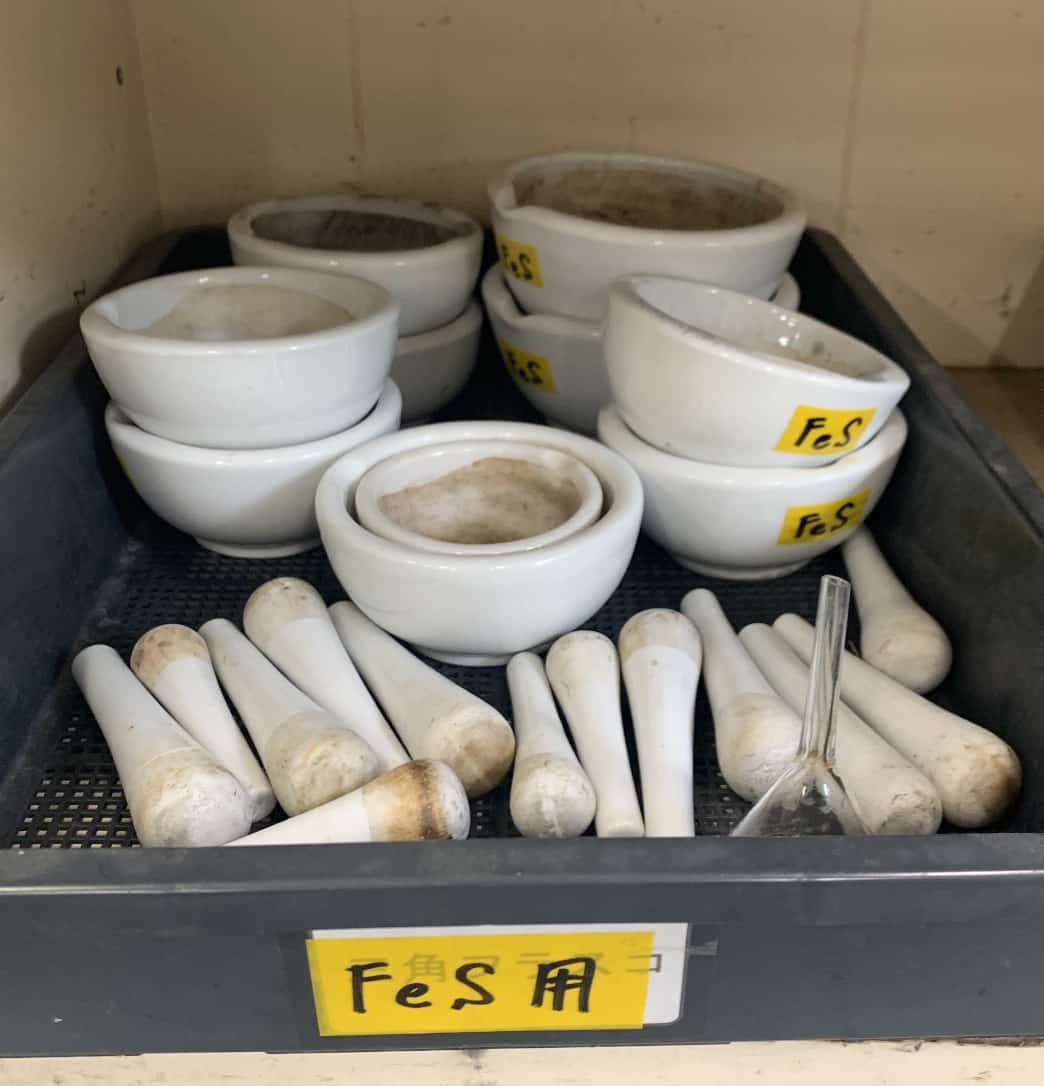
It’s convenient to keep separate mortars for iron sulfide experiments and copper oxide experiments. That way, you can reuse them for the next class without washing in between.
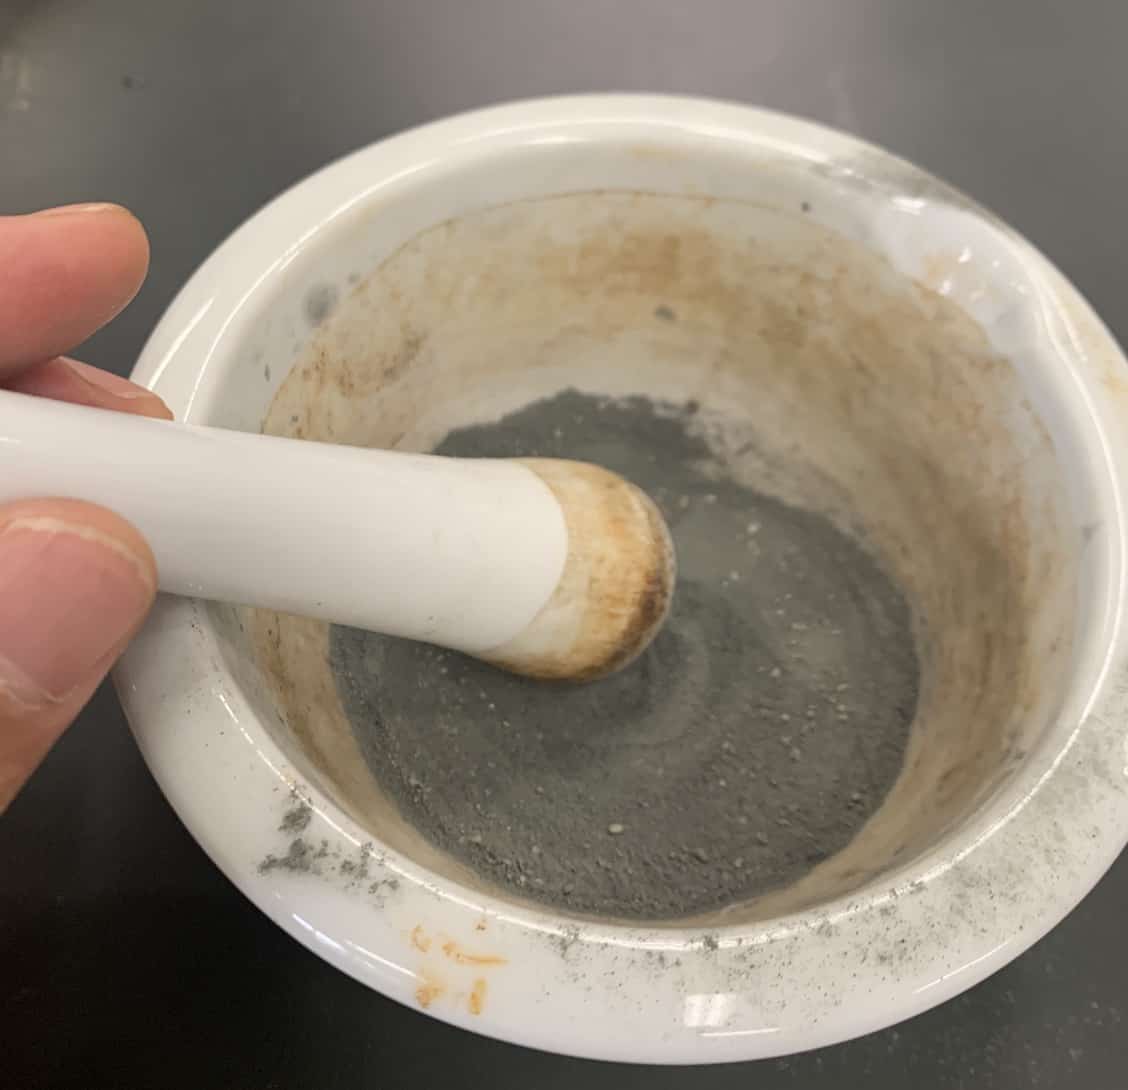
Keep mixing until the entire powder turns gray. If yellow sulfur clumps remain, the reaction becomes uneven, and excess sulfur may vaporize.
A completely gray mixture is your visual cue that it’s ready.
Checkpoint 3: Mix thoroughly. Poor mixing can produce sulfur vapor.
Reference: Sulfur melts at 112°C and boils at 446°C. A gas burner flame reaches around 1500°C.
This is an example of poor mixing. Yellow sulfur clumps are still visible. Keep mixing until everything becomes gray.
Step 2: Make two aluminum foil containers and fill them with the mixture
Prepare aluminum foil pieces about 5 cm × 10 cm ahead of time.
Tape together two AAA batteries to use as a mold. Wrap the foil tightly around them while pressing firmly against the desk. Seal one end, remove the batteries, and you’ve got a sturdy aluminum container. Make two of them.
Roll it up gently by hand.

Transfer the mixed sample onto weighing paper, then use a funnel to pour it into the aluminum tube.
After filling, lightly tap the tube against the desk to remove trapped air and improve contact between the particles.
Warn students not to tap too hard, or the foil may tear.
Also, funnels can simply be reused for the next class without washing.
Step 3: Heat the sample in a test tube <The glowing red reaction — the highlight of the experiment!>
Label the two samples “a” and “b.” Leave sample b untouched as a control.
Place sample a into a test tube, plug the opening with cotton, and heat the upper part of the aluminum container.
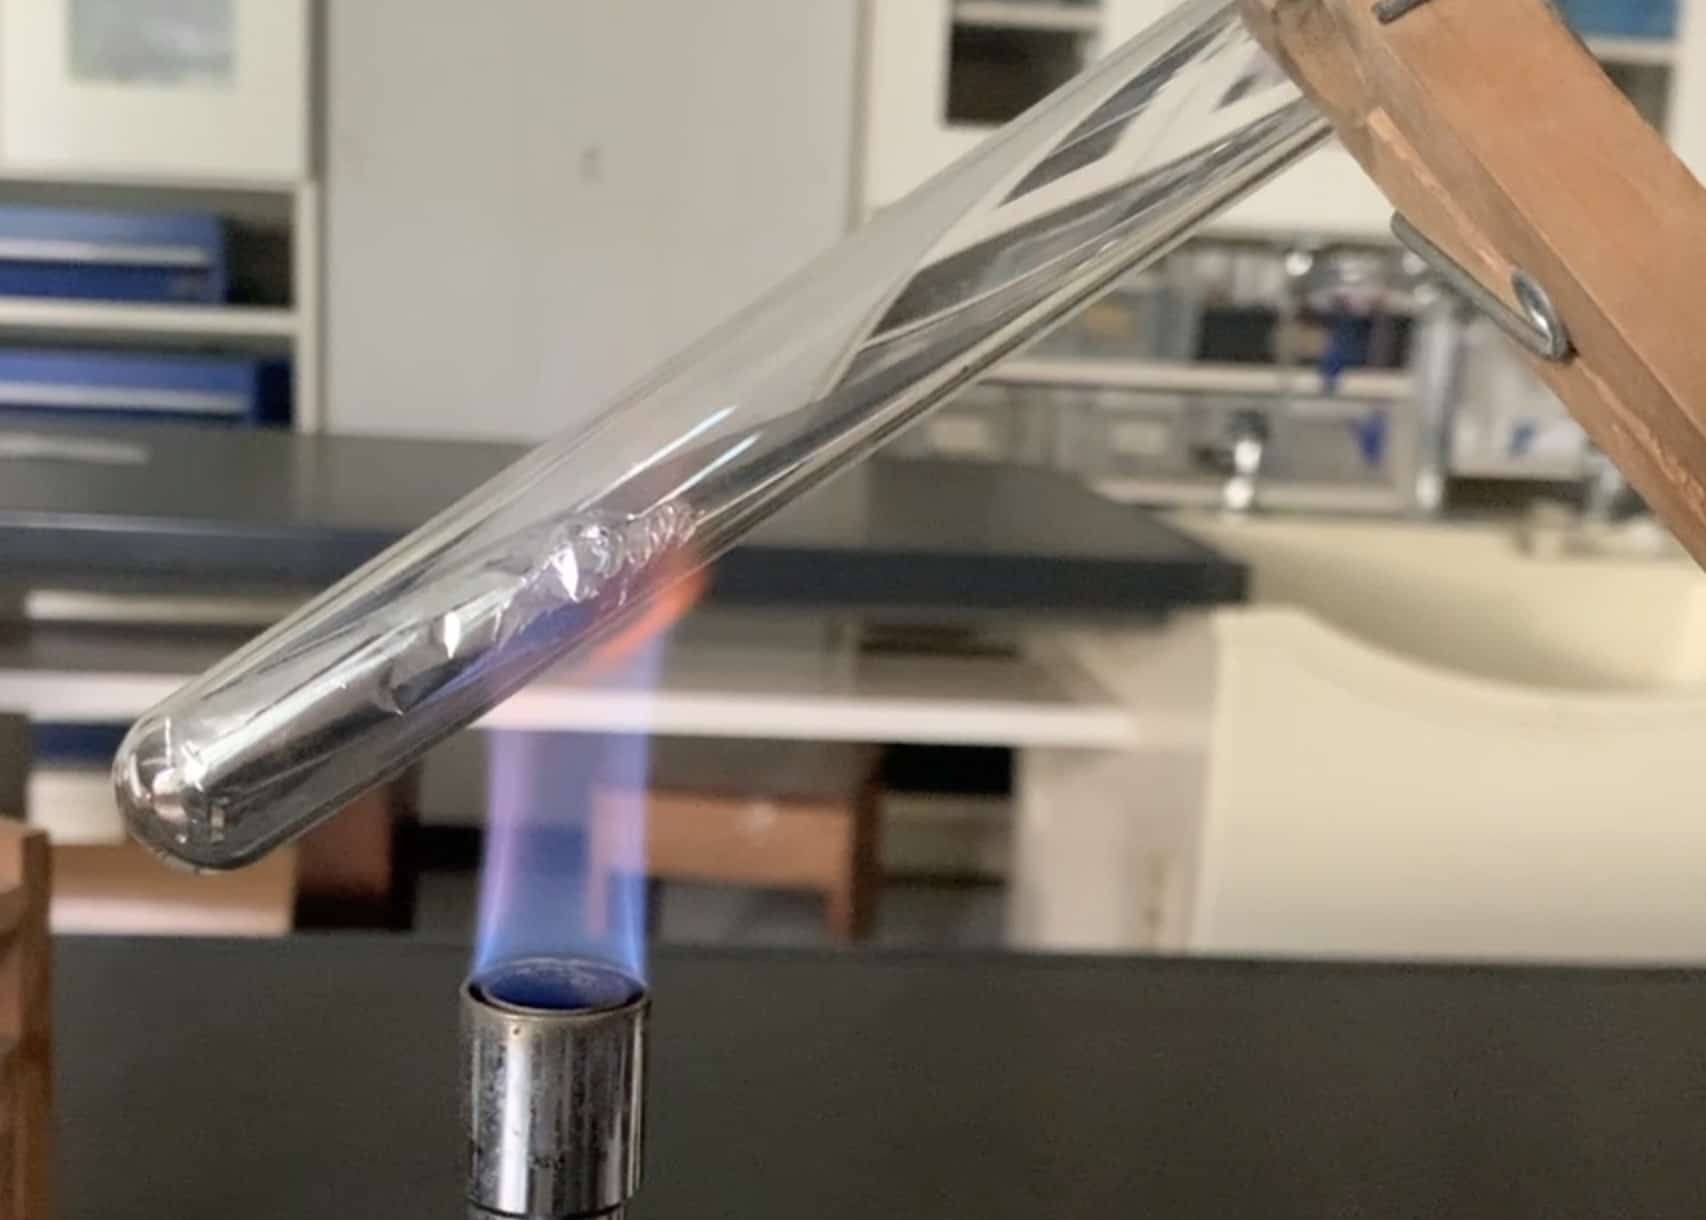
There’s an important reason for heating from the top.
If you heat the bottom directly, the combined heat from the burner and the chemical reaction can crack the test tube, causing the contents to fall out suddenly.
Starting the reaction from the top keeps the tube cleaner and allowed me to reuse the same test tubes across four classes.

Checkpoint 4: Plug the tube with cotton to reduce the release of toxic sulfur vapor.
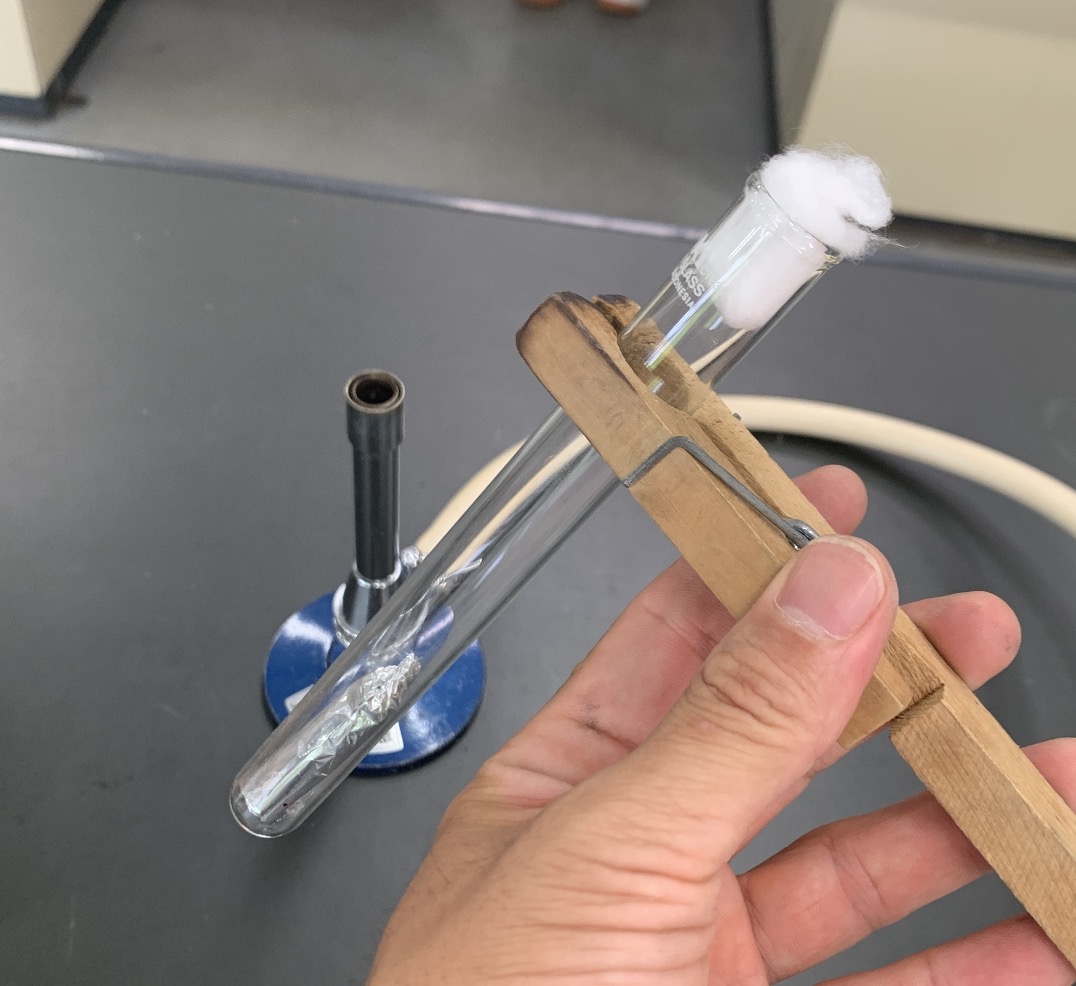
Checkpoint 5: Heat the top of the foil container, not the bottom.
Checkpoint 6: Attach the test tube holder near the top of the tube. Never hold the squeezing part while heating, or it may accidentally open.
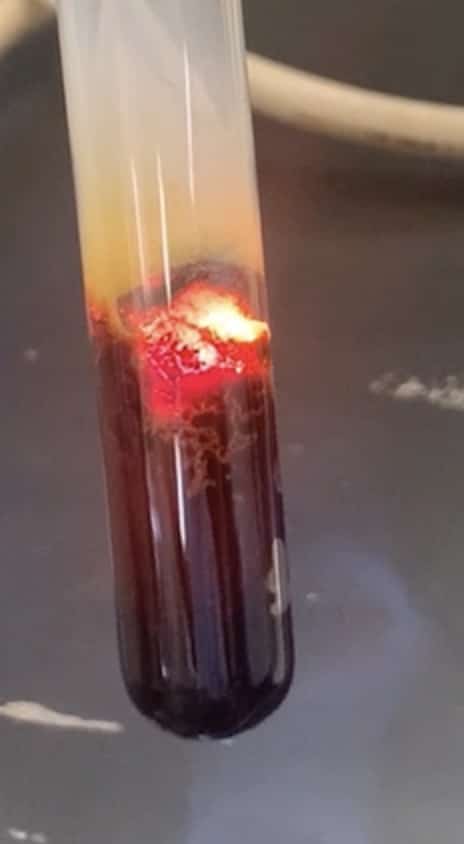
Once the reaction starts, you can remove the burner flame. The reaction will continue using its own heat.
The bright red glow looks almost like fireworks, and it’s the dramatic centerpiece of the lesson.
This is the exact moment when iron (Fe) and sulfur (S), two completely different substances, transform into iron sulfide (FeS), a new material with entirely different properties.
Afterward, students can also confirm that the product is no longer strongly magnetic.

Checkpoint 7: There’s no need to extinguish the burner immediately. Keep students focused on the reaction itself.
Checkpoint 8: Make sure students never place their hands underneath the test tube.
Hold the tube with the clamp for a short while to cool it slightly, then place it on an empty mortar to finish cooling.
While waiting, students can clean up the heating equipment to save time.
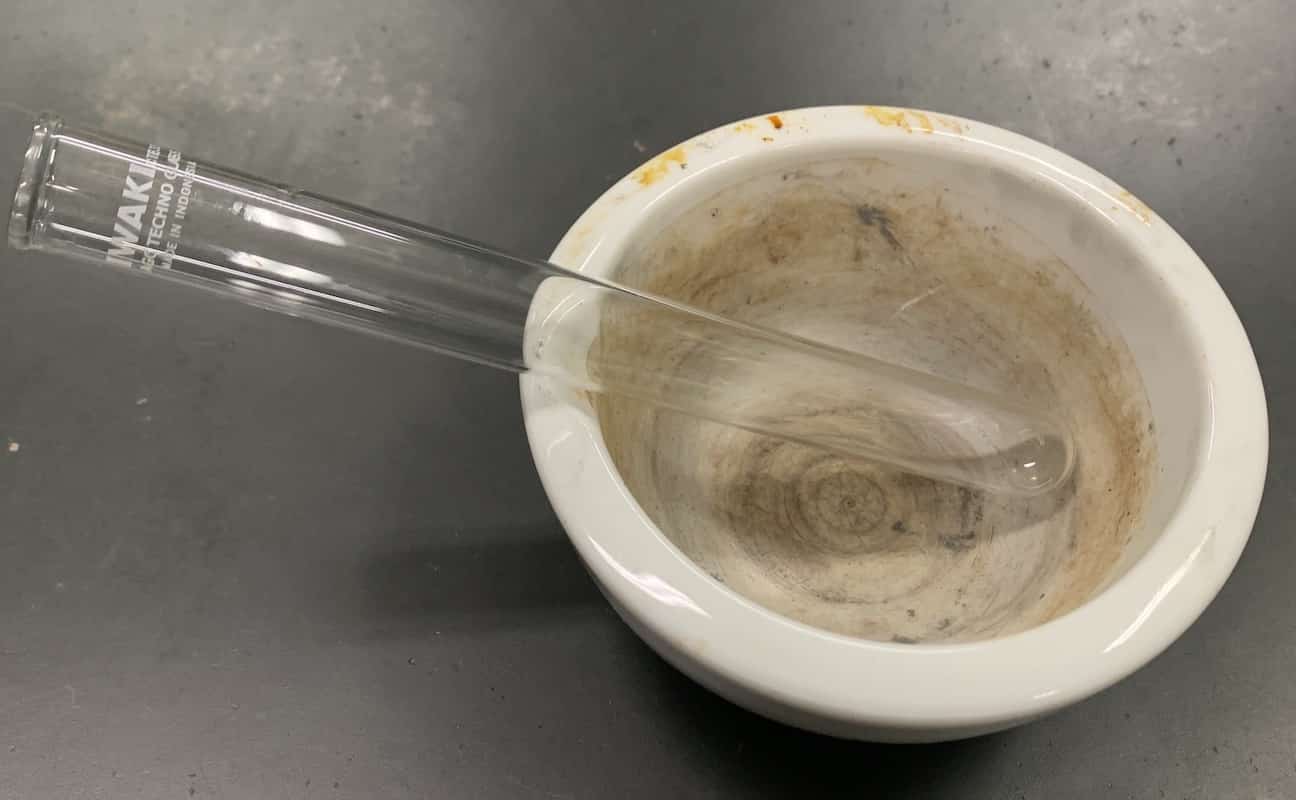
I forgot to take a photo of the actual cooling process, but this gives the general idea.
Step 4: Remove the cooled sample and compare it with sample b
Touch the tip of the test tube with a wet cloth. If you don’t hear a sizzling sound, it’s cool enough to handle safely.
Wrap the entire tube in the wet cloth to cool it further, remove the cotton plug, and take out the sample.

Now bring a magnet close to the sample.
Before the reaction, iron sticks strongly to a magnet. But what happens after it becomes iron sulfide?
Checkpoint 9: Ferrite magnets work best. Neodymium magnets can weakly attract iron sulfide as well, so students should pay attention to differences in the strength of attraction.

Step 5: Add three drops of hydrochloric acid and check the smell <The most dangerous moment of the experiment>
This is the point where accidents are most likely to happen.
Hydrogen sulfide is heavier than air, so it tends to collect near the floor. At high concentrations, it becomes extremely dangerous. (The acceptable exposure limit for humans is said to be below 1 ppm.)
Double-check the ventilation. Open all windows and doors completely.
Repeat the instructions to students again and again:
“Break the sample into small pieces.”
“Use only three drops of hydrochloric acid.”
Say it clearly and firmly.
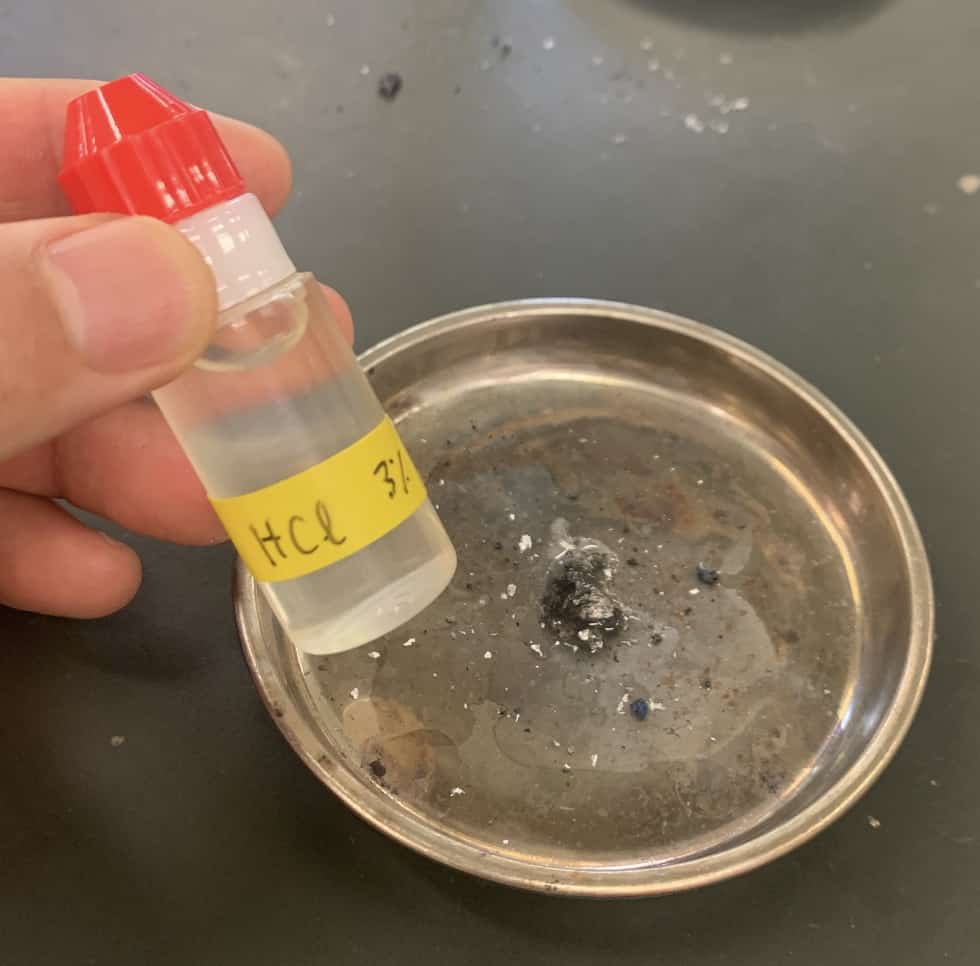
Using small squeeze bottles helps prevent overpouring, although some students may still twist the cap wider to release more liquid. Depending on the class, it may be safer for the teacher to add the acid personally.
Small squeeze bottles help prevent overpouring… though some students still try to open the cap wider. Stay alert!
Checkpoint 10: Open doors and windows for ventilation. Break the iron sulfide into small pieces and add only three drops of hydrochloric acid.
Checkpoint 11: If any student feels unwell, have them leave the room immediately. Since the gas is heavier than air, encourage students to stay standing while working.
Checkpoint 12: The gas produced is toxic. Students should gently fan the gas toward their nose with their hand instead of sniffing directly. Never let them put their face close or inhale deeply. Once everyone has checked the smell, add a little water to stop the reaction.
Using a Petri dish, as shown above, is highly recommended.
In a test tube, hydrogen sulfide takes time to rise out of the opening. Impatient students may lean in too close trying to smell it.
With a Petri dish, the gas spreads quickly, making it easier and safer to detect with gentle wafting.
After the experiment, wash the test tubes with a brush. They may remain stained, but that’s fine. Leftover iron sulfide should never be washed down the drain. Collect it as non-burnable waste instead.
Check test tubes for cracks before reusing them.
Checkpoint 13: Collect all remaining samples. Never dispose of them down the sink. Waste handling must also be done carefully by the teacher.
Disposal is especially important.
If leftover iron-sulfur mixtures are left sitting around, they can potentially ignite spontaneously in the science room. Similar incidents have been reported before. Cleaning up safely is part of the experiment too.
Alternative Methods(Reference)
Heating the mixture directly without a test tube
Another option is to heat the mixture directly without using a test tube.
I actually used this method for several years. The chemical reaction is incredibly visible and easy to observe.
However, students tend to lean in too close, and some may inhale sulfur vapor and start coughing.
If safety is your top priority, I strongly recommend the cotton-plug method instead.
Using steel wool instead of iron powder
Some textbooks introduce a method using sulfur and steel wool inside a test tube.
Here’s what it looks like in practice.


It’s definitely easier for students to observe.
Related Materials
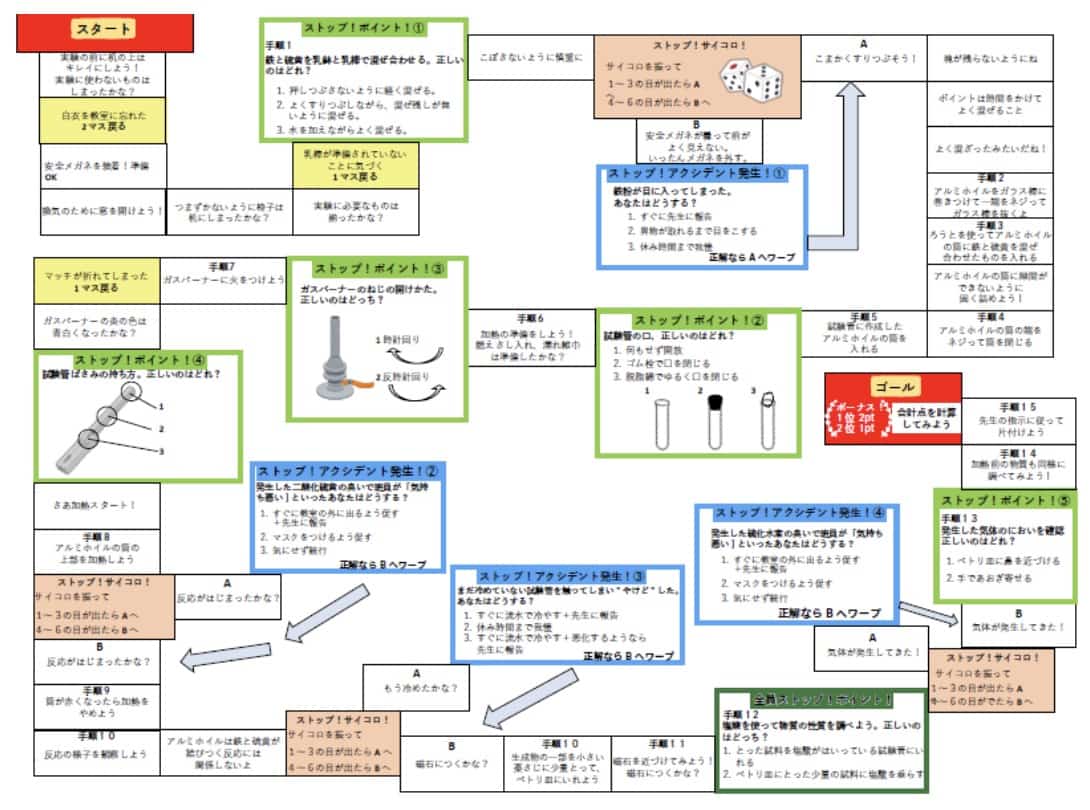
Safety Sugoroku Teaching Material
Together with Ms. Hina Morishige, I helped develop a board-game-style safety education activity based on the iron and sulfur experiment.
Students can learn proper safety practices while playing, making it a great pre-lab activity.
Give it a try here. It’s free to download.
Safety Instruction Slides
【You can also find the classroom instruction slides I used during the lesson here.】
Safety Instruction Radio
【I also created a short radio program to remind students about safety. Listen here.】
Examples of accidents
・Possible hydrogen sulfide exposure at a junior high school in Edogawa, Tokyo — five students became ill(Asahi Shimbun)(2026/05/15)
・Is the hydrogen sulfide experiment still necessary? Repeated emergency transports raise concerns(Mainichi Shimbun)(2025/6/19)
・“Something used in a science experiment may have heated up” — Onagawa, Miyagi(2025/5/14)
Considering the timing, I suspect this may also have been related to a hydrogen sulfide experiment.
Contact & Requests
I want to make the wonder and excitement of science more accessible to everyone! This site introduces fun science experiments you can even try at home, along with practical tips and explanations.
・Learn more about Kuwako Ken here
・For requests such as writing, lectures, science workshops, TV supervision, or media appearances, click here
・Updates are also posted on X!
![]() Science Idea Channel features experiment videos as well!
Science Idea Channel features experiment videos as well!
6月のイチオシ実験!
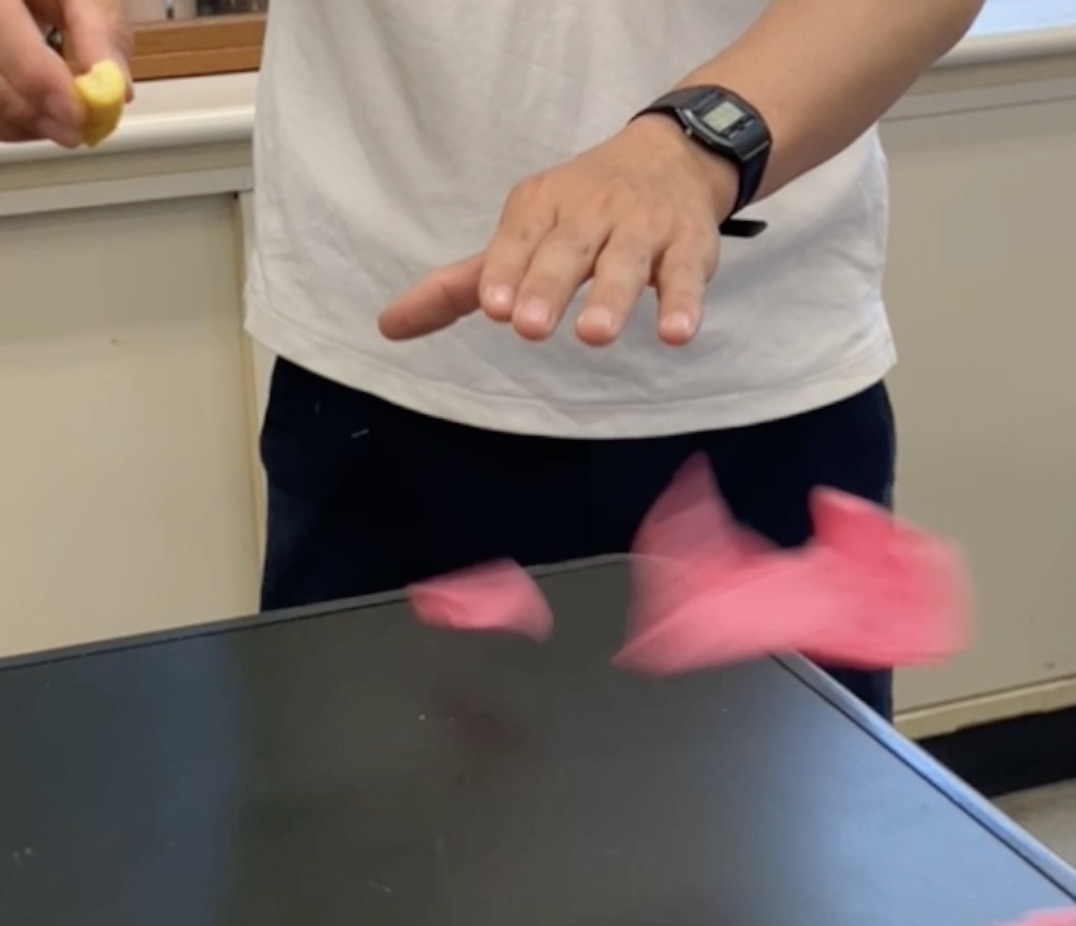
レモンやオレンジで風船を割ろう!インパクトが抜群のリモネン風船の実験
テレビ番組監修・イベント等のお知らせ
- 6月3日(水)20:30〜 「
バカリズムのちょっとバカりハカってみた!」(テレビ東京)を科学監修・出演します。テーマは「 そばの出前は何人前まで運べるのか、限界を測ってみた」です。 - 6月4日(木) 7:00〜 「THE突破ファイル」(日本テレビ)について科学監修しました。
- 6月14日(日) 千葉大学インスタレーション「探究」にて講師を務めます
- 6月26日(金) 公開研究会「脱作業化!デジタル化と段階的指導で実現する オームの法則の探究」
- 6月28日(日) ダビンチマスターズ@昭和女子
- 7月18日(土) 教員向け実験講習会「ナリカカサイエンスアカデミー」の講師をします。お会いしましょう。
書籍のお知らせ
- 『大人のための高校物理復習帳』(講談社)…一般向けに日常の物理について公式を元に紐解きました。特設サイトでは実験を多数紹介しています。※増刷がかかり6刷となりました(2026/02/01)

- 『きめる!共通テスト 物理基礎 改訂版』(学研)… 高校物理の参考書です。イラストを多くしてイメージが持てるように描きました。授業についていけない、物理が苦手、そんな生徒におすすめです。特設サイトはこちら。

各種SNS(更新情報をお届け!)
X(Twitter)/instagram/Facebook(日本語)
Explore
- 楽しい実験…お子さんと一緒に夢中になれるイチオシの科学実験を多数紹介しています。また、高校物理の理解を深めるための動画教材も用意しました。
- 理科の教材… 理科教師をバックアップ!授業の質を高め、準備を効率化するための選りすぐりの教材を紹介しています。
- Youtube…科学実験等の動画を配信しています。
- 科学ラジオ …科学トピックをほぼ毎日配信中!AI技術を駆使して作成した「耳で楽しむ科学」をお届けします。
- 講演 …全国各地で実験講習会・サイエンスショー等を行っています。
- About …「科学のネタ帳」のコンセプトや、運営者である桑子研のプロフィール・想いをまとめています。
- お問い合わせ …実験教室のご依頼、執筆・講演の相談、科学監修等はこちらのフォームからお寄せください。