Master the Saliva & Starch Experiment in 50 Minutes! — Clever Tricks That Actually Work in Class
I’m Ken Kuwako, the Science Trainer. Every day is an experiment.
One of the classic experiments in a second-year junior high school unit on digestion investigates how saliva reacts with starch. Once you actually run it in class, you quickly realize just how busy it is. There are lots of steps, and unless students work together efficiently, time runs out fast.
A while ago, I had the chance to learn this experiment in detail from a veteran teacher, Mr. Y.
His approach was packed with practical classroom wisdom—little tricks developed through years of experience to make sure students get clear, successful results within a single lesson. When I tried it myself, the students were amazed, saying, “It really changed color!” and genuinely experienced the power of digestive enzymes. In this article, I’ll share those techniques along with the preparation process.
Materials
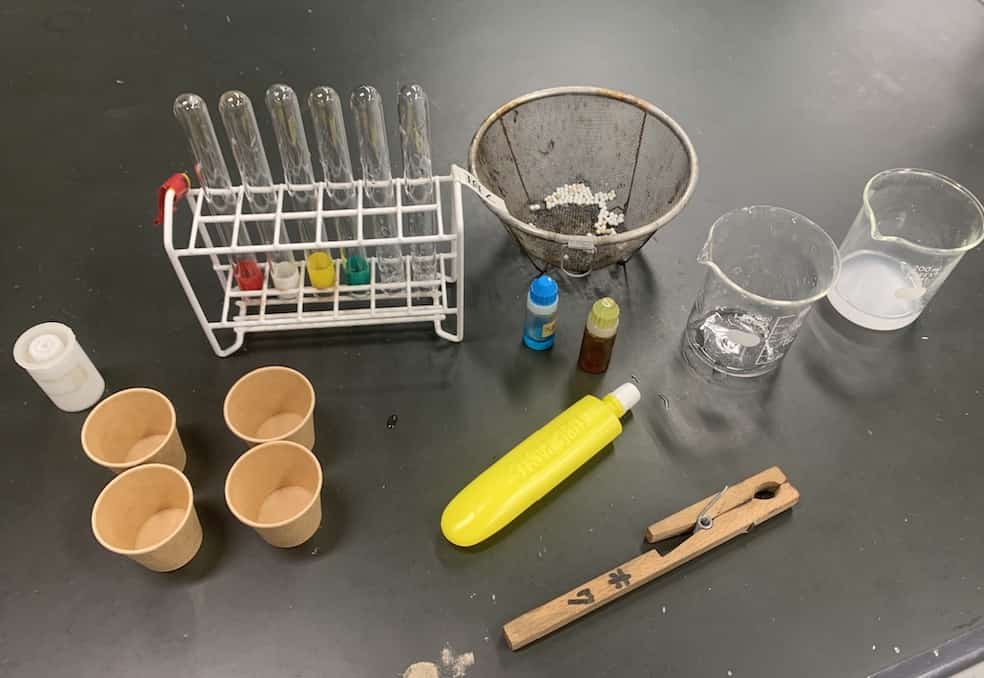
• Paper cups (one per student), test tubes (number of students per group + 2), beakers, test tube racks, one test tube holder, heating equipment, boiling stones, starch solution made by dissolving glue-stick adhesive (prepare immediately before the lesson, about 50 mL), reagents (iodine solution and Benedict’s solution)
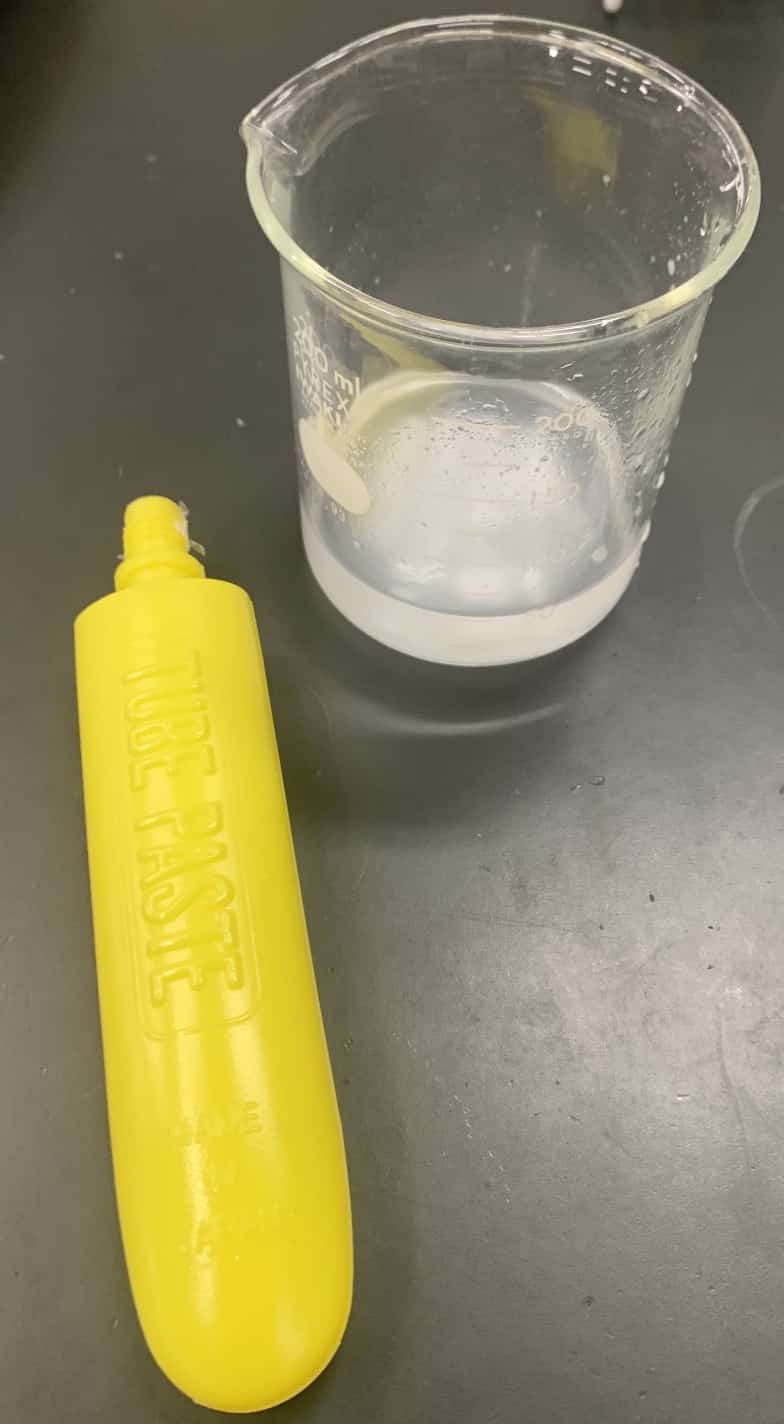
Dissolve the glue-stick adhesive in water to make the starch solution. It is important to prepare this shortly before the experiment. Place about 40 mL of starch solution into a 100 mL beaker for each group. Also prepare small paper cups (around 90 mL) filled about one-quarter full with water—one for each student.
Now it’s time to begin.
Procedure
① Each student takes the water from their paper cup into their mouth, keeps it there for about one minute, and then spits the saliva-mixed water back into the cup.
Some students may complain that this sounds gross, but it helps to reassure them with something like, “Actually, your mouth is much cleaner than you think!” If everyone does it together, most students won’t feel embarrassed.
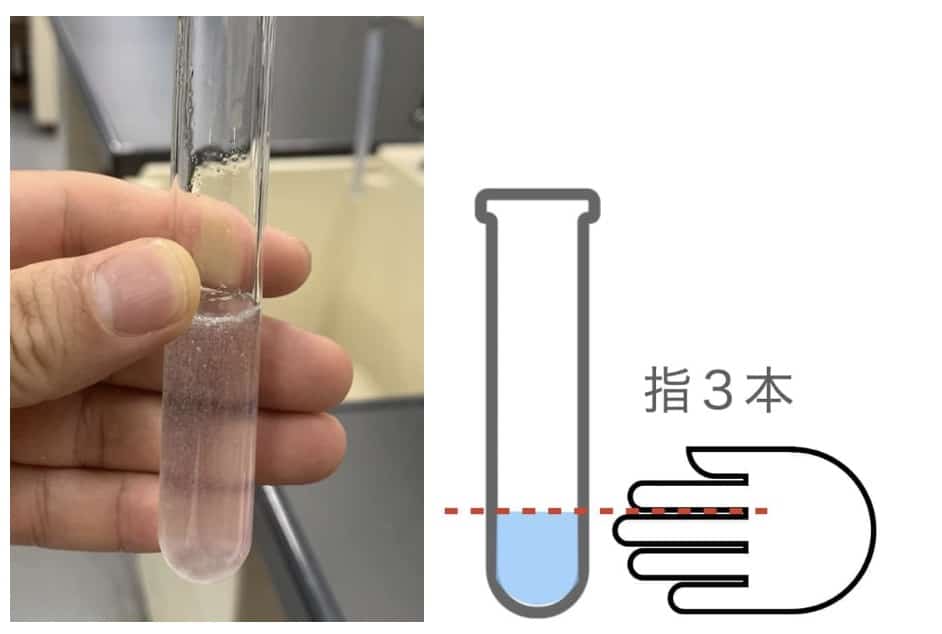
② Each student pours about 5 mL of starch solution into their test tube.
Rather than measuring with a pipette, simply tell them to fill the tube to about “two and a half finger widths.” This saves a surprising amount of cleanup time.
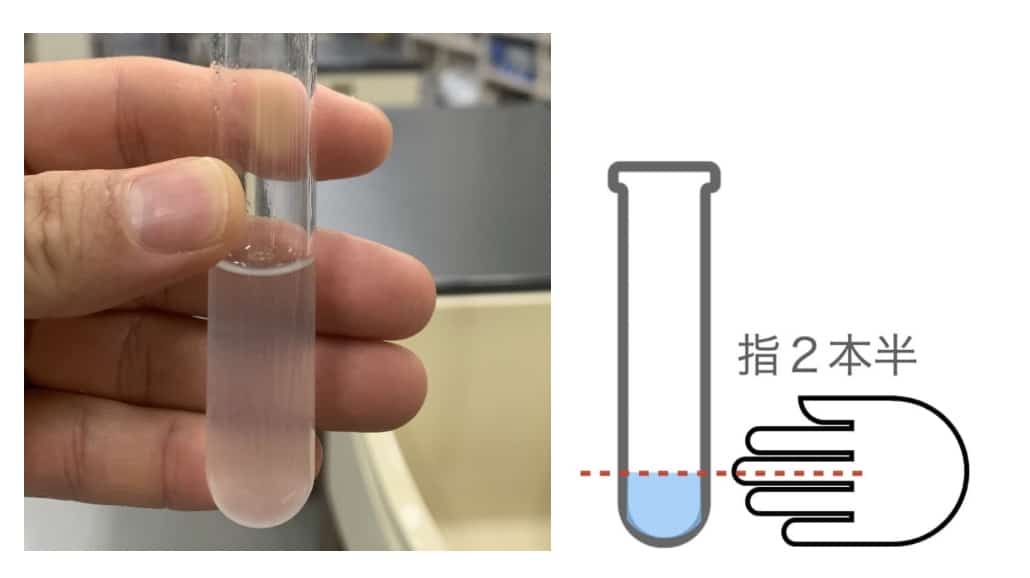
Next, add about 2 mL of the saliva mixture from Step ①. Again, skip the pipette. Since this is about half a finger width, simply instruct students to add enough so the combined liquid reaches about three finger widths in the test tube.
If students slightly fold the paper cup, they can pour the liquid directly into the test tube. Afterward, discard the remaining saliva solution—but keep the paper cup itself, since it will be used again later.
Using color-coded tape on the test tubes makes identification easy. In a group of four, there will be four saliva samples. Tell students to remember the color of their own tube.
③ For the control experiment, prepare one test tube containing 5 mL of starch solution and 2 mL of water (no saliva). Only one control tube is needed per group.
④ Place all five test tubes (four saliva samples plus one control, assuming a four-person group) into water at about 40°C for ten minutes. The teacher should prepare enough warm-water baths for all groups.
This creates a ten-minute waiting period. It’s a good idea to explain Steps ⑤ and beyond during this time. This experiment is truly a race against the clock.
⑤ Each student pours about half of the liquid from their saliva-containing test tube back into their paper cup.
The paper cups make their return!
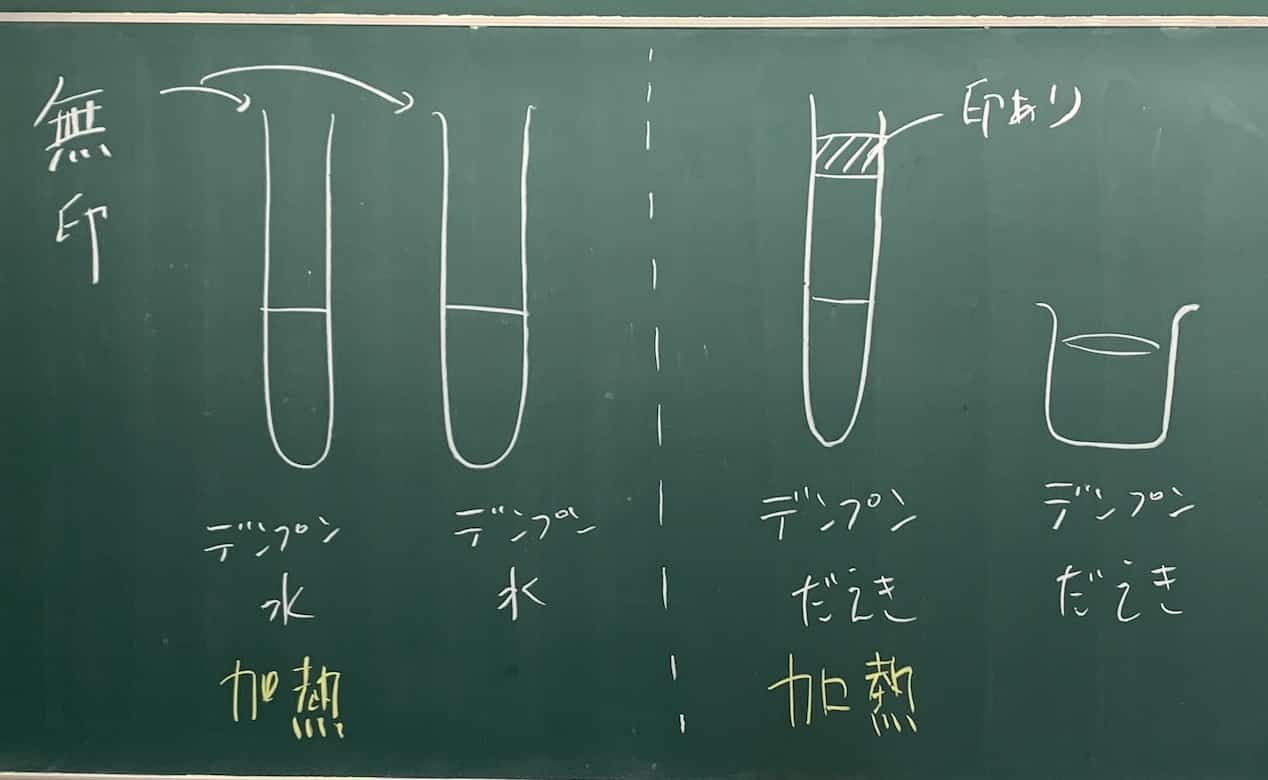
⑥ Pour half of the control solution into a second plain test tube.
The setup should now look like this:
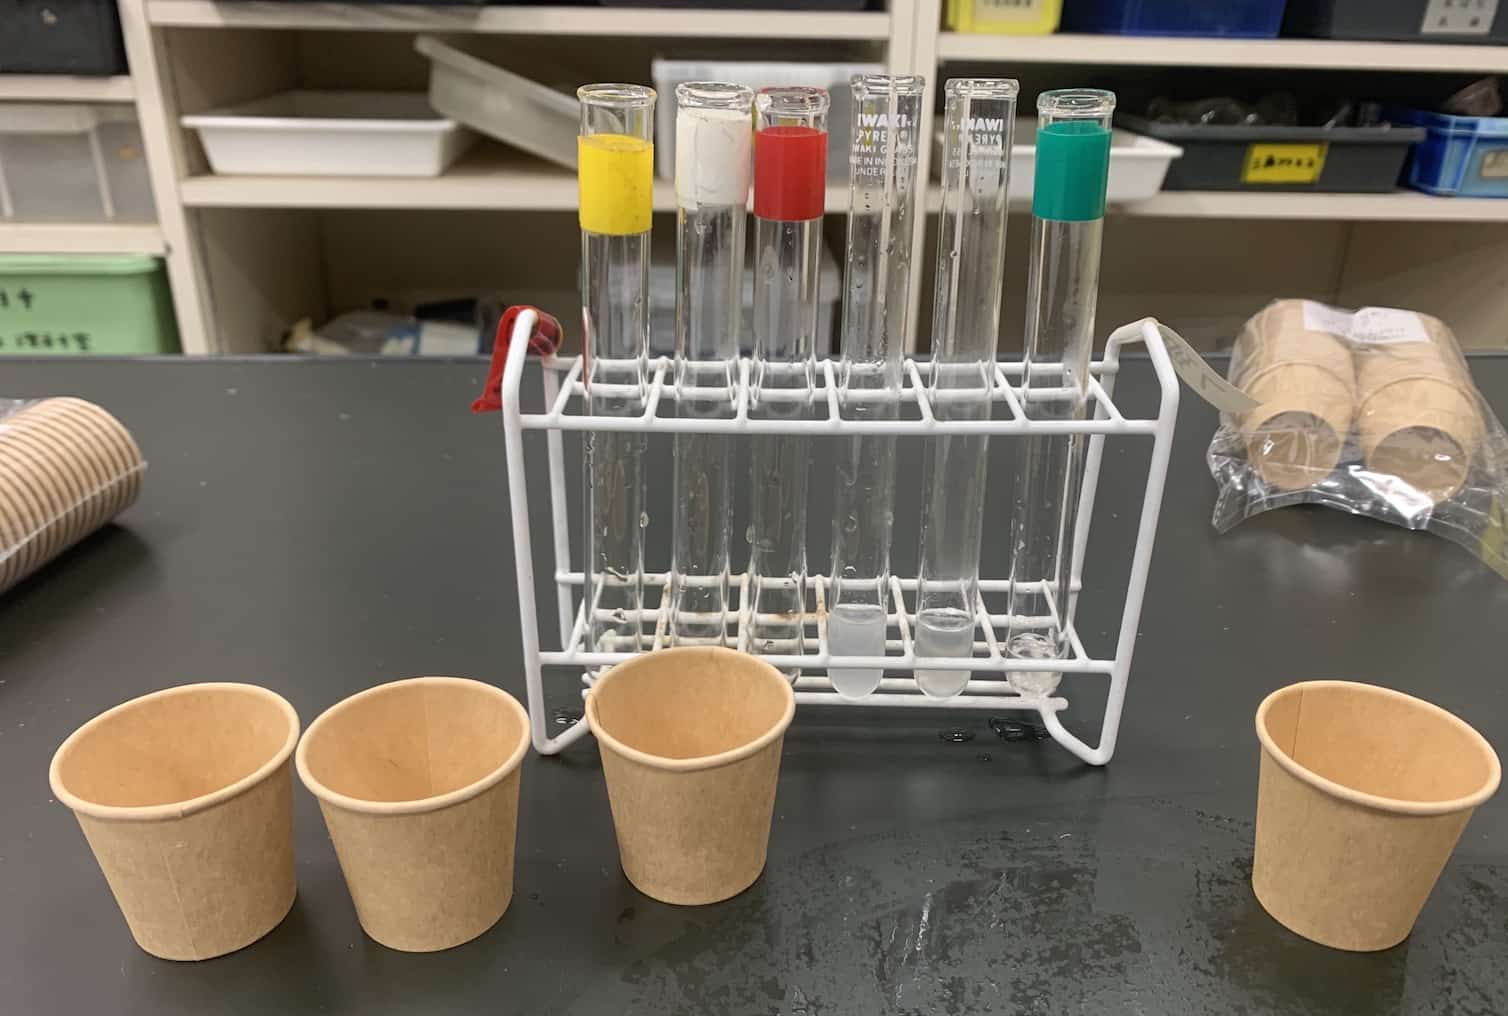
For a four-person group, there will be four test tubes containing saliva-treated starch solution, four paper cups holding portions of those solutions, and two plain test tubes containing the divided control solution.
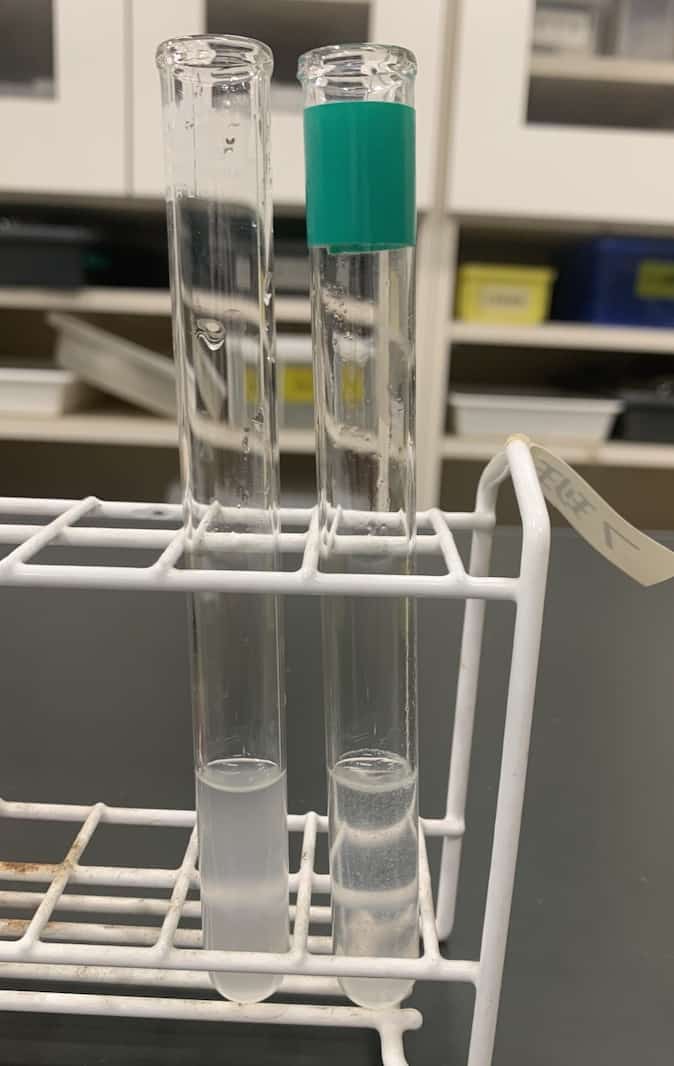
⑦ Add a few drops of iodine solution to the saliva-treated starch solutions in the paper cups and to the control starch solution.
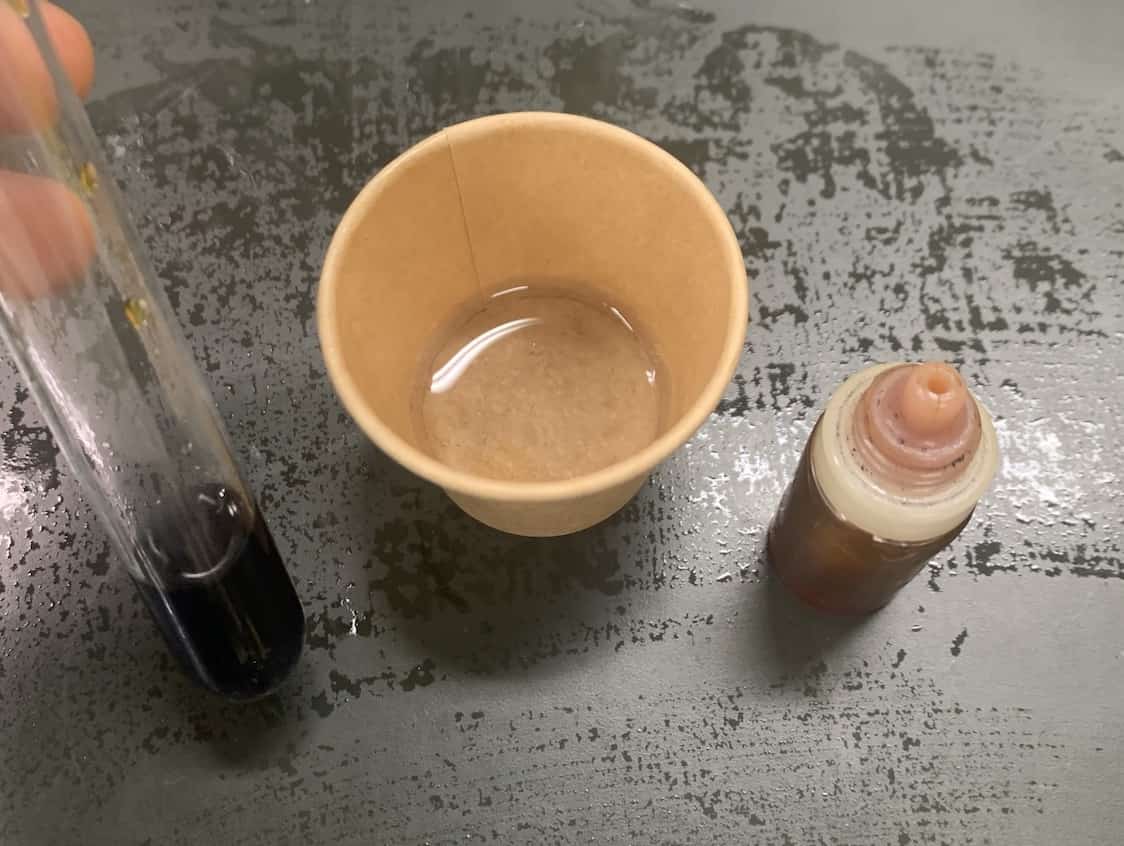
The saliva-treated samples show little or no reaction, while the control sample changes color.
This tells us that starch is no longer detectable in the saliva-treated solution.
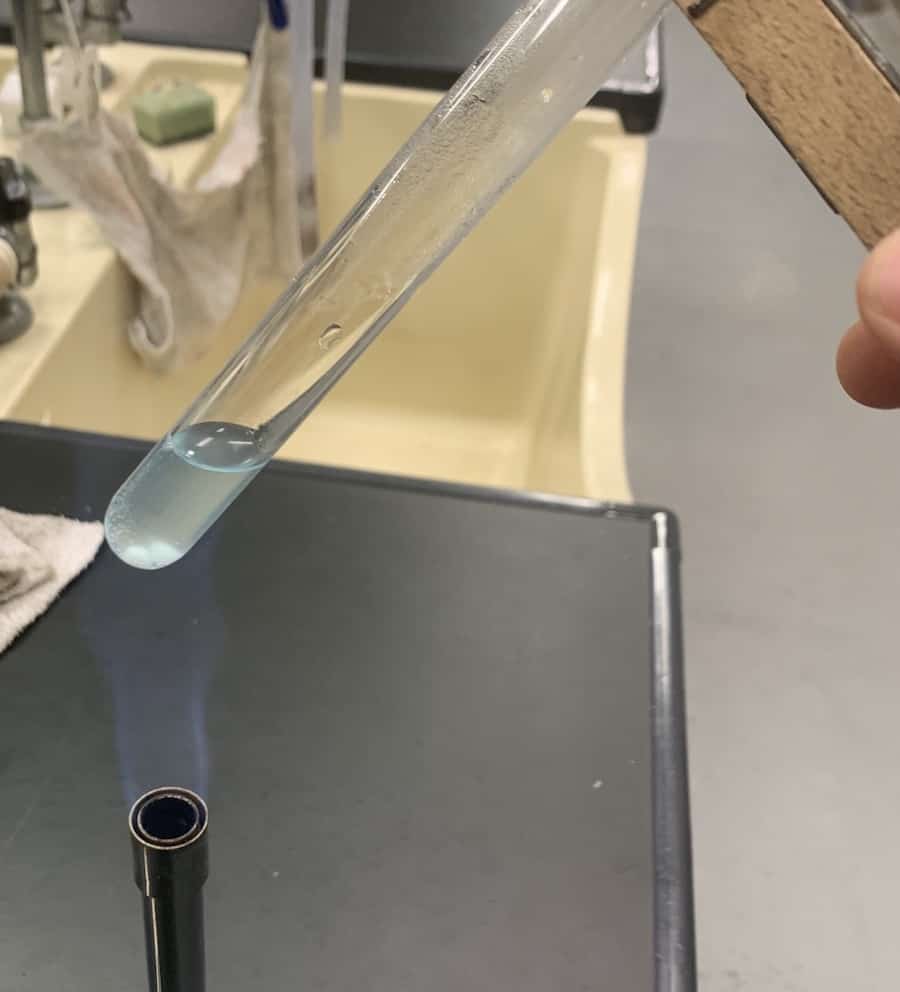
⑧ Next, add a few drops (3–4 drops is enough) of Benedict’s solution to one saliva-treated test tube and one control test tube. Add two or three boiling stones as well.
Before heating, be sure to wipe the outside of the test tubes dry to help prevent cracking.
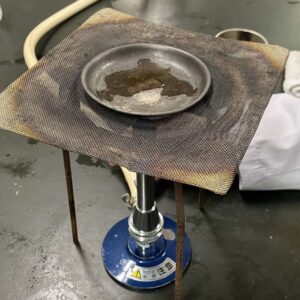
Heat the test tubes with a test tube holder and observe the color changes.
Benedict’s solution reacts with reducing sugars. These are sugars capable of reducing the blue copper ions in Benedict’s solution when heated.
Common reducing sugars include:
• Glucose
• Fructose
• Maltose
• Lactose
Ordinary sucrose (table sugar) and starch generally do not react.
Since Benedict’s solution requires heating, let’s warm the samples and see what happens.
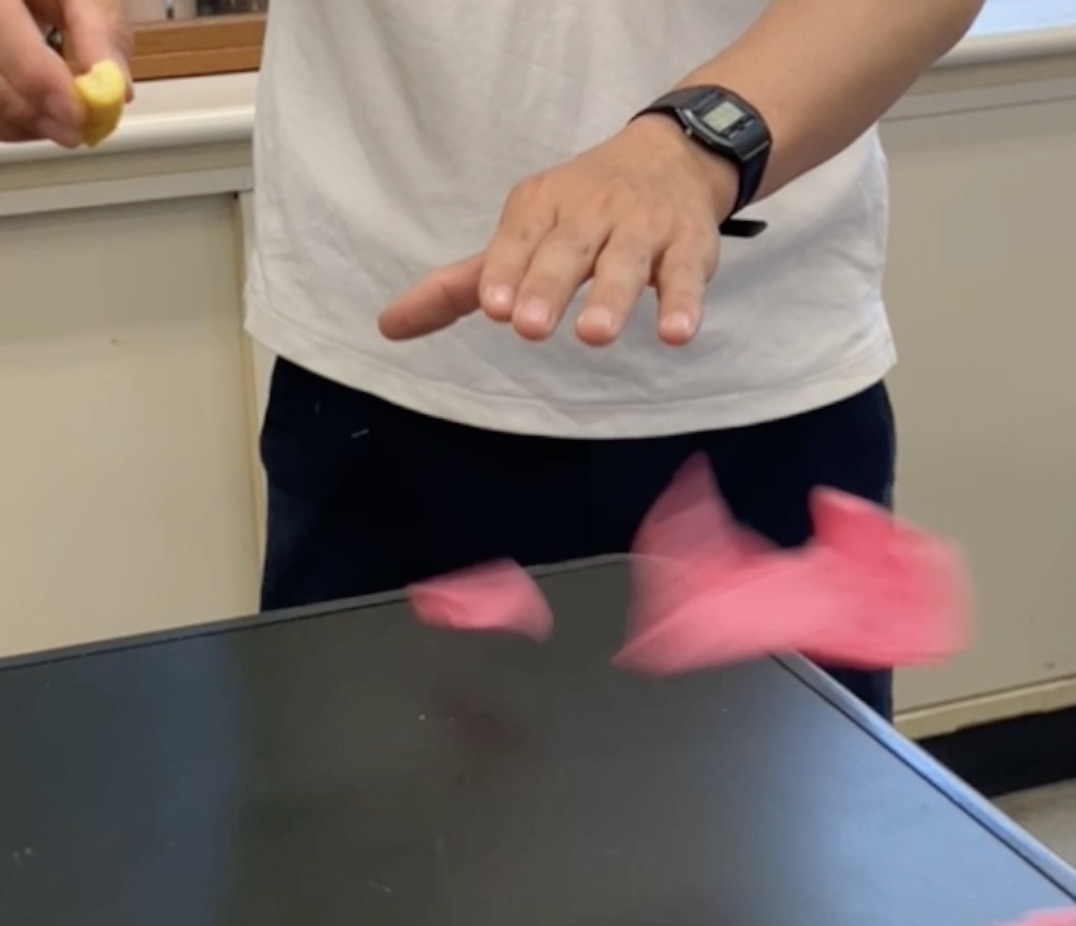
Important Safety Note When Heating
Sudden boiling can cause hot liquid to erupt from the test tube. Always point the opening away from people when heating.
The following video shows what can happen when a test tube is heated without boiling stones. Even with boiling stones, splashing hot liquid is still possible, so exercise caution.
As heating continues…
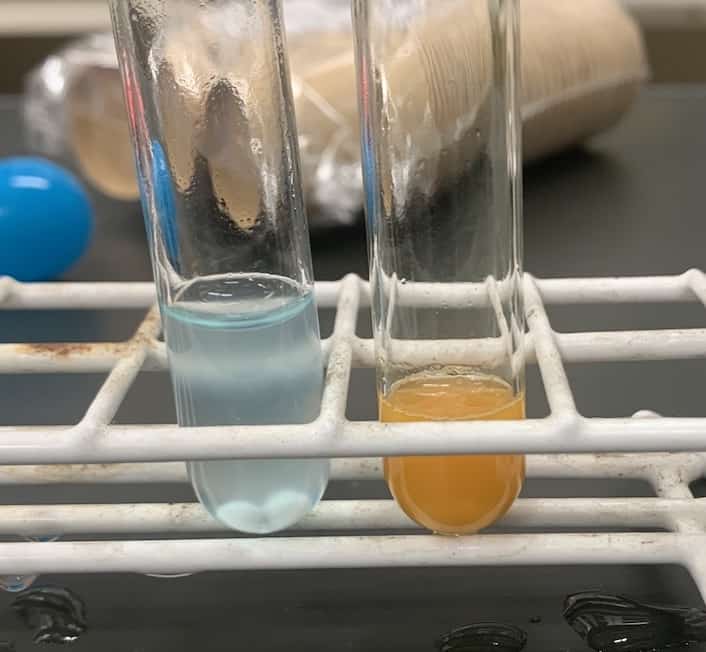
The colors begin to change.
On the left is the starch-and-water control. The copper ions remain unchanged, so the solution stays blue.
On the right is the starch-and-saliva sample. The copper ions have been reduced, producing a brownish color.
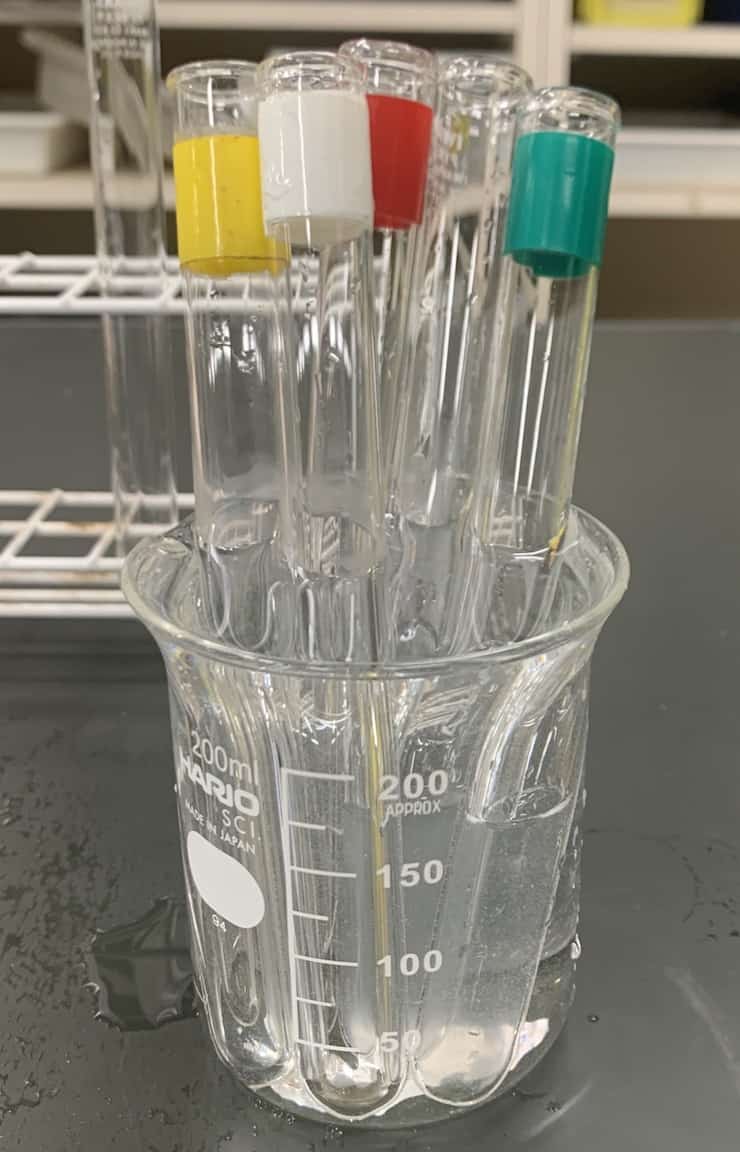
Here is an example from one student group. The first four test tubes from the left contain saliva samples from individual students. The tube on the right is the control.
The saliva-treated samples show a variety of colors, but all clearly changed from the original blue.
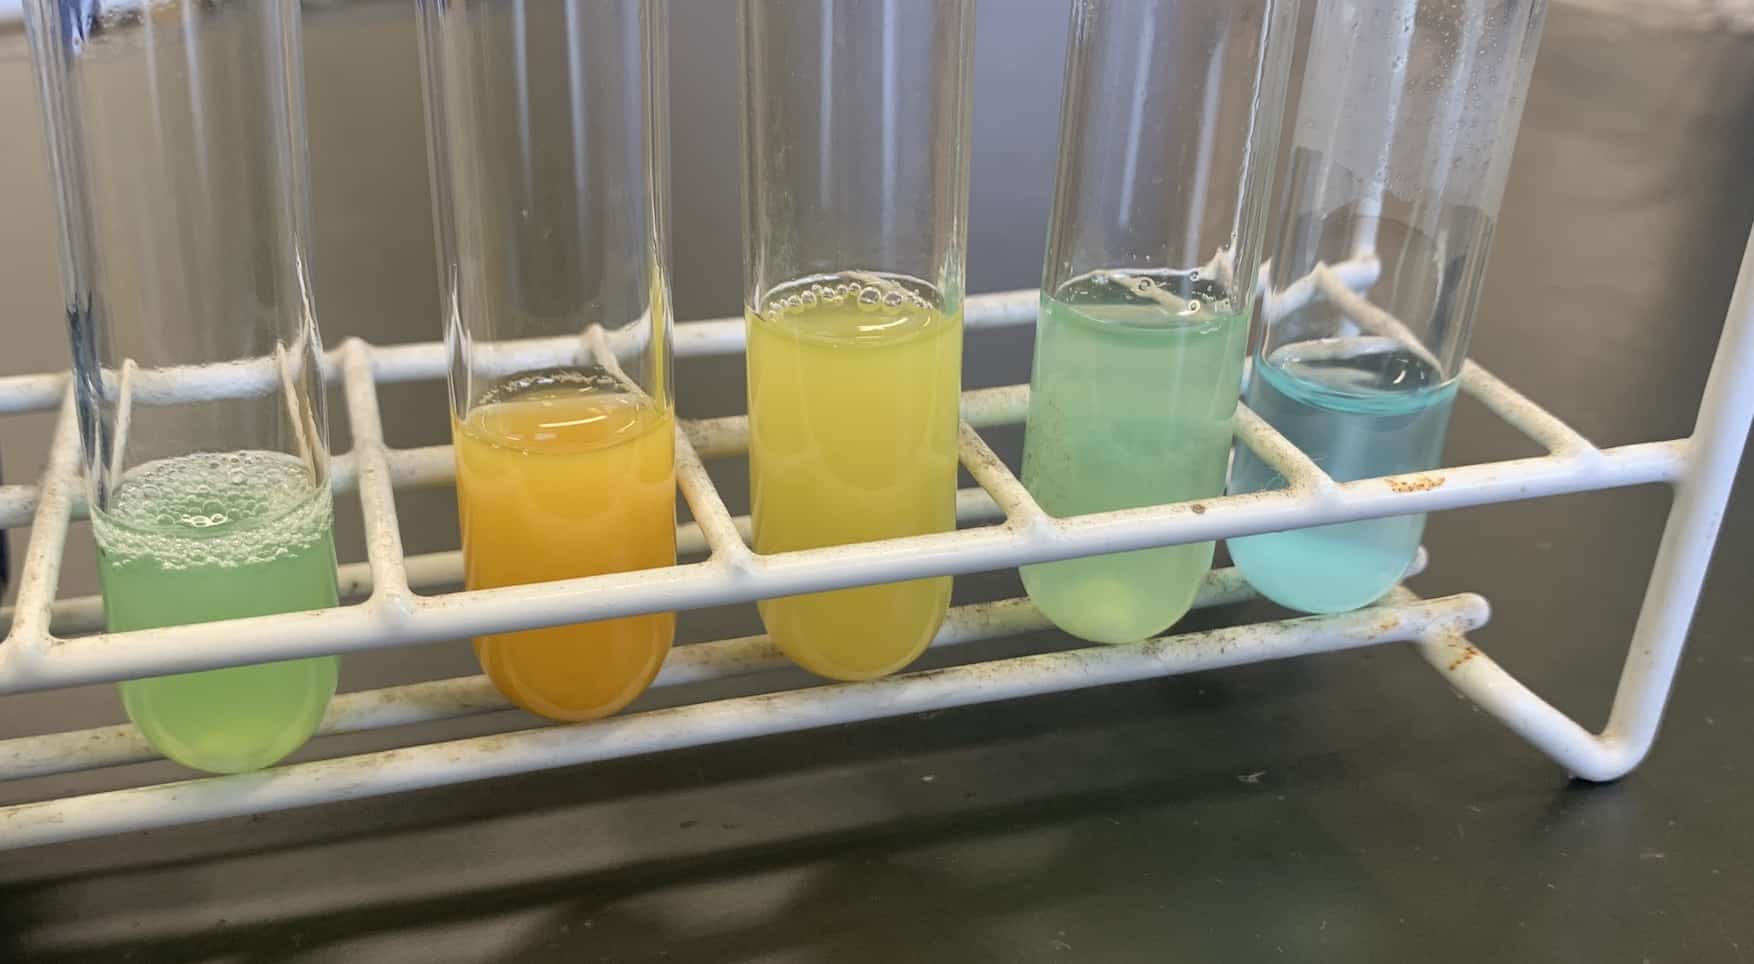
A positive Benedict’s test means that reducing sugars were detected.
In other words, the starch disappeared and was broken down into different sugars.
This experiment is an excellent way for students to experience a key scientific idea: digestive enzymes are invisible, yet they create very real and measurable changes. At the same time, the success of the lesson depends heavily on preparation and classroom management. Every tip I learned from Mr. Y directly improved student understanding, and I plan to keep using these techniques in future classes.
Contact & Requests
Making the wonders of science more accessible and fun! This site introduces enjoyable science experiments that can be done at home, along with practical tips and explanations.
• Learn more about the site operator, Ken Kuwako, here
• For writing projects, lectures, science workshops, TV supervision, appearances, and other requests, click here
• Follow updates on new articles via X!
![]() Science Ideas Channel features experiment videos and demonstrations!
Science Ideas Channel features experiment videos and demonstrations!
6月のイチオシ実験!
レモンやオレンジで風船を割ろう!インパクトが抜群のリモネン風船の実験
テレビ番組監修・イベント等のお知らせ
- 6月3日(水)20:30〜 「
バカリズムのちょっとバカりハカってみた!」(テレビ東京)を科学監修・出演します。テーマは「 そばの出前は何人前まで運べるのか、限界を測ってみた」です。 - 6月4日(木) 7:00〜 「THE突破ファイル」(日本テレビ)について科学監修しました。
- 6月14日(日) 千葉大学インスタレーション「探究」にて講師を務めます
- 6月26日(金) 公開研究会「脱作業化!デジタル化と段階的指導で実現する オームの法則の探究」
- 6月28日(日) ダビンチマスターズ@昭和女子
- 7月18日(土) 教員向け実験講習会「ナリカカサイエンスアカデミー」の講師をします。お会いしましょう。
書籍のお知らせ
- 『大人のための高校物理復習帳』(講談社)…一般向けに日常の物理について公式を元に紐解きました。特設サイトでは実験を多数紹介しています。※増刷がかかり6刷となりました(2026/02/01)

- 『きめる!共通テスト 物理基礎 改訂版』(学研)… 高校物理の参考書です。イラストを多くしてイメージが持てるように描きました。授業についていけない、物理が苦手、そんな生徒におすすめです。特設サイトはこちら。

各種SNS(更新情報をお届け!)
X(Twitter)/instagram/Facebook(日本語)
Explore
- 楽しい実験…お子さんと一緒に夢中になれるイチオシの科学実験を多数紹介しています。また、高校物理の理解を深めるための動画教材も用意しました。
- 理科の教材… 理科教師をバックアップ!授業の質を高め、準備を効率化するための選りすぐりの教材を紹介しています。
- Youtube…科学実験等の動画を配信しています。
- 科学ラジオ …科学トピックをほぼ毎日配信中!AI技術を駆使して作成した「耳で楽しむ科学」をお届けします。
- 講演 …全国各地で実験講習会・サイエンスショー等を行っています。
- About …「科学のネタ帳」のコンセプトや、運営者である桑子研のプロフィール・想いをまとめています。
- お問い合わせ …実験教室のご依頼、執筆・講演の相談、科学監修等はこちらのフォームからお寄せください。