Mechanical Pencil Lead as Electrodes!? Track Chemical Changes with “Electrolysis of Copper(II) Chloride” (Eco-Friendly Microscale Experiment!)
I’m Kuwako Ken, your Science Trainer. Every Day is an Experiment.
What comes to mind when you hear the phrase “science experiment”? Perhaps an image of beakers and flasks, with lots of seemingly complex chemicals. But actually, there’s a much simpler, more eco-friendly way to get to the core of science.This time, we’re featuring the familiar middle school science experiment, the electrolysis of copper chloride, using an incredibly small apparatus called a #microplate in what we call a #MicroscaleExperiment. This isn’t just about running an electric current. You get to witness a magical chemical transformation right before your eyes, as a beautiful blue solution turns transparent and an invisible metal suddenly appears!The Charm of the Small Laboratory: “Microscale”The #MicroscaleExperiment approach we’re using is something I introduced at a school where I used to work. By minimizing the amount of chemicals and water used, we can drastically reduce the amount of chemical waste produced after the experiment. The biggest advantages are that it’s environmentally conscious, easier to set up and clean up, and safer to conduct.Because of the small scale, changes often appear quickly, making it perfect for observation. If you want to know more about microscale experiments, be sure to check out this paper. It thoroughly details the experiment and even explains how to prepare the copper chloride solution.
Detailed information on Microscale Experiments is available in this paper.
Here’s a look at the actual experiment. Check out the video first!https://youtu.be/pXVSWsXLMNUPreparing the Experiment and the “Aha!” InnovationsThe copper chloride solution used in the experiment is a blue-colored liquid. In science experiments, the concentration of chemicals is prepared using precise calculations.
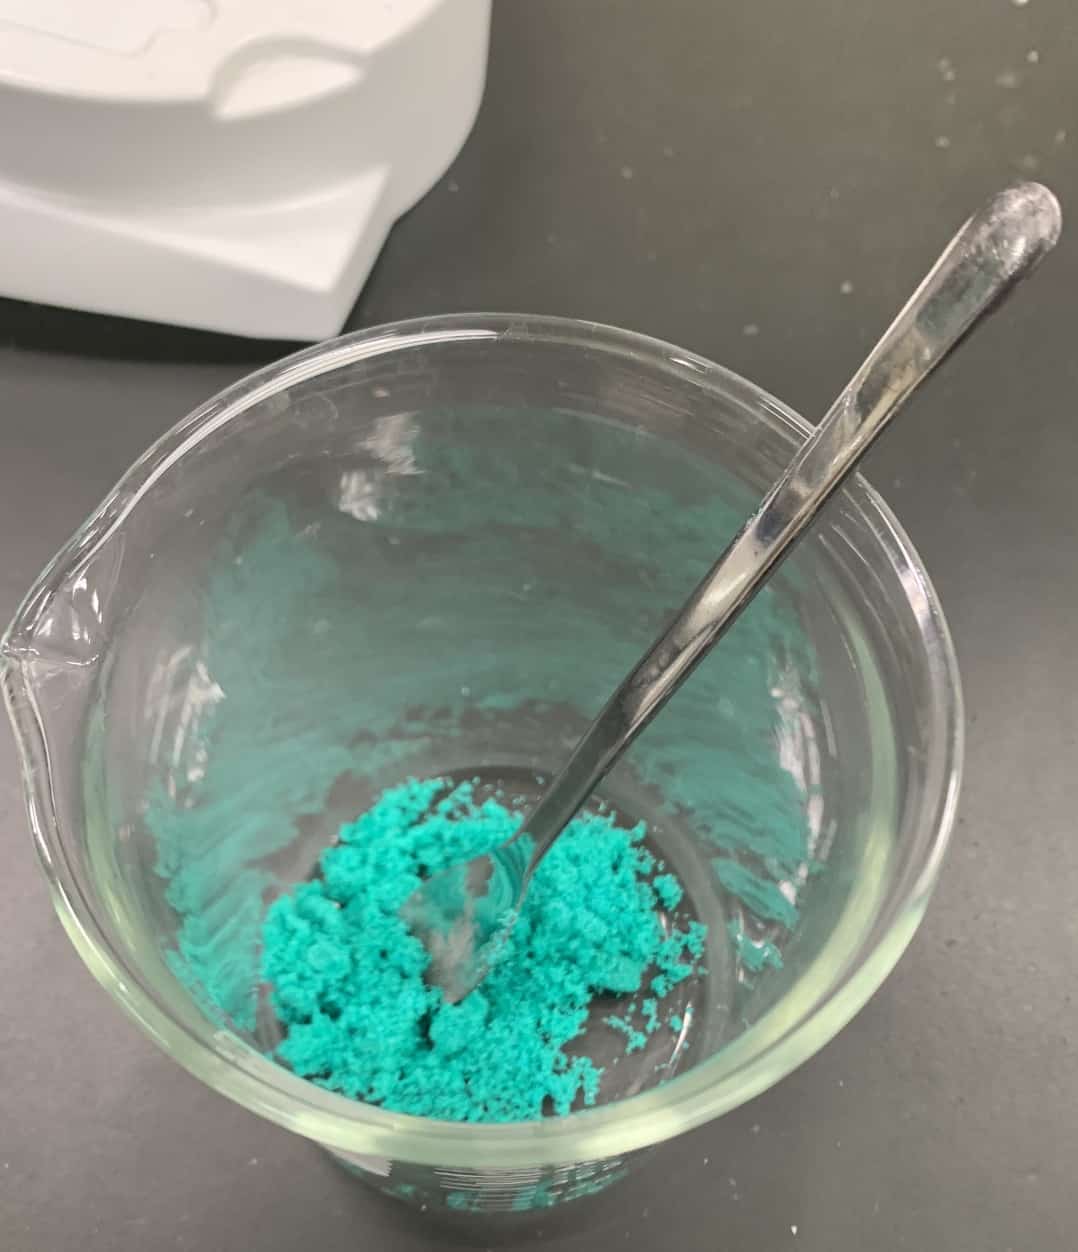
【Preparation Method for 10% Copper(II) Chloride Dihydrate Solution】
Copper(II) Chloride Dihydrate, CuCl2⋅2H2O Formula Weight =170.48
To prepare a 10% solution, measure the amount that equals 10g excluding the water of hydration. CuCl2=63.5+35×2=133.5. 2H2O=2×18=36. Therefore,
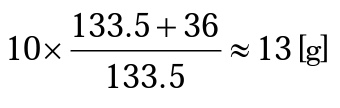
Thus, 13g of copper(II) chloride dihydrate crystals are added to water to make 100g of solution.
That was a bit technical, but the calculation is necessary when the solution contains water of hydration (water included in the crystal structure). Thankfully, for this experiment, a lower concentration of copper chloride is fine (even 3% works). The paper suggests 4cm3 per cell (well), but we also prepared 1cm3 for comparison.By the way, if a class of 40 students (10 groups of 4) performs this experiment, they would only need $4\text{cm}^3$ per group $\times 10 = 40\text{cm}^3$. Even for four entire classes, it would only amount to $160\text{cm}^3$ (about 1/6 of a milk carton). It truly is eco-friendly!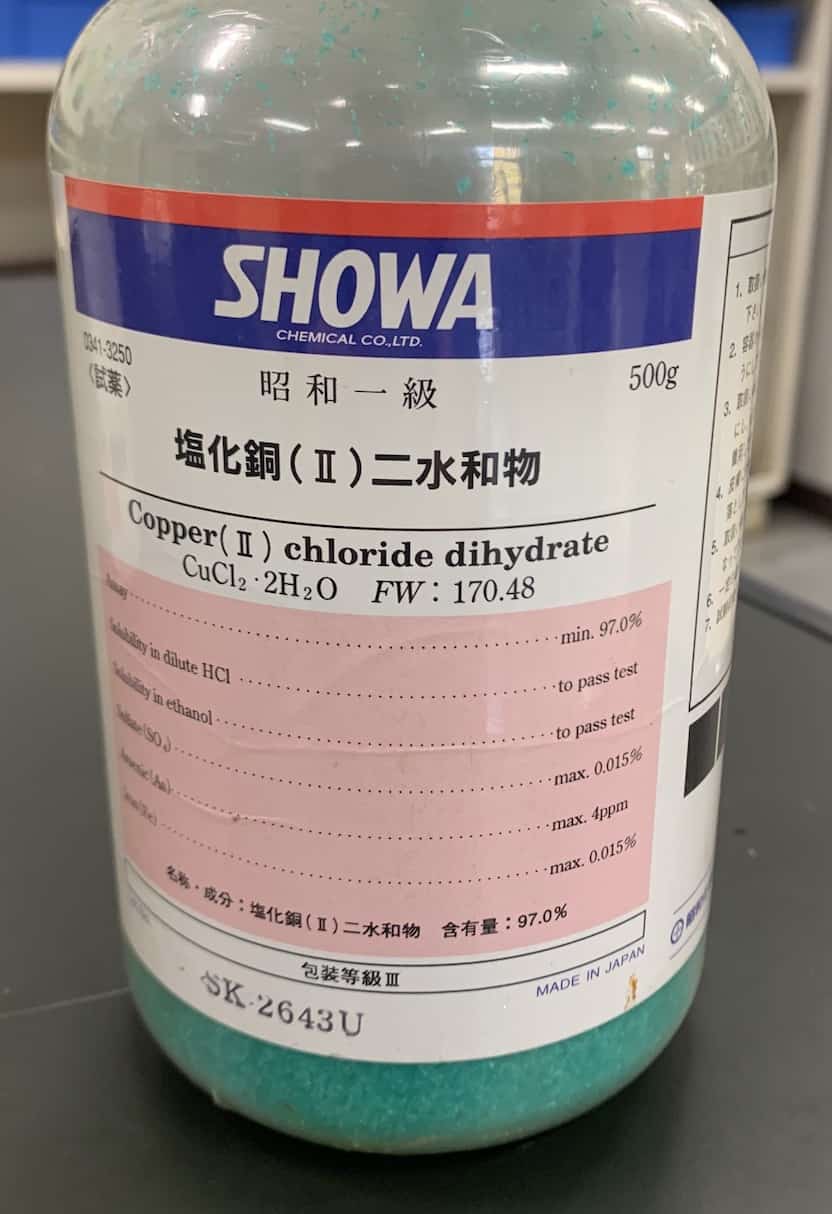
(We made a bit extra this time as we were also conducting a comparison experiment.)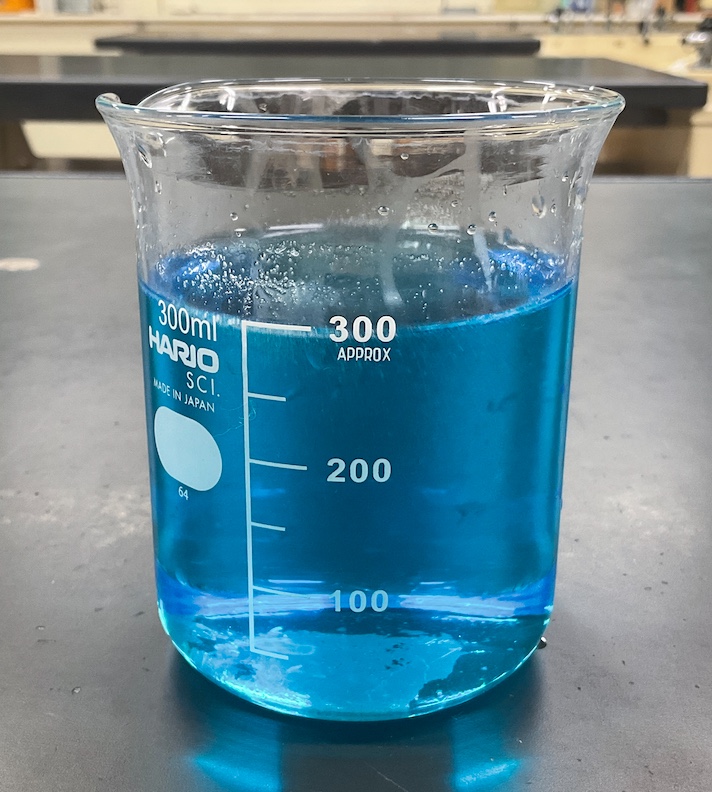 Method and Safety InnovationsThe method is simple:
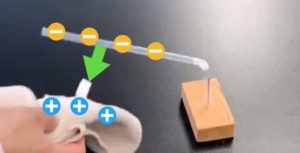
- Pour the copper(II) chloride dihydrate solution into the cell.
- Insert the carbon rod electrodes and apply 5V DC voltage.
- Observe the changes at the anode (+ pole) and cathode (− pole).
- Test and identify the substances generated at the anode and cathode.
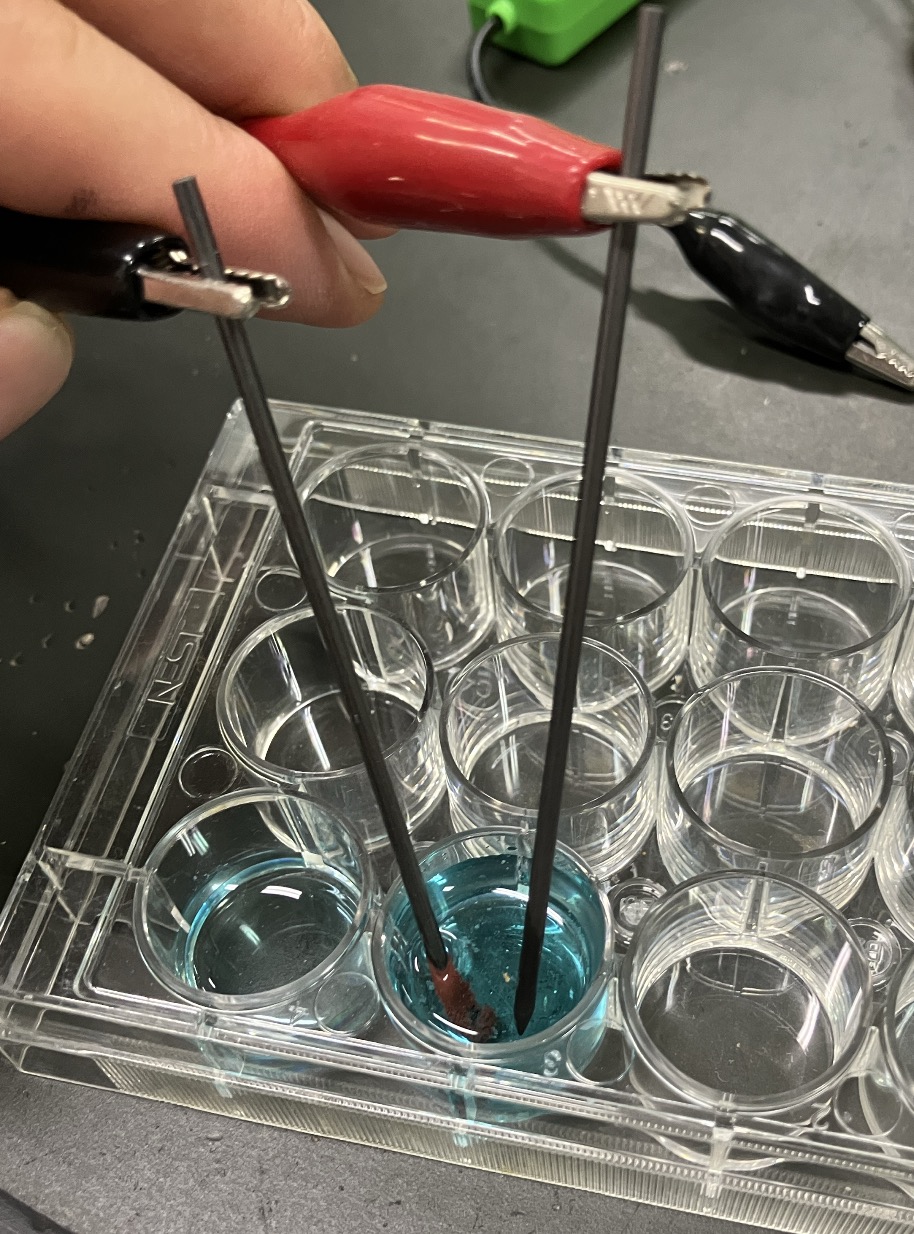
Here’s a cool trick: The carbon rods used as electrodes can be replaced with thick 2mm mechanical pencil leads!
|
|
![[商品価格に関しましては、リンクが作成された時点と現時点で情報が変更されている場合がございます。]](https://hbb.afl.rakuten.co.jp/hgb/2c4b1d07.ce019e28.2c4b1d08.6132124d/?me_id=1208593&item_id=10346879&pc=https%3A%2F%2Fthumbnail.image.rakuten.co.jp%2F%400_mall%2Farde%2Fcabinet%2Fitem654%2F5312487_1.jpg%3F_ex%3D240x240&s=240x240&t=picttext "[商品価格に関しましては、リンクが作成された時点と現時点で情報が変更されている場合がございます。]")

Mechanical pencil leads, just like pencil graphite, are made of carbon and conduct electricity well.However, a crucial safety point is preventing a short circuit. If the positive and negative electrodes touch inside the solution, the electricity will flow directly between the electrodes instead of through the solution (a short circuit), preventing proper electrolysis and creating a hazard. To avoid this, we cut a small piece of Styrofoam to create a pedestal to secure the electrodes.
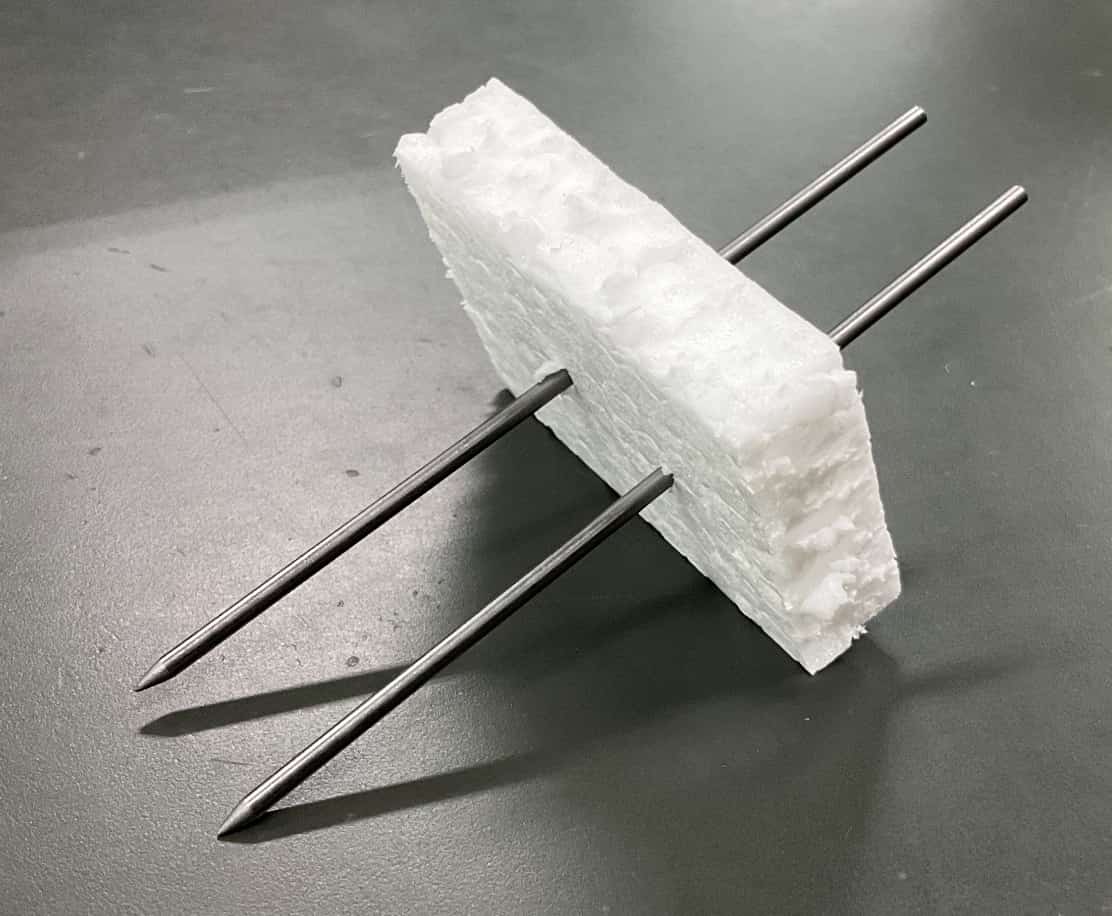 Even without Styrofoam, it’s vital to splay the electrodes into a V-shape and strictly ensure they never touch.
The V-shape is key!
The circuit was set up to branch from one power source, allowing two experiments to be run simultaneously. The voltage is $5\text{V}$.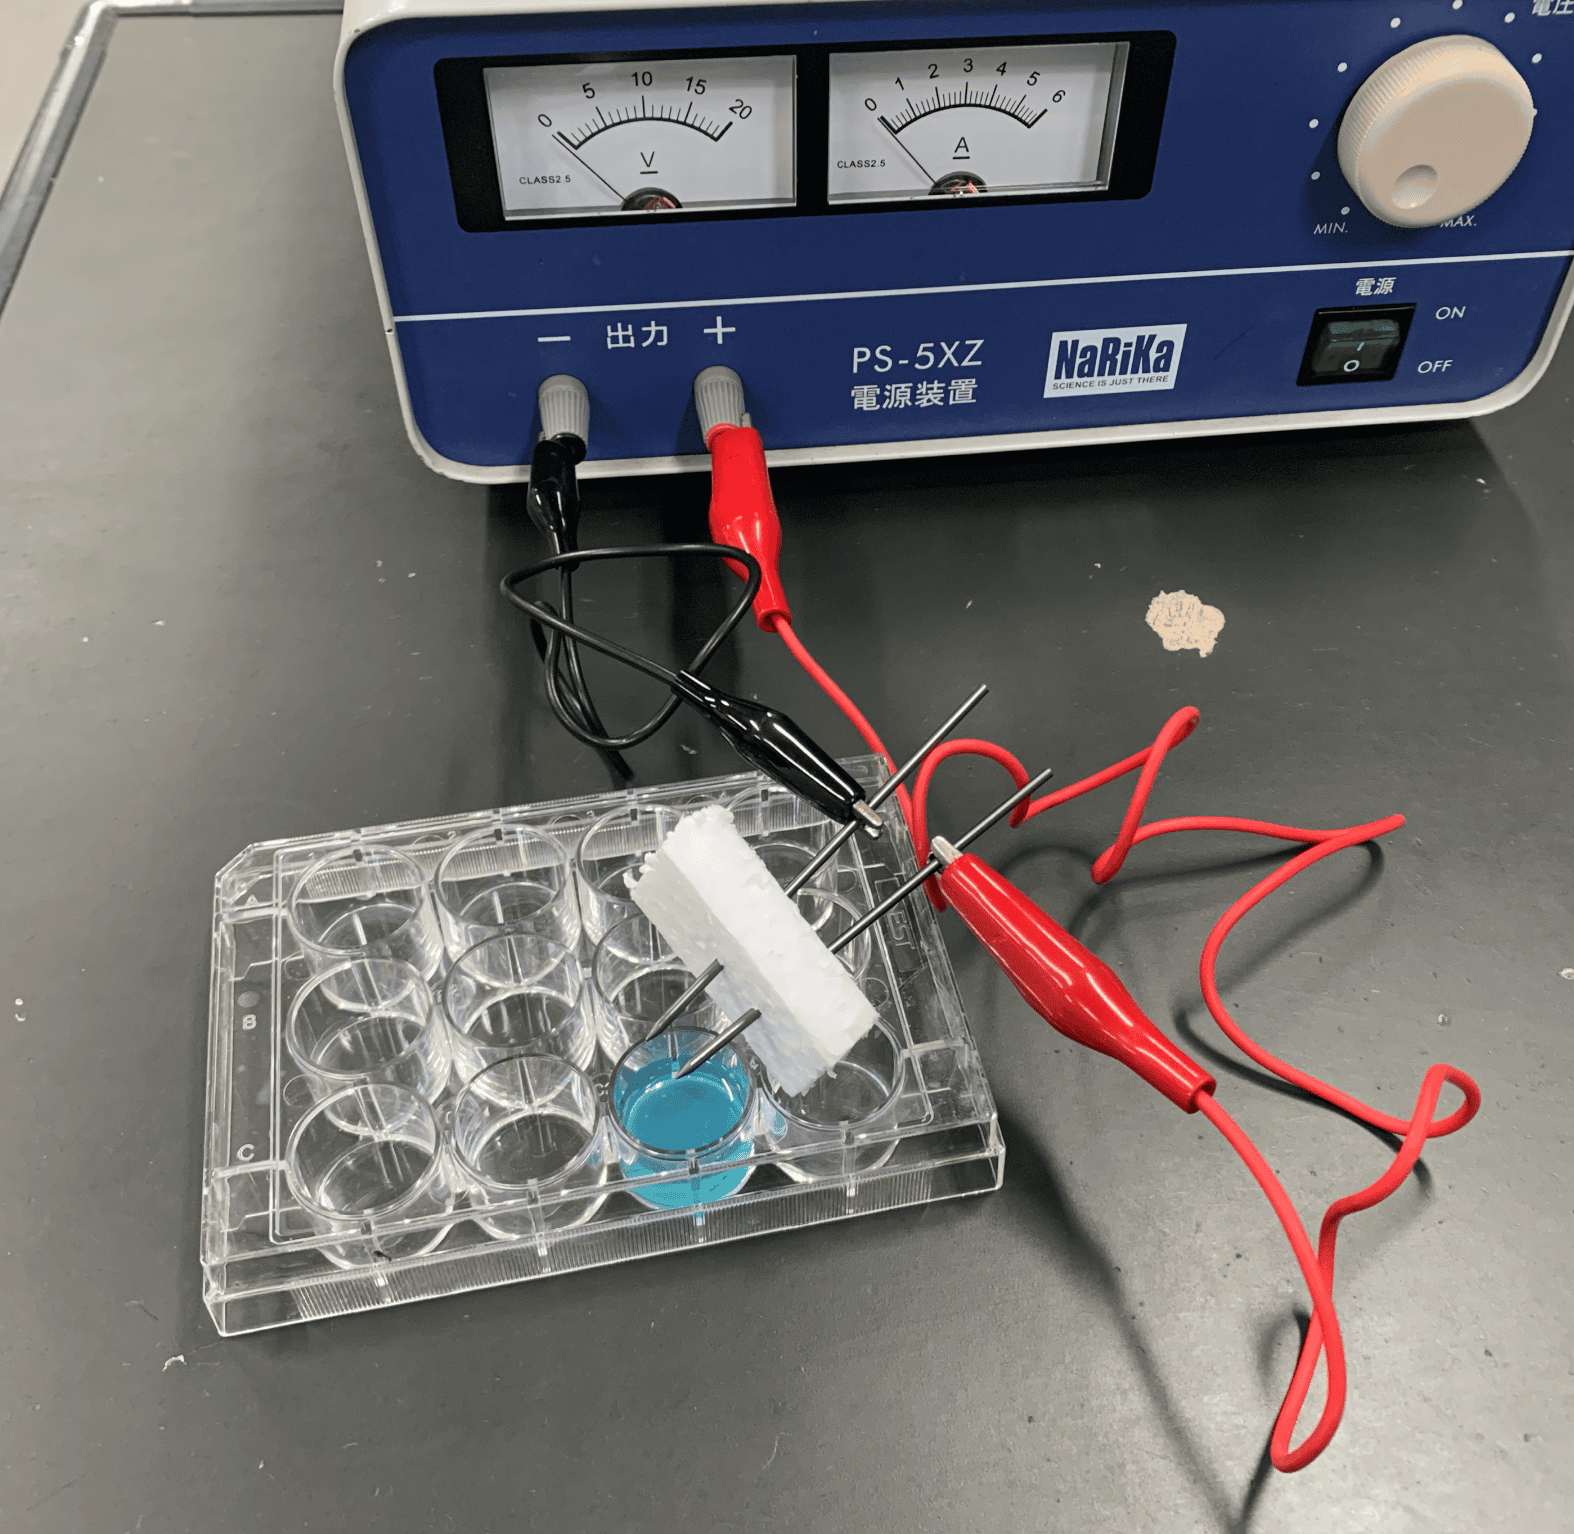 Time to Experiment! The Blue Solution’s TransformationWith the electrodes attached, the electrolysis begins!
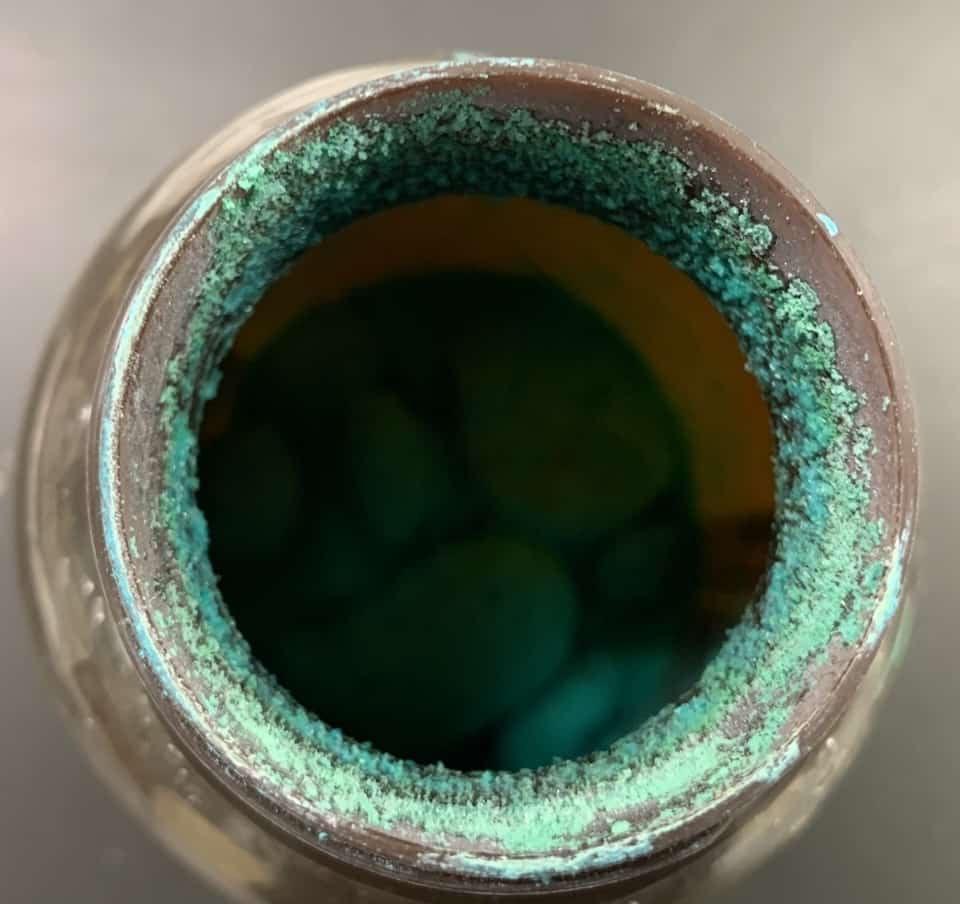
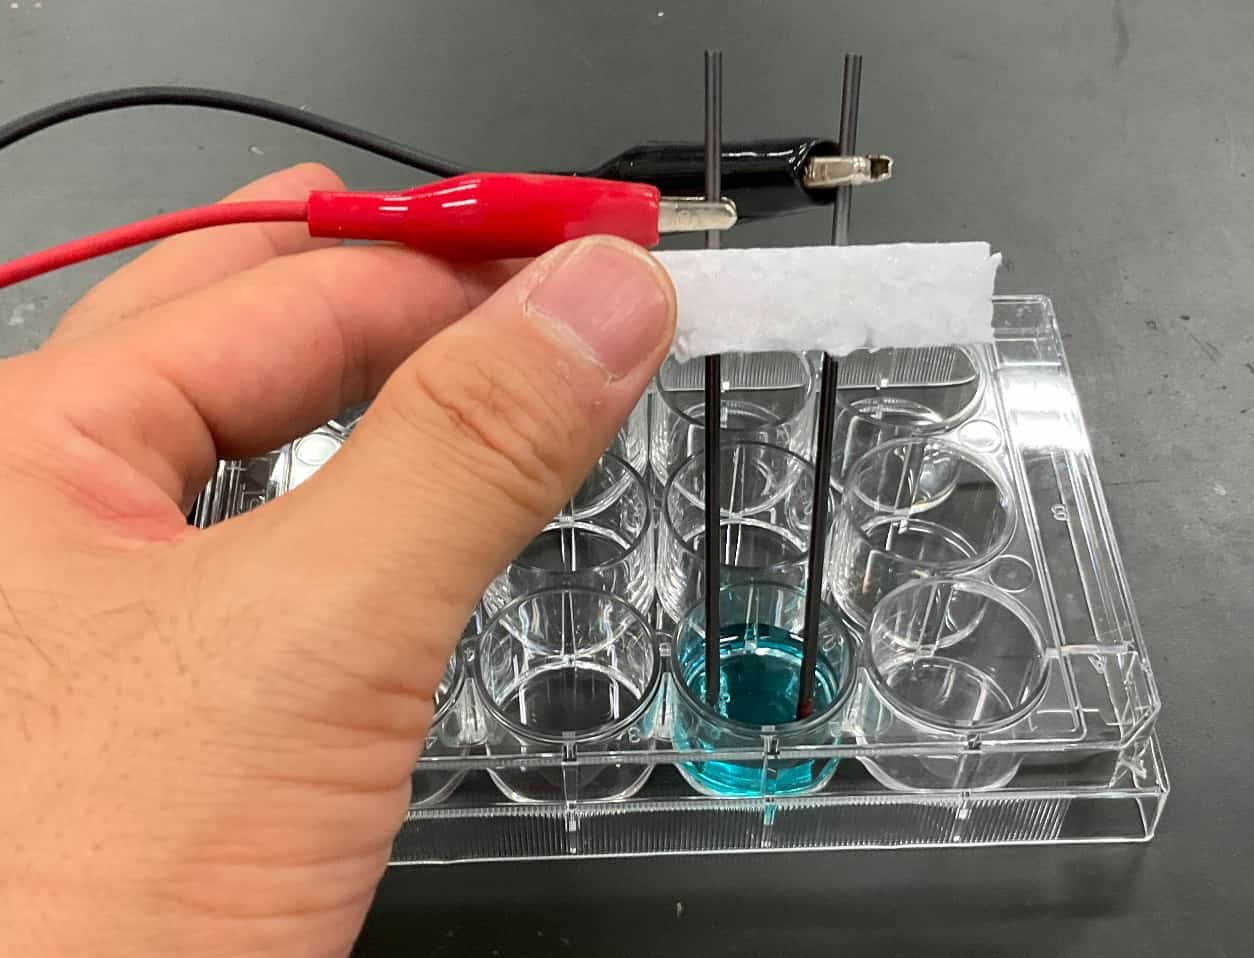 As we closely watch the solution, a change appears almost immediately. A brownish substance starts clinging to the cathode ($-$ pole). Meanwhile, fine bubbles start popping up from the anode ($+$ pole).
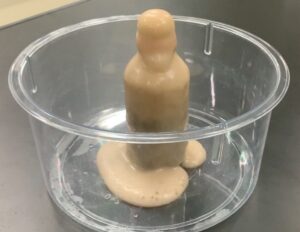
 After applying the voltage for about 10 minutes… the vibrant blue color of the solution completely disappeared and turned transparent! (Note: If you want to speed things up, you can use around $9\text{V}$, but you must be even more cautious about short-circuiting!)
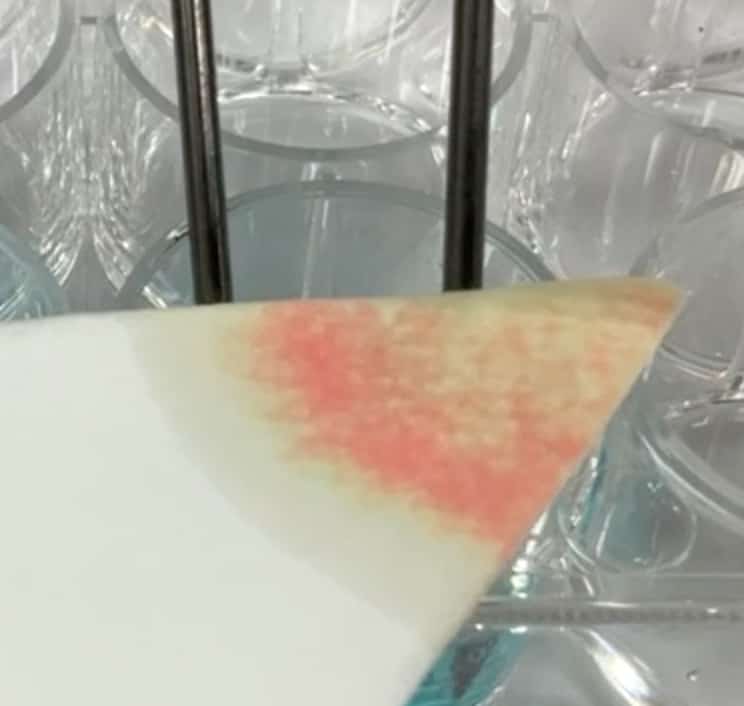
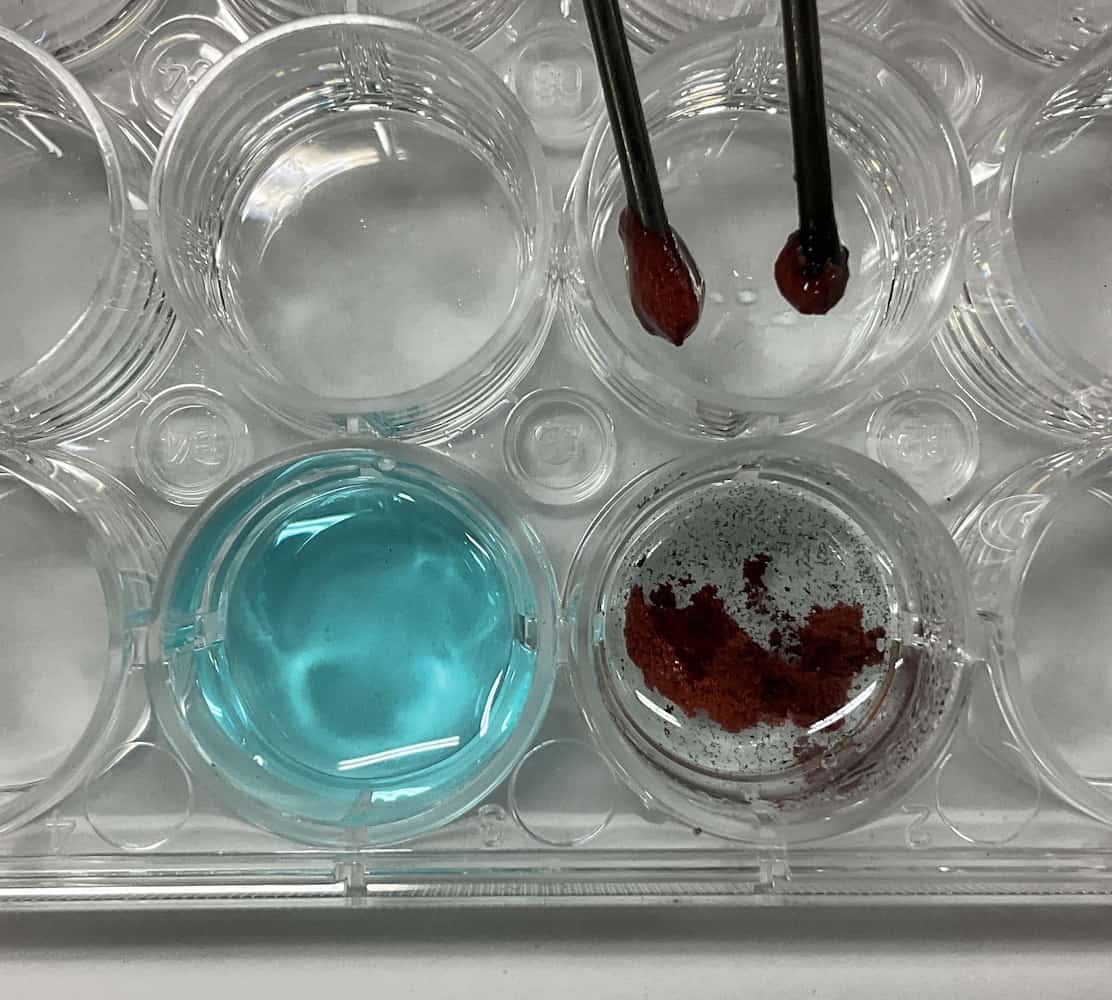 The Mystery Solved: What are the Missing “Blue” and the Appearing “Bubbles”?Let’s uncover the secrets behind these strange changes. First, the “blue color” in the solution is due to particles called copper ions ($\text{Cu}^{2+}$). When copper chloride ($\text{CuCl}_2$) dissolves in water, it separates into copper ions ($\text{Cu}^{2+}$) and chloride ions ($\text{Cl}^{-}$).【Change at the Cathode ($-$ pole)】The positively charged copper ions ($\text{Cu}^{2+}$) are attracted to the cathode ($-$ pole). They receive electrons ($\text{e}^{-}$) supplied by the power source and become electrically neutral copper ($\text{Cu}$) atoms. This is the brownish substance sticking to the electrode! Because the blue “copper ions” are continually converted into “copper” and removed from the solution, the blue color disappears, and the solution becomes transparent.$$\text{Cu}^{2+} + 2\text{e}^{-} \rightarrow \text{Cu}$$【Change at the Anode ($+$ pole)】The negatively charged chloride ions ($\text{Cl}^{-}$) are attracted to the anode ($+$ pole). They lose electrons ($\text{e}^{-}$) and become chlorine ($\text{Cl}_2$) gas. The fine bubbles are chlorine, which is familiar from the smell of pool disinfectant!$$2\text{Cl}^{-} \rightarrow \text{Cl}_2 + 2\text{e}^{-}$$Chlorine has a bleaching effect (decolorization), meaning it removes color. We let the students freely test for this chlorine. Some groups placed red water-based ink on filter paper near the anode to confirm the bleaching reaction, others dipped the paper into the solution, and some even guided the gas bubbles into an adjacent cell containing water and ink.
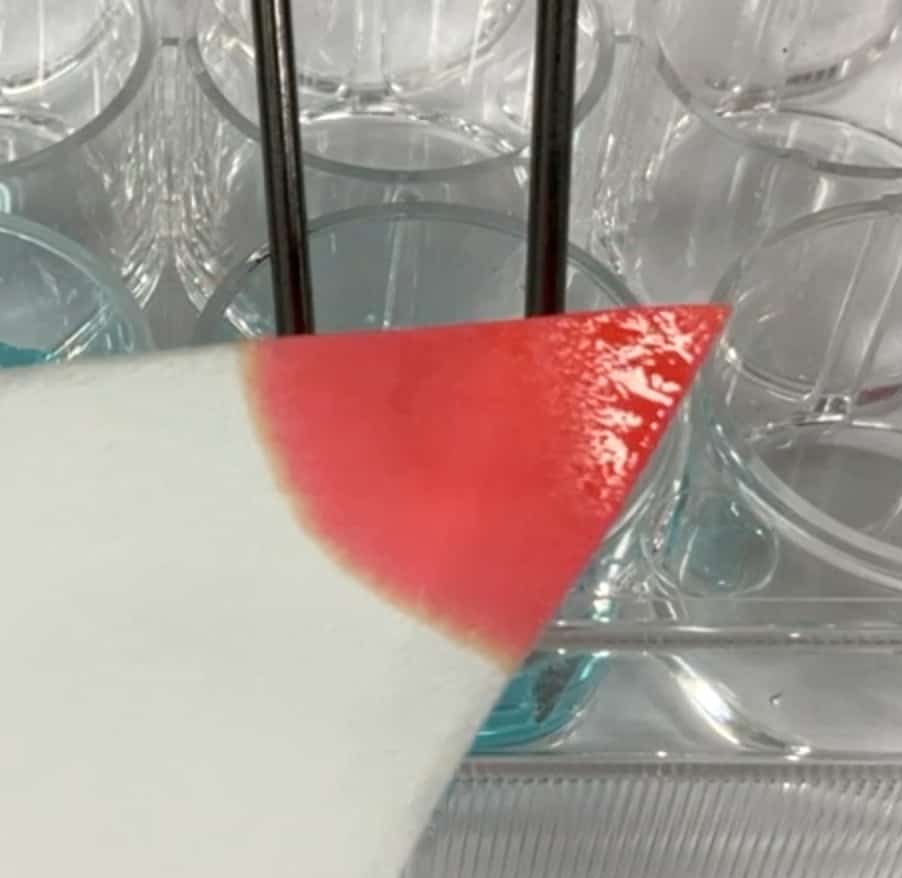
 We also found that using a green highlighter made the color change much easier to see! This was another interesting discovery.
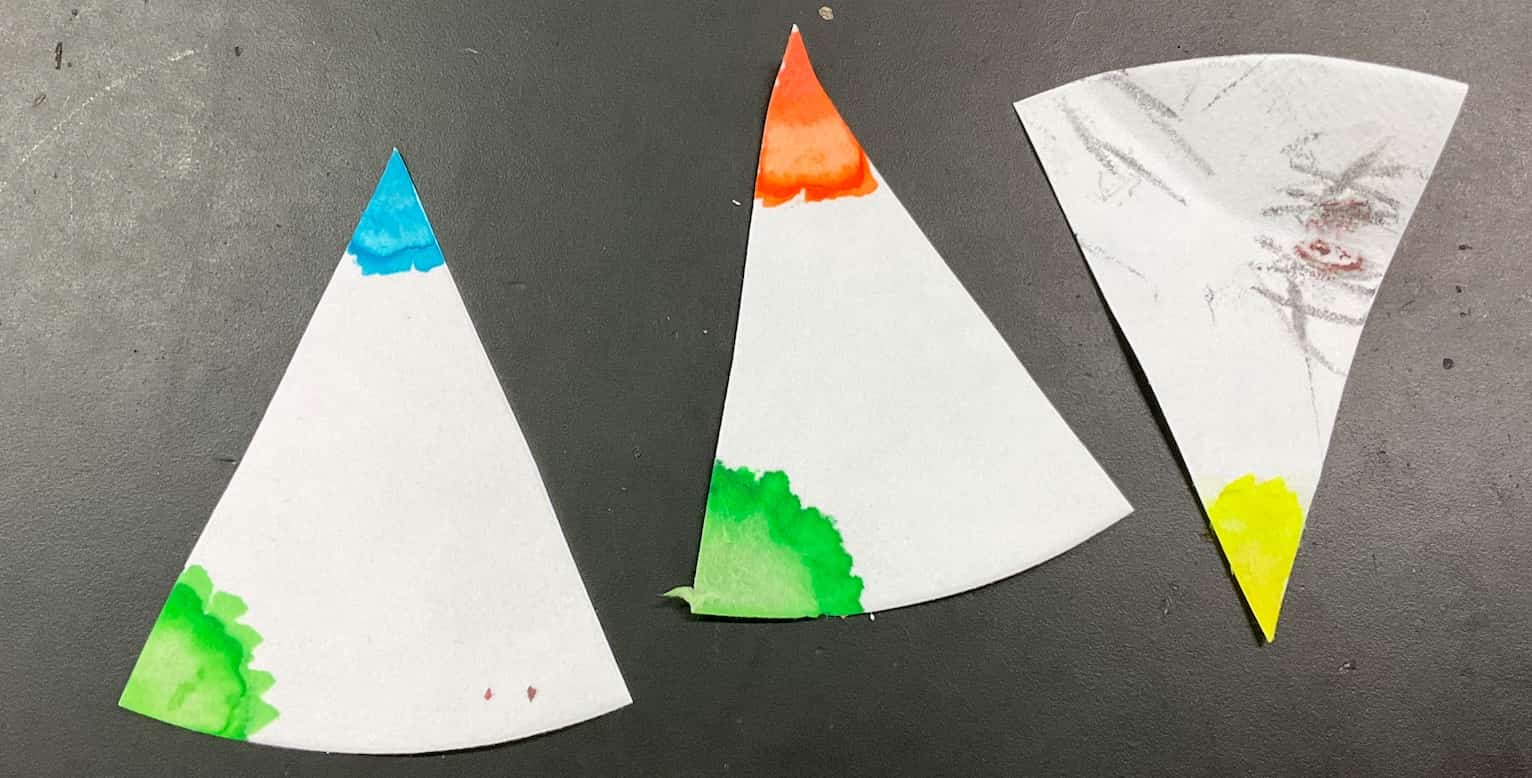 Expanding Scientific ConnectionsThe experiment doesn’t end there. The copper that deposited on the cathode can be carefully scraped onto filter paper and rubbed with a spoon to reveal a shiny metallic luster. Furthermore, one group went the extra mile and used a Bunsen burner to burn the remaining solution or the deposited copper to confirm the flame test reaction.
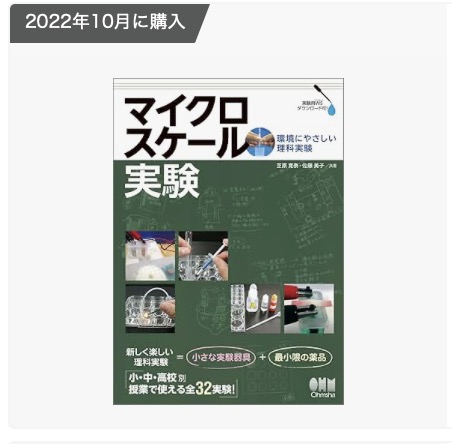
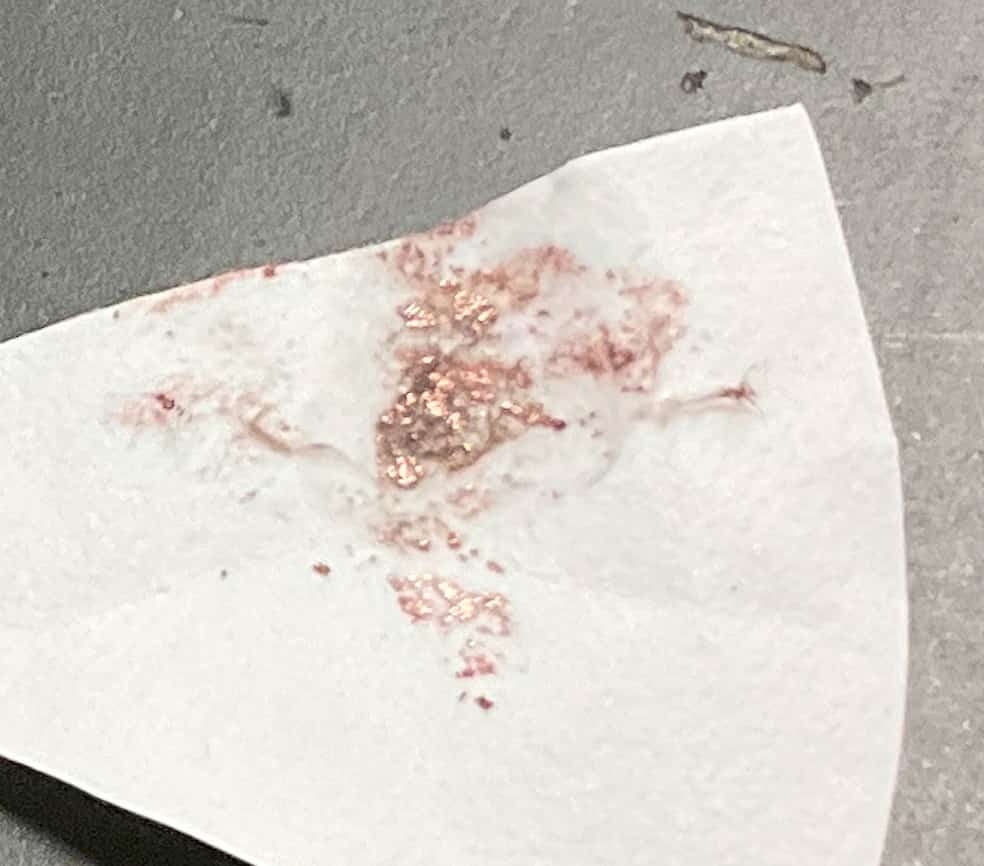 Copper produces a blue-green flame when heated, a principle also used to color fireworks. Verifying that the substance they extracted is indeed “copper” using various methods is truly the essence of science. Instead of just memorizing the term “electrolysis,” experiencing the moment a substance changes, a color vanishes, and new materials are born right before your eyes deepens your understanding of chemistry. This is a genuinely fascinating experiment with many opportunities for discovery. I also bought this book about microscale experiments.
Contact and RequestsBring the wonder and fun of science closer to home! I’ve clearly compiled fun at-home science experiments and tips. Feel free to browse!・About the operator, Kuwako Ken: Click here・For various requests (writing, lectures, science workshops, TV supervision/appearances, etc.): Click here・Article updates are posted on X!
![]() Kagaku no Neta Channel (Science Tips Channel) streams experiment videos!
Kagaku no Neta Channel (Science Tips Channel) streams experiment videos!
6月のイチオシ実験!
レモンやオレンジで風船を割ろう!インパクトが抜群のリモネン風船の実験
テレビ番組監修・イベント等のお知らせ
- 6月3日(水)20:30〜 「
バカリズムのちょっとバカりハカってみた!」(テレビ東京)を科学監修・出演します。テーマは「 そばの出前は何人前まで運べるのか、限界を測ってみた」です。 - 6月4日(木) 7:00〜 「THE突破ファイル」(日本テレビ)について科学監修しました。
- 6月14日(日) 千葉大学インスタレーション「探究」にて講師を務めます
- 6月26日(金) 公開研究会「脱作業化!デジタル化と段階的指導で実現する オームの法則の探究」
- 6月28日(日) ダビンチマスターズ@昭和女子
- 7月18日(土) 教員向け実験講習会「ナリカカサイエンスアカデミー」の講師をします。お会いしましょう。
書籍のお知らせ
- 『大人のための高校物理復習帳』(講談社)…一般向けに日常の物理について公式を元に紐解きました。特設サイトでは実験を多数紹介しています。※増刷がかかり6刷となりました(2026/02/01)

- 『きめる!共通テスト 物理基礎 改訂版』(学研)… 高校物理の参考書です。イラストを多くしてイメージが持てるように描きました。授業についていけない、物理が苦手、そんな生徒におすすめです。特設サイトはこちら。

各種SNS(更新情報をお届け!)
X(Twitter)/instagram/Facebook(日本語)
Explore
- 楽しい実験…お子さんと一緒に夢中になれるイチオシの科学実験を多数紹介しています。また、高校物理の理解を深めるための動画教材も用意しました。
- 理科の教材… 理科教師をバックアップ!授業の質を高め、準備を効率化するための選りすぐりの教材を紹介しています。
- Youtube…科学実験等の動画を配信しています。
- 科学ラジオ …科学トピックをほぼ毎日配信中!AI技術を駆使して作成した「耳で楽しむ科学」をお届けします。
- 講演 …全国各地で実験講習会・サイエンスショー等を行っています。
- About …「科学のネタ帳」のコンセプトや、運営者である桑子研のプロフィール・想いをまとめています。
- お問い合わせ …実験教室のご依頼、執筆・講演の相談、科学監修等はこちらのフォームからお寄せください。