Earthquake Lesson Revamp: The Mind-Blowing Digital Tool That Makes P-Waves and S-Waves Click!
Ken Kuwako, Your Science Trainer. Every Day is an Experiment.
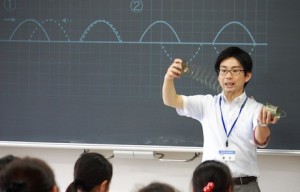
Today, I’m thrilled to share an absolute gem of a digital tool that will dramatically spice up your earthquake lessons. A colleague told me about this resource, created by Dr. Kiwamu Nishida from the Earthquake Research Institute at the University of Tokyo, and honestly, I was speechless! The first time I saw it, I was glued to the screen with my jaw dropped.
It’s notoriously difficult to grasp the concept of “shaking” in an earthquake. In particular, getting students to intuitively understand the difference between P-waves (Primary/Compressional waves) and S-waves (Secondary/Shear waves) is a monumental challenge. But this one tool instantly solves that problem. By simply dragging your mouse, you can reproduce everything right before your eyes—from the generation and propagation of seismic waves to their reflection. This is, without exaggeration, a dream come true for science educators. Seeing is believing! You can find it on Dr. Nishida’s website here. Click the link and try it out! For now, I’ve captured some screenshots to show you.
http://www.eri.u-tokyo.ac.jp/people/knishida/Seismology/body_wave.html
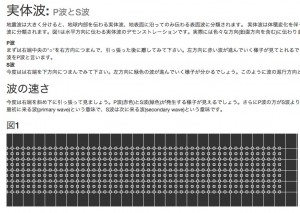
🖱️ Drag Your Mouse, Generate Seismic Waves!
Let’s take a look at the photos.
Photo demonstration:
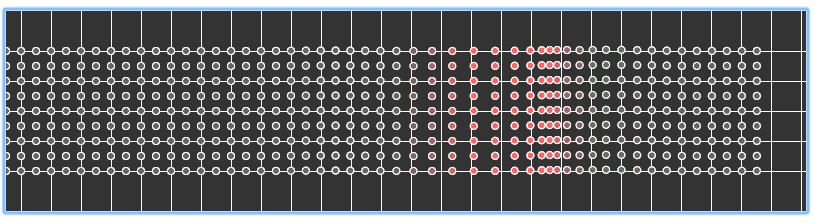
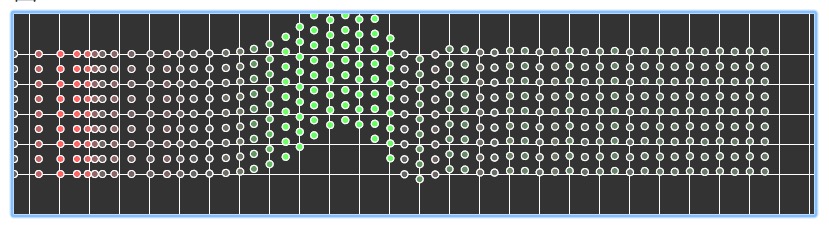
When you place your mouse over the screen and drag it upward…
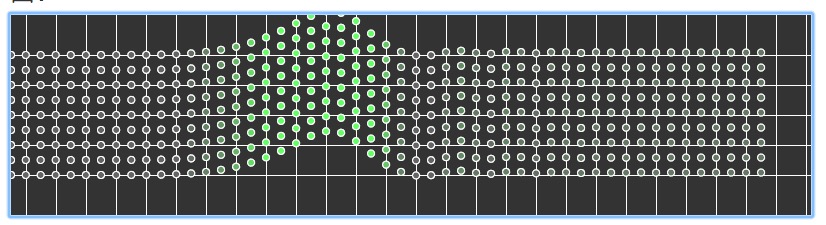
… an S-wave (Shear wave) is generated. And look at what happens at the boundary wall!
Fixed-end reflection! Amazing!!
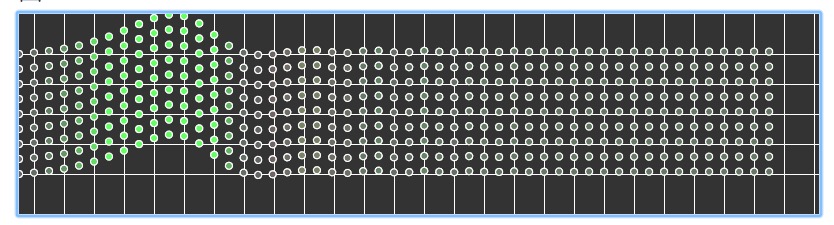
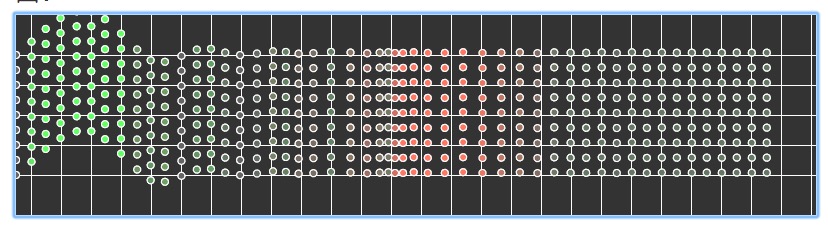
Next, let’s try dragging it horizontally. This produces:
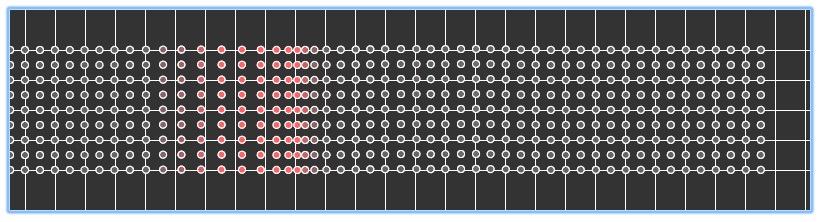
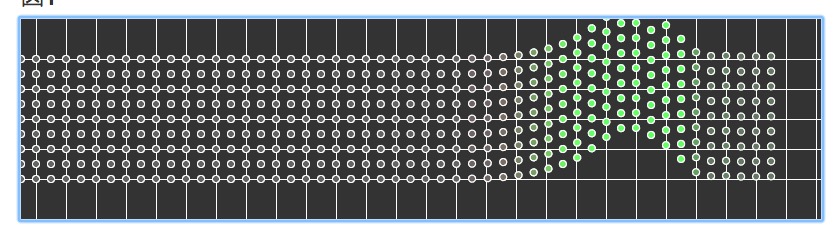
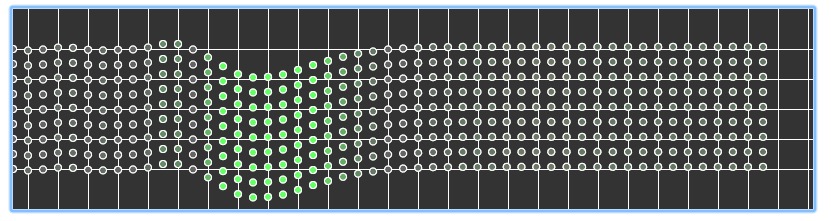
A P-wave (Compressional wave)! But the fun doesn’t stop there. Now, try dragging it diagonally!
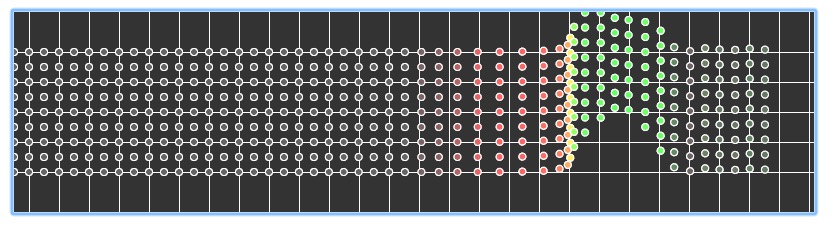
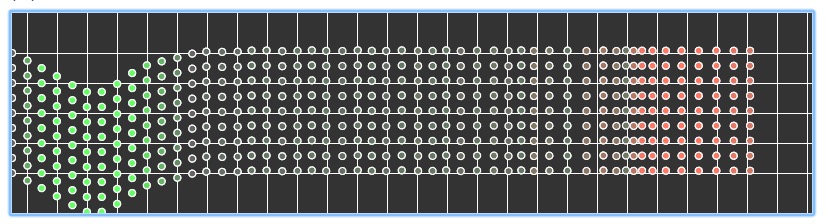
Incredible! Both P-waves and S-waves are generated simultaneously!

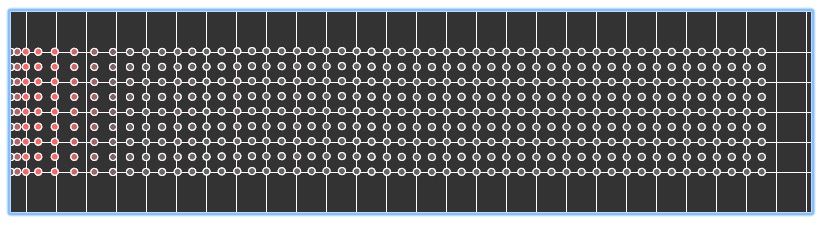
And the P-wave is faster!
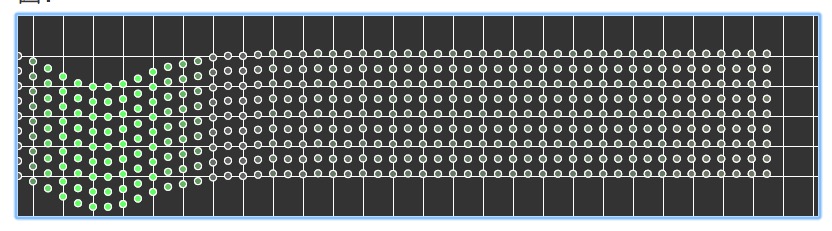
We’re witnessing a perfect recreation of seismic waves. The P-wave has now reflected off the left boundary.

What a fantastic teaching tool!
💡 3 Key Reasons This Tool is Great for the Classroom
Here’s why this digital resource is a must-have for your lessons:
The motion is slow and easy to follow:
Many simulations move too fast for a teacher to explain what’s happening. With this tool, the waves propagate slowly, allowing you to narrate and explain the physics in real-time.
Color coding clarifies wave types:
P-waves are shown in red, and S-waves are in green. This visual distinction makes it incredibly easy for students to grasp the difference between the two.
You can observe wave reflection:
The left boundary is set as a fixed end and the right as a free end, so you can observe the fascinating phenomenon of wave reflection in action.
This simulation is packed with features that naturally spark students’ curiosity. It helps them visually solve questions like: Why are P-waves faster? and Why do seismic waves reflect? I highly recommend using a projector to display this on a large screen in your classroom and explore the amazing world of seismic waves with your students!
Inquiries & Contact
Discover more about the wonders of science! I frequently post clear, easy-to-understand explanations of fun science experiments you can do at home, along with tips and tricks. Feel free to browse around!
About the operator, Ken Kuwako: Click Here
For various requests (writing, lectures, science classes, TV supervision, appearances, etc.): Click Here
* Get updates on new articles by following me on X!
![]() I share experiment videos on my Science Channel on YouTube!
I share experiment videos on my Science Channel on YouTube!
NEW 分解問題集 理科
- 7月21日発売!『高校入試 分解問題集 理科』(学研)…難しい問題も小さな問題に分解することで、問題を解くことができます。そんな分解の技術が身につくように深く関わりを持って作りました。
7月のイチオシ実験!
夏でプシュッと爽やか実験!

テレビ番組監修・イベント等のお知らせ
- 7月18日(土)「TIF presents ONE SONG FES. 」(フジテレビ)
- 7月18日(土) 教員向け実験講習会「ナリカカサイエンスアカデミー」
- 7月23日(木)科学監修 19:00〜 THE突破ファイル(日本テレビ)
- 7月30日(水) 監修したテレビ番組放送予定
- 12月26日(土) ナリカサイエンスアカデミー(教員向け実験講習会)開催
書籍のお知らせ
- 『大人のための高校物理復習帳』(講談社)…一般向けに日常の物理について公式を元に紐解きました。特設サイトでは実験を多数紹介しています。※増刷がかかり6刷となりました(2026/02/01)

- 『きめる!共通テスト 物理基礎 改訂版』(学研)… 高校物理の参考書です。イラストを多くしてイメージが持てるように描きました。授業についていけない、物理が苦手、そんな生徒におすすめです。特設サイトはこちら。

各種SNS(更新情報をお届け!)
【日本語】X(Twitter)/instagram/Facebook 【英語】BlueSky/Threads
Explore
- 楽しい実験…お子さんと一緒に夢中になれるイチオシの科学実験を多数紹介しています。また、高校物理の理解を深めるための動画教材も用意しました。
- 理科の教材… 理科教師をバックアップ!授業の質を高め、準備を効率化するための選りすぐりの教材を紹介しています。
- Youtube…科学実験等の動画を配信しています。
- 科学ラジオ …科学トピックをほぼ毎日配信中!AI技術を駆使して作成した「耳で楽しむ科学」をお届けします。
- 講演 …全国各地で実験講習会・サイエンスショー等を行っています。
- About …「科学のネタ帳」のコンセプトや、運営者である桑子研のプロフィール・想いをまとめています。
- お問い合わせ …実験教室のご依頼、執筆・講演の相談、科学監修等はこちらのフォームからお寄せください。