The Fire Wizard! Sparkling Colors Unleashed — Flame Reaction Fun with a Spray!
I’m Ken Kuwako, a Science Trainer. Every Day is an Experiment!
【This article is also available on the radio!】
Have you ever wondered why the fireworks that light up the night sky emit such beautiful, vividly colored light? That dazzling glow of red, green, and yellow? It looks like magic, but in reality, it’s a legitimate scientific phenomenon called “Flame Test” or “Flame Coloration Reaction.” Today, I’ll dive into the fascinating world of the flame test and show you a dynamic, exciting science experiment using a spray bottle to observe it! Check out this video first:
Have you ever seen an ordinary flame suddenly change color as if by magic? When a “material”—a metal—meets an “energy”—a flame—a beautiful light show drama unfolds.
What is the Flame Test? — How Do Fireworks Get Their Colors? —
The elements that make up metals (their atoms) are usually in a calm, stable state (a low-energy state). However, when they are heated, for example by a burner flame, they absorb that energy and become excited (a high-energy state). Think of it like a tiny atom jumping vigorously from its usual “first floor” up to the “second or third floor” after getting a burst of energy.
But this excited state is unstable, so the atom quickly tries to return to its calm “first floor.” When it falls back down from the “upper floor” to the “lower floor,” it releases the absorbed energy as “light.” And here’s the cool part! The “height of the floors” (the energy difference) is unique to each type of metal. Therefore, the color of the light emitted is also specific to that metal.
- Lithium (Li) → Red flame
- Sodium (Na) → Yellow flame
- Potassium (K) → Violet/Lilac flame
- Copper (Cu) → Green flame
- Strontium (Sr) → Crimson Red flame (This is the “red” in fireworks!)
- Barium (Ba) → Yellowish-Green flame (This is the “green” in fireworks!)
That’s right! Pyrotechnicians cleverly use this flame test phenomenon to paint the night sky with various colored flowers! Being able to identify what metal is present just by looking at the color of the flame is almost like forensic science.
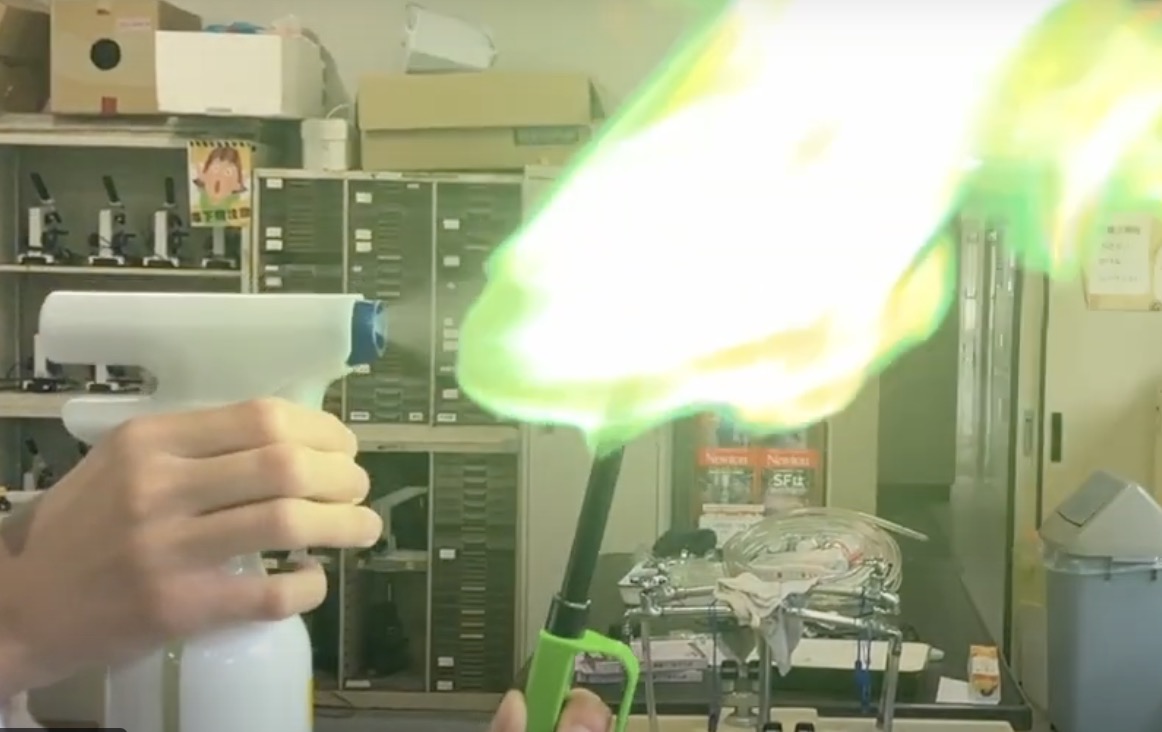
Light emitted by Copper atoms!
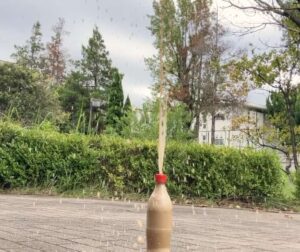
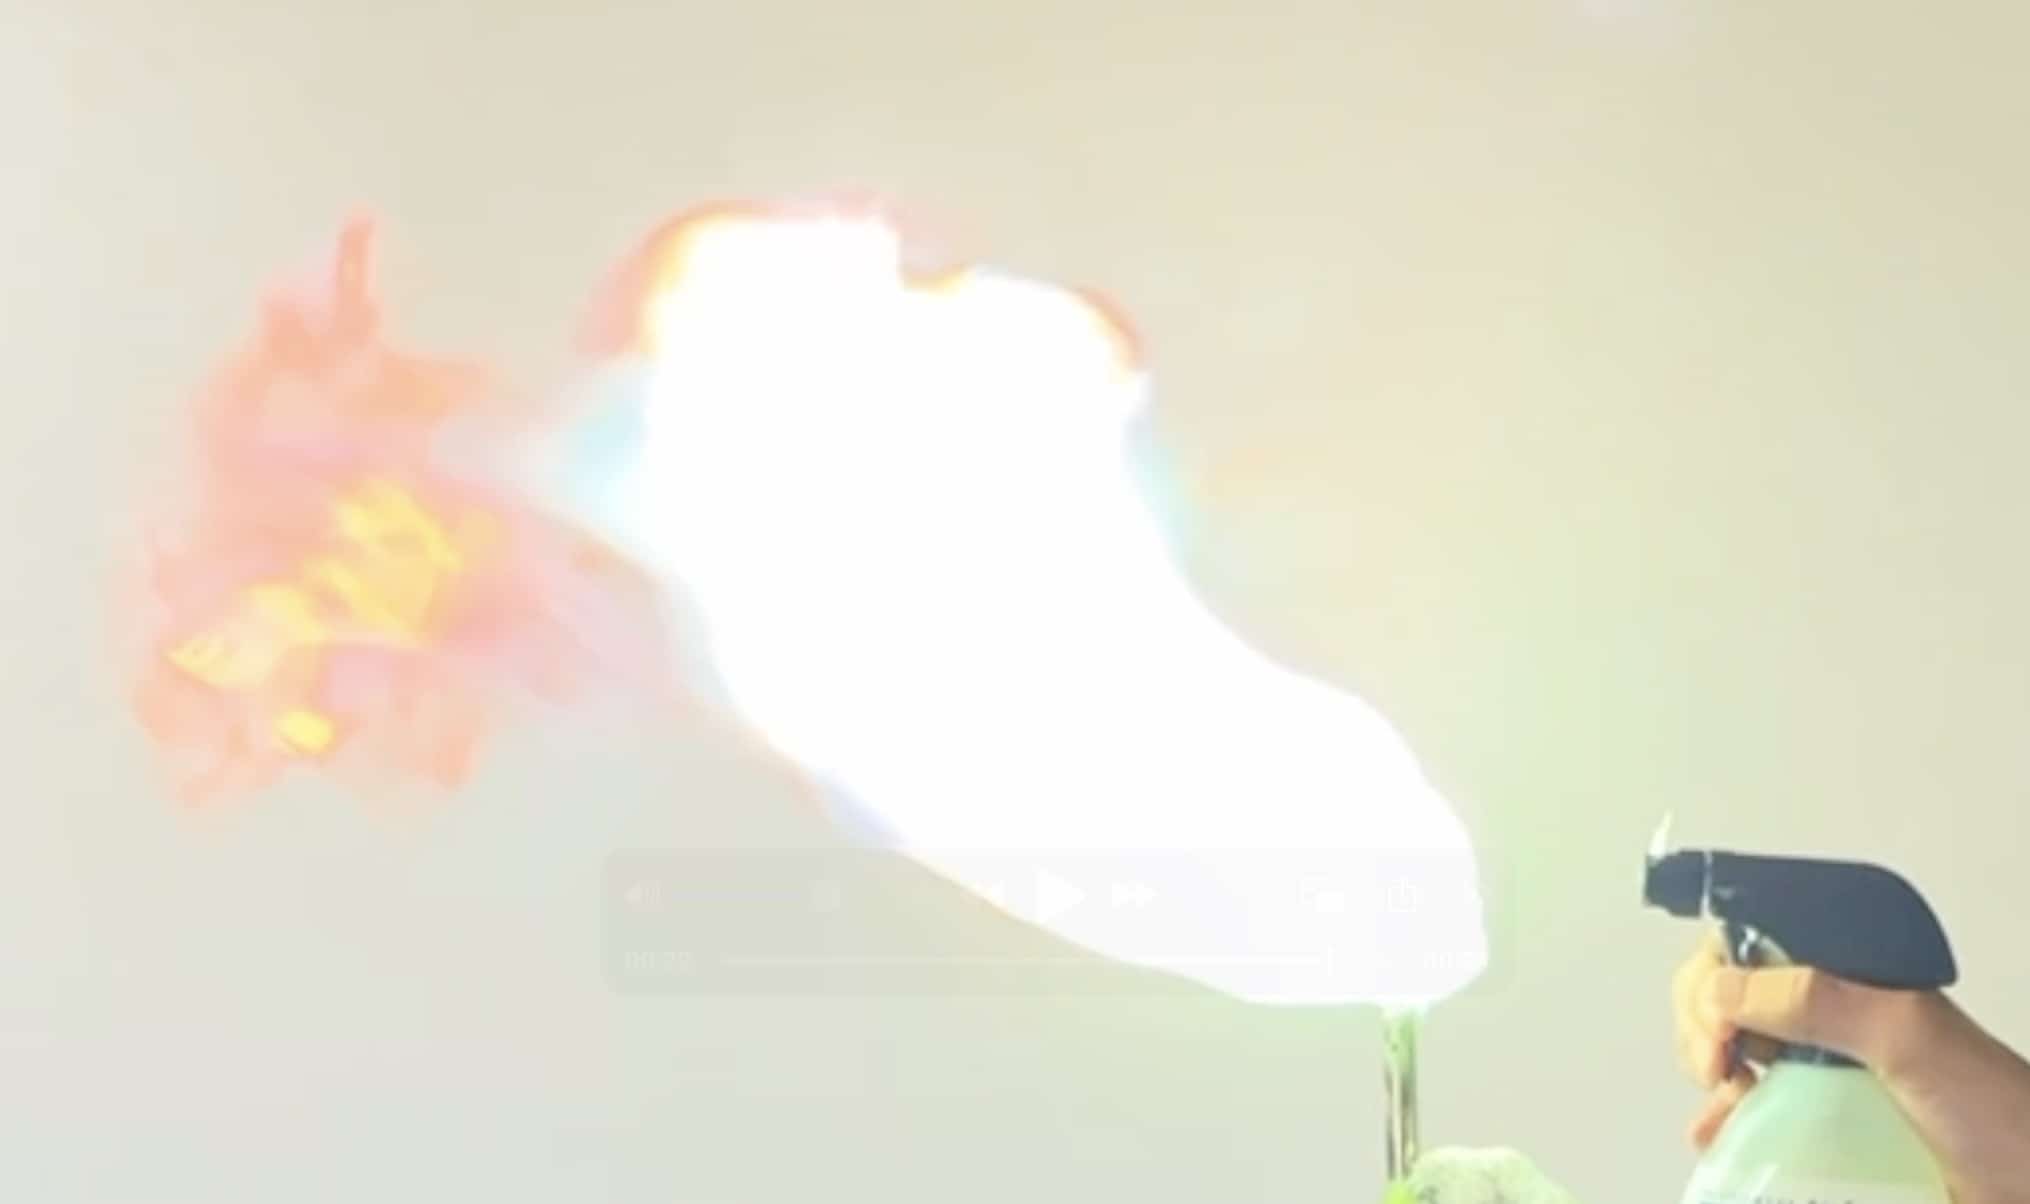
The Dynamic Flame Test Experiment with a Spray Bottle!
Typically, in school science labs, the experiment involves placing a small amount of metal salt (we call these “salts” or “compounds”) on a spatula and holding it over a burner flame. While safe, this method can be a bit underwhelming. So, today, I’m introducing a much flashier method where the flame’s color spreads out beautifully!
What You Need
- Ethanol (fuel-grade alcohol)
- Metal Salts (e.g., copper chloride, lithium chloride, sodium chloride)
- A Spray Bottle (Be sure to choose one that is alcohol-resistant)
- A Lighter (For safety, a long-handled utility lighter is recommended)
- A Fire-Resistant Work Surface (A lab tray or a large metal dish)
- Fire Safety Gear (A wet cloth, a fire extinguisher or a bucket of water)
How to Do the Experiment
- Pour ethanol into the spray bottle (Be careful not to overfill).
- Add a small amount (about half a scoop/spatula of salt) of the metal salt you want to observe into the ethanol and shake well to dissolve. (e.g., copper chloride for green, lithium chloride for red).
- On your safe work surface, ignite the lighter.
- Point the spray bottle towards the lighter flame and give it a quick “psst!” (spray from a safe distance).
- The instant you spray, the mist will catch fire and flare up with the color of the metal you chose!
Why is the Spray Bottle Method So Dynamic?
There are two secrets behind why this experiment produces such a spectacular flame. The first is that the fuel, ethanol, is atomized into a fine mist by the spray bottle. When it’s a fine mist, the surface area in contact with the air (oxygen) becomes incredibly large, allowing it to ignite and spread instantly. The second is that the metal particles are evenly dispersed throughout the flame. When you burn a solid chunk of salt on a spatula, the metal is concentrated; but with the spray, the fine particles spread across the entire flame, making the color vivid and exceptionally beautiful.
Safety Warnings (You MUST Follow These!)
While this experiment is visually stunning and fun, it uses fire and alcohol, making it extremely dangerous if done incorrectly. You must strictly follow these rules:
🔥 DO NOT attempt this at home. Only conduct this in a well-ventilated, spacious area where using fire is safe, such as a science lab, and always under adult supervision (ideally with a science teacher).
🔥 To prevent a fire, absolutely do not place any flammable materials (paper, cloth, the alcohol bottle itself, etc.) near the work area.
🔥 The flame can be larger than expected. When spraying, never bring your face or hands too close to the flame.
🔥 After the experiment, make absolutely sure the fire is completely extinguished.
Even phenomena that seem like magic can be explained by considering what’s happening at the atomic level—that’s the fun of science. Just by changing the color of the flame, the fire we are used to seeing looks like something completely different. Everyone, please prioritize safety above all else, and try this with your teacher in the science lab!
Inquiries and Requests
Making the wonders and fun of science more accessible! We compile easy-to-understand at-home science experiments and useful tips. Feel free to browse our content! ・The content of our Science Notes has been published in a book. Details here ・About the administrator, Ken Kuwako, click here ・For various requests (writing, lectures, experiment classes, TV supervision, appearances, etc.), click here ・Article updates are posted on X!
![]() We post experiment videos on the Science Note Channel!
We post experiment videos on the Science Note Channel!
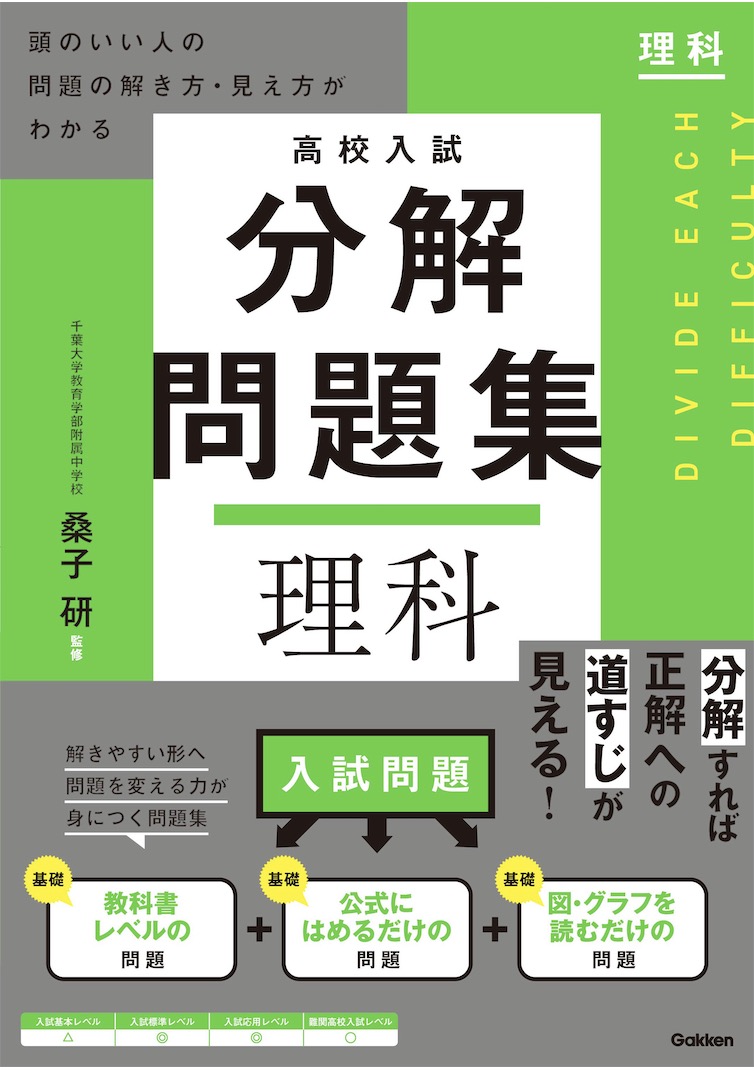
NEW 分解問題集 理科
- 7月21日発売!『高校入試 分解問題集 理科』(学研)…難しい問題も小さな問題に分解することで、問題を解くことができます。そんな分解の技術が身につくように深く関わりを持って作りました。
7月のイチオシ実験!
夏でプシュッと爽やか実験!

テレビ番組監修・イベント等のお知らせ
- 7月18日(土)「TIF presents ONE SONG FES. 」(フジテレビ)
- 7月18日(土) 教員向け実験講習会「ナリカカサイエンスアカデミー」
- 7月23日(木)科学監修 19:00〜 THE突破ファイル(日本テレビ)
- 7月30日(水) 監修したテレビ番組放送予定
- 12月26日(土) ナリカサイエンスアカデミー(教員向け実験講習会)開催
書籍のお知らせ
- 『大人のための高校物理復習帳』(講談社)…一般向けに日常の物理について公式を元に紐解きました。特設サイトでは実験を多数紹介しています。※増刷がかかり6刷となりました(2026/02/01)

- 『きめる!共通テスト 物理基礎 改訂版』(学研)… 高校物理の参考書です。イラストを多くしてイメージが持てるように描きました。授業についていけない、物理が苦手、そんな生徒におすすめです。特設サイトはこちら。

各種SNS(更新情報をお届け!)
【日本語】X(Twitter)/instagram/Facebook 【英語】BlueSky/Threads
Explore
- 楽しい実験…お子さんと一緒に夢中になれるイチオシの科学実験を多数紹介しています。また、高校物理の理解を深めるための動画教材も用意しました。
- 理科の教材… 理科教師をバックアップ!授業の質を高め、準備を効率化するための選りすぐりの教材を紹介しています。
- Youtube…科学実験等の動画を配信しています。
- 科学ラジオ …科学トピックをほぼ毎日配信中!AI技術を駆使して作成した「耳で楽しむ科学」をお届けします。
- 講演 …全国各地で実験講習会・サイエンスショー等を行っています。
- About …「科学のネタ帳」のコンセプトや、運営者である桑子研のプロフィール・想いをまとめています。
- お問い合わせ …実験教室のご依頼、執筆・講演の相談、科学監修等はこちらのフォームからお寄せください。