Easy Home Science! Project an “Upside-Down World” on Your Wall — The Magic of Lenses and Light
I’m Ken Kuwako, a Science Trainer. Every Day is an Experiment.
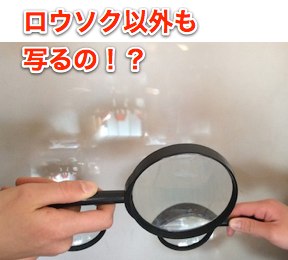
Do you remember that classic science class experiment using a candle, a magnifying glass, and a screen? In the dark room, when the upside-down image of the candle flickered onto the screen—a bit blurry, yet clearly there—didn’t you feel a little spark of excitement?
But here’s a question that often pops up: “Why is it always a candle?”
Maybe that experiment led you to believe, “You can only project things that glow on their own, like a candle or a light bulb.” “So, you can’t project that pencil on your desk or the blue sky outside the window?”… Wrong! Not at all!
The truth is, a magnifying glass (a convex lens) has the power to project anything that our eyes can see. That’s because everything we look at is reflecting light. The lens simply gathers that reflected light.
Today, I’m going to share a beautiful and very easy experiment that proves this point. We won’t be using any candle flames. Instead, we’ll use the view outside your window!
The Science Recipe
What you need: Colored cellophane, a magnifying glass (you can often buy one at a dollar store/100-yen shop)
How to experiment:
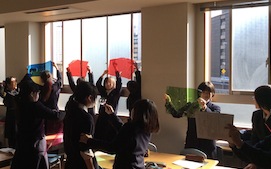
① It’s best to do this during the day. Turn off the lights in the room and have someone hold the colored cellophane near the window.
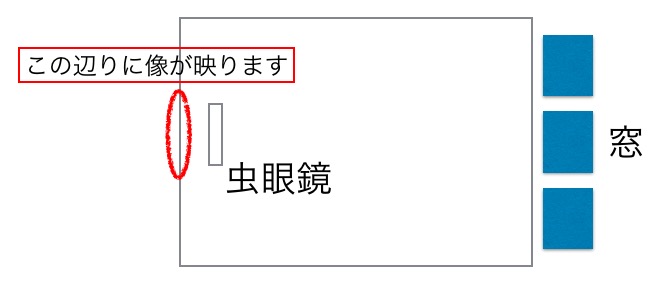
② Take the magnifying glass and move toward a wall opposite the window.
③ Hold the magnifying glass close to the wall and move it back and forth.
Result:
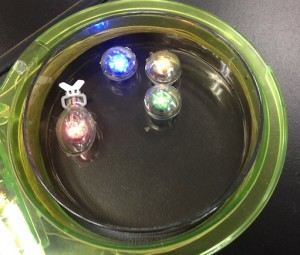
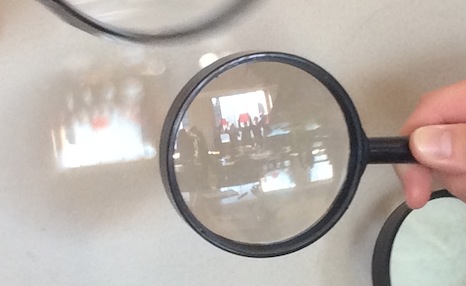
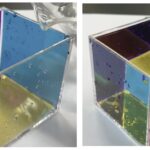
What do you see? When you do this, a clear image of the window view appears, just like in the photo below.
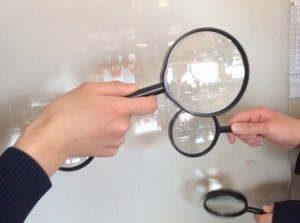
You get an image for every magnifying glass! Isn’t that neat? If you zoom in, you can see…
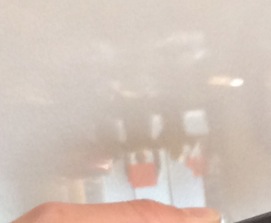
Do you notice it? The person holding the cellophane is projected upside down! The entire scene is projected, too.
Why is the image upside down? It’s the exact same principle as the candle experiment. The view outside the window and the cellophane reflect sunlight. That light refracts (bends) as it passes through the magnifying glass (a convex lens). After passing through the lens, the light rays converge at a single point (they come into focus). This image, which is formed where the light actually gathers, is called a Real Image (jitsuzou in Japanese) in science. A Real Image can be clearly projected onto a screen or a wall, and it always has the property of being inverted (upside down and flipped horizontally).
The image you see reflected on the magnifying glass itself is NOT upside down! Only the image created by the light passing THROUGH the lens is inverted.
This is a wonderful observation! The reflection you see on the glass surface of the magnifying glass is just like a mirror, unrelated to the lens’s power of refraction. But the Real Image, formed by the light that passes through the lens, is inverted. This is the very proof of how a lens works!
The Same Mechanism as Your Eye and a Camera!
In fact, this experiment uses the exact same principle as a camera. The magnifying glass is the “lens,” and the wall acts as the “film” or “image sensor.” Even more surprisingly, our own eyes use this same mechanism to see the world. The lens in our eye, called the crystalline lens, projects an inverted Real Image of the scene onto the retina, the screen at the back of the eye.
“Wait, then why don’t we see the world upside down?” you might ask. That’s because our brain instantly flips the inverted image from the retina, correcting it to the “proper orientation.” Our bodies are truly amazing!
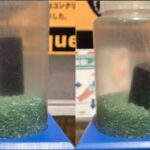
You can do this experiment without cellophane, but seeing the beautiful colors projected makes the experience much more impressive. Also, when I ran this experiment, one student did something very clever, which I’d like to share. They projected the image onto a sheet of paper:

This is a great way to project a clear image even if you don’t have a white wall. I hadn’t thought of that myself—students are incredible! I highly recommend trying this at home.
Tips for Demonstrating This in Class!
Finally, here are a few tips for demonstrating this kind of experiment in a classroom setting. The two main keys are:
Ensure every student gets to handle some of the equipment.
Ensure every student is actively participating.
For example, with a class of 40 students, you could provide 20 magnifying glasses. Distribute those to half the students, and have the other half stand by the window holding the cellophane and moving it around. By doing this, every student is involved in some activity. This makes the lesson much more effective, so I recommend it. Especially in the field of light and optics, it’s great to use a variety of hands-on demonstrations to move the lesson forward!
Contact and Requests
Bring the wonder and excitement of science closer to you! I’ve put together easy-to-understand tips and fun science experiments you can do at home. Feel free to search around!
The content of the Science Idea Notebook has been published as a book. Details are here
About the administrator, Ken Kuwako: here
For various requests (writing, lectures, science classes, TV supervision/appearances, etc.): here ・Updates on articles are posted on X!
![]() Experimental videos are available on the Kagaku no Neta Channel!
Experimental videos are available on the Kagaku no Neta Channel!
7月のイチオシ実験!
夏でプシュッと爽やか実験!

テレビ番組監修・イベント等のお知らせ
-
時速200kmで走るランボルギーニが、長さ12mのテーブルクロスを一瞬で引き抜く——そんな常識破りの実験が、ふたたびテレビの世界で大きな話題になりました。しかも今回は「視聴者が選ぶワクワク実験ランキング」で、なんと堂々の第1位を獲得したのです。Tverでまだ見ることができるのでぜひご覧ください。
- 7月18日(土) 教員向け実験講習会「ナリカカサイエンスアカデミー」の講師をします。お会いしましょう。
- 12月26日(土) ナリカサイエンスアカデミー(教員向け実験講習会)開催
書籍のお知らせ
- 7月16日発売 『高校入試 分解問題集 理科』(学研)…難しい問題も小さな問題に分解することで、問題を解くことができます。そんな分解の技術が身につくように深く関わりを持って作りました。
- 『大人のための高校物理復習帳』(講談社)…一般向けに日常の物理について公式を元に紐解きました。特設サイトでは実験を多数紹介しています。※増刷がかかり6刷となりました(2026/02/01)

- 『きめる!共通テスト 物理基礎 改訂版』(学研)… 高校物理の参考書です。イラストを多くしてイメージが持てるように描きました。授業についていけない、物理が苦手、そんな生徒におすすめです。特設サイトはこちら。

各種SNS(更新情報をお届け!)
【日本語】X(Twitter)/instagram/Facebook 【英語】BlueSky/Threads
Explore
- 楽しい実験…お子さんと一緒に夢中になれるイチオシの科学実験を多数紹介しています。また、高校物理の理解を深めるための動画教材も用意しました。
- 理科の教材… 理科教師をバックアップ!授業の質を高め、準備を効率化するための選りすぐりの教材を紹介しています。
- Youtube…科学実験等の動画を配信しています。
- 科学ラジオ …科学トピックをほぼ毎日配信中!AI技術を駆使して作成した「耳で楽しむ科学」をお届けします。
- 講演 …全国各地で実験講習会・サイエンスショー等を行っています。
- About …「科学のネタ帳」のコンセプトや、運営者である桑子研のプロフィール・想いをまとめています。
- お問い合わせ …実験教室のご依頼、執筆・講演の相談、科学監修等はこちらのフォームからお寄せください。
- Why Doesn’t Your Stomach Digest Itself? What a 170-Year-Old Accident Revealed (Video: “The Marvel of Human Digestion”)

- How Buildings Fight Back Against Earthquakes: From Liquefaction to Sloshing Dampers, Fully Explained [Miraikan]
- See the Invisible: The Mysterious Phase Shift Hiding in Coils

- Punches Aren’t Damage: Understanding Becquerels and Sieverts Through Boxing

- Pour Water and a Cube Appears! The CMY Water Cube That Reveals the Magic of Color Subtraction
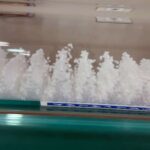
- The Mysterious Device That Makes Styrofoam Float in Midair — Visualizing Sound Waves with a Kundt’s Tube
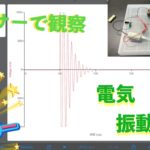
- The Switch Is Off, But It Won’t Stop! Capturing the Mystery of Coil Oscillations with a Sensor (EasySense V-Hub)
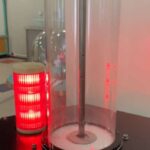
- Eddy Currents Launch Metal Rings Into the Air — The Electromagnetic Magic of Tsukuba Expo Center
- Caught in the Lab: Does Current Actually Hesitate? A Coil’s 0.0005-Second Story