Make Your Own Fault Line for $1! Feel the Real Movements of Normal and Reverse Faults in Your Hands – Easy DIY Geoscience!
I’m Ken Kuwako, a Science Trainer. Every Day is an Experiment!
You’ve heard the word “fault” in earthquake news. But it’s difficult to truly grasp the movement of that enormous energy happening beneath the ground just by looking at a single illustration in a textbook, isn’t it? I was convinced: “If students could experience this dynamic phenomenon of ‘the ground shifting’ right on their desks with their own hands, their understanding and fascination would surely deepen dramatically!” This conviction sparked the development of an experimental model. The key goal? “Anyone can easily build it using materials from a 100-yen shop.” Please join me for this small development story on how to bring the Earth’s grand activities a little closer to home.
[The Secret Development Story] The Flash of Genius and the Savior Masking Tape
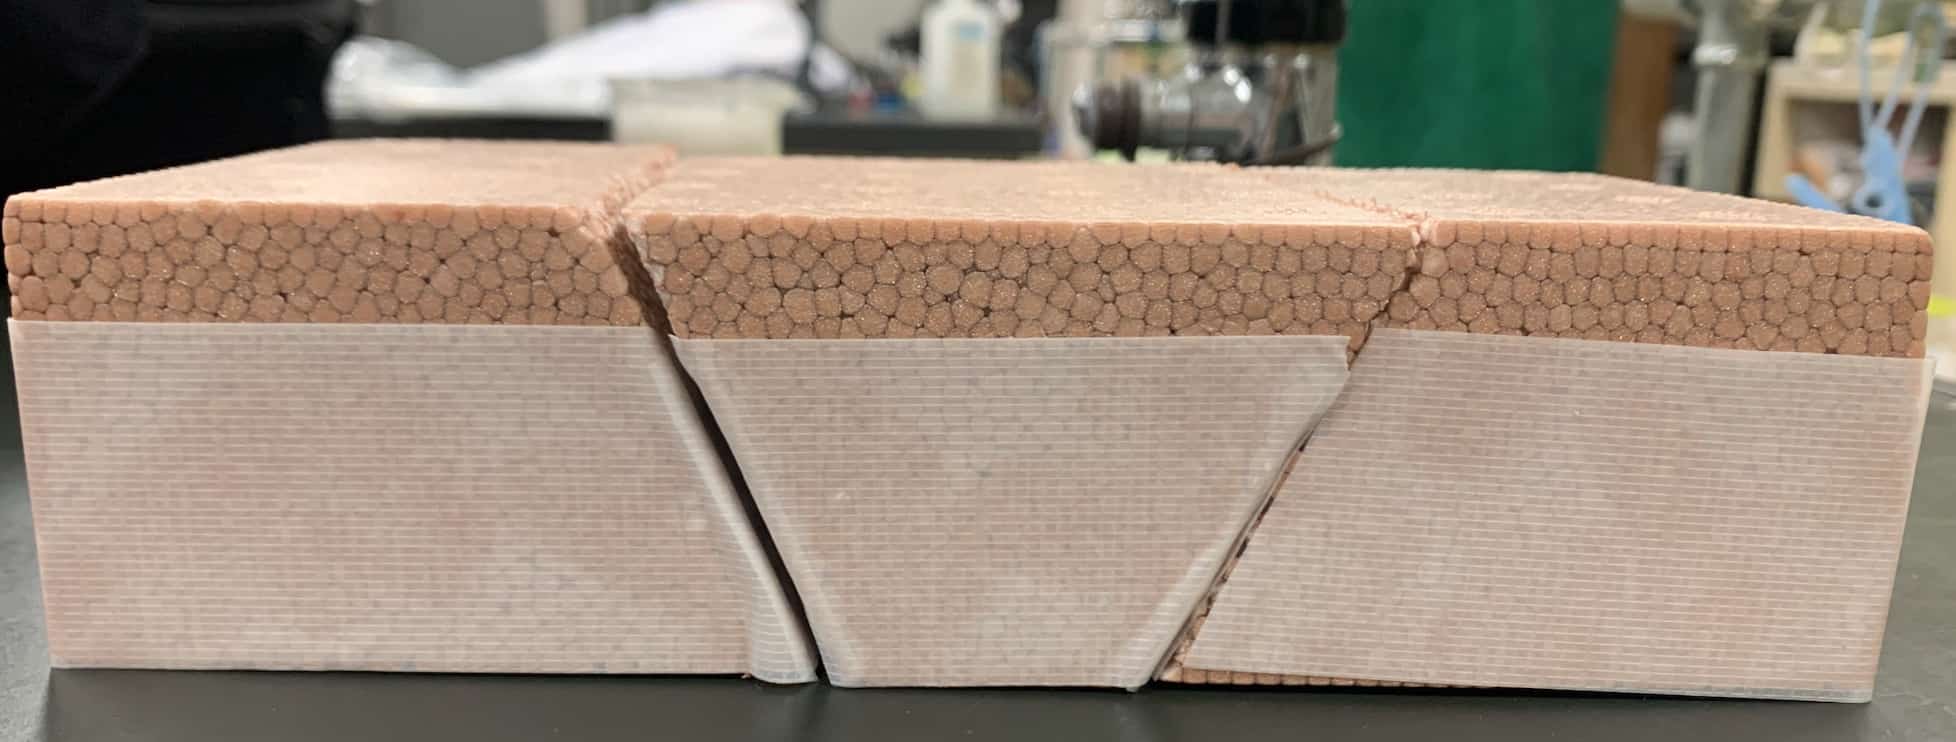
First, I headed to a treasure trove of ideas: the 100-yen shop. There, I came across this styrofoam brick (from Daiso). It was light, easy to process, and absolutely ideal for representing layers of geological strata!
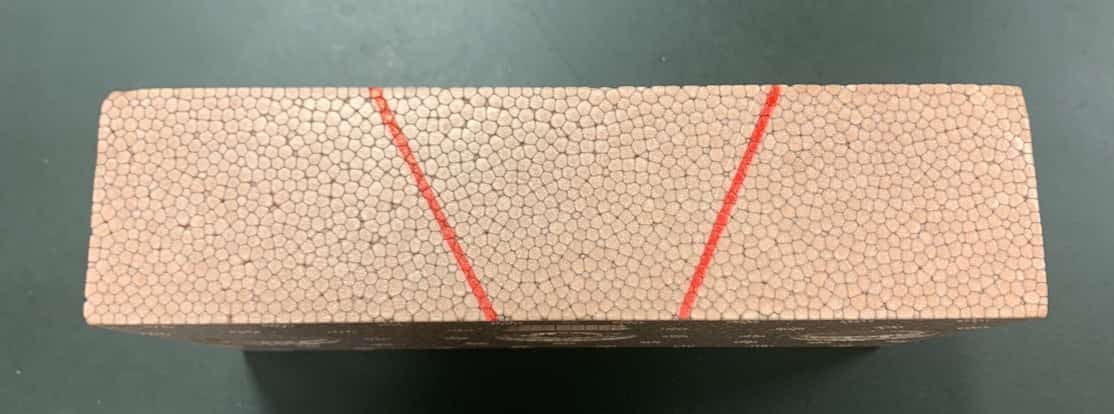
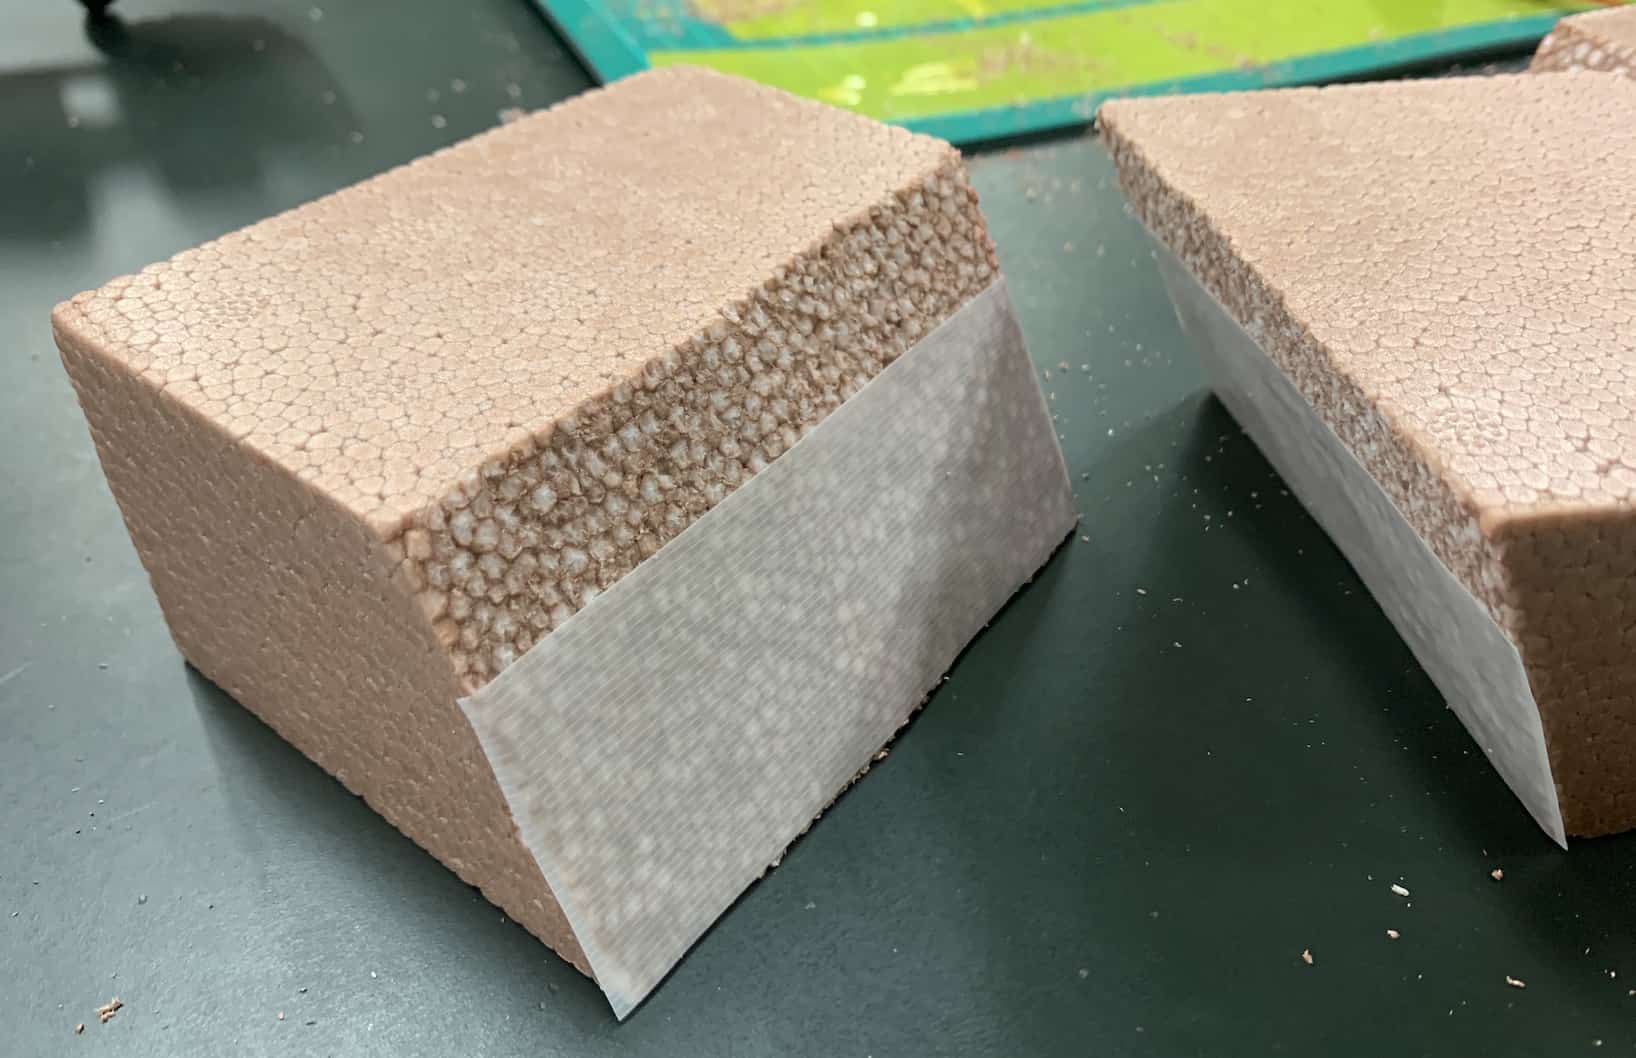
I cut the brick diagonally to simulate a fault plane. It took shape, but then a major problem emerged. The friction between the styrofoam pieces was too strong, preventing the strata from sliding smoothly. In particular, the movement of a “reverse fault”—where one layer is pushed up over the other—would only move with a “grinding… catching…” resistance and couldn’t be accurately reproduced.
“This doesn’t look like a realistic movement of the Earth’s crust at all… What should I do?”
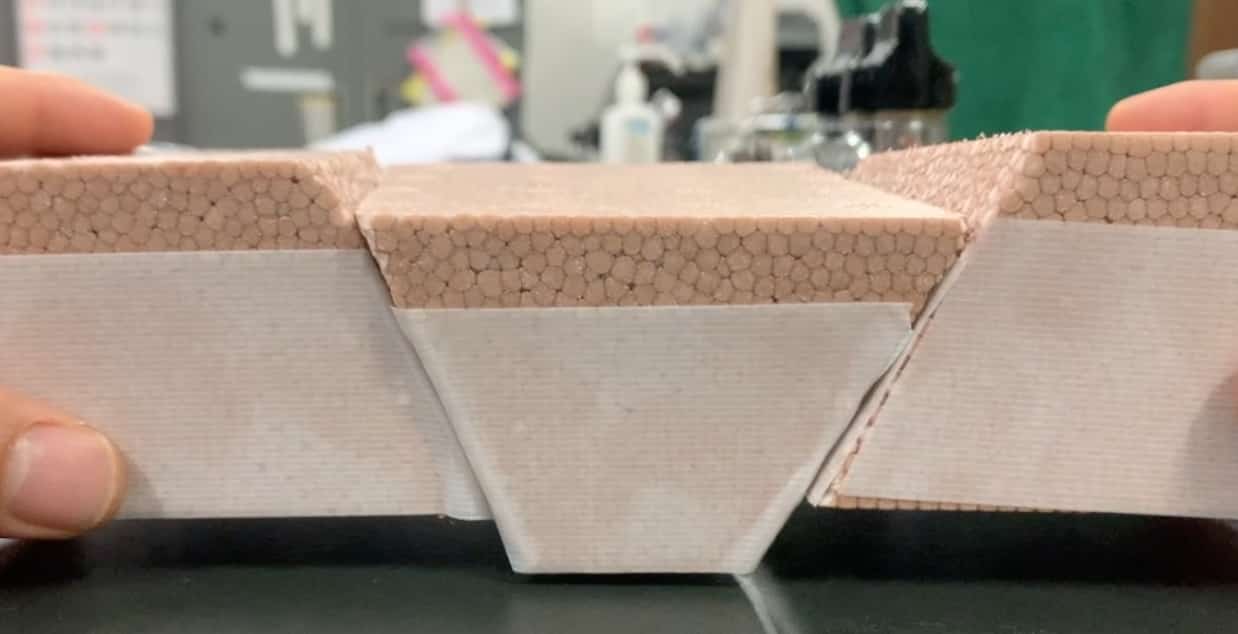
While I was pondering this, my eyes landed on an item found everywhere: “Masking Tape” (or Curing Tape). Could it make it slippery? I tried sticking it onto the fault boundary surface… and amazingly, the pieces started moving with incredible smoothness!
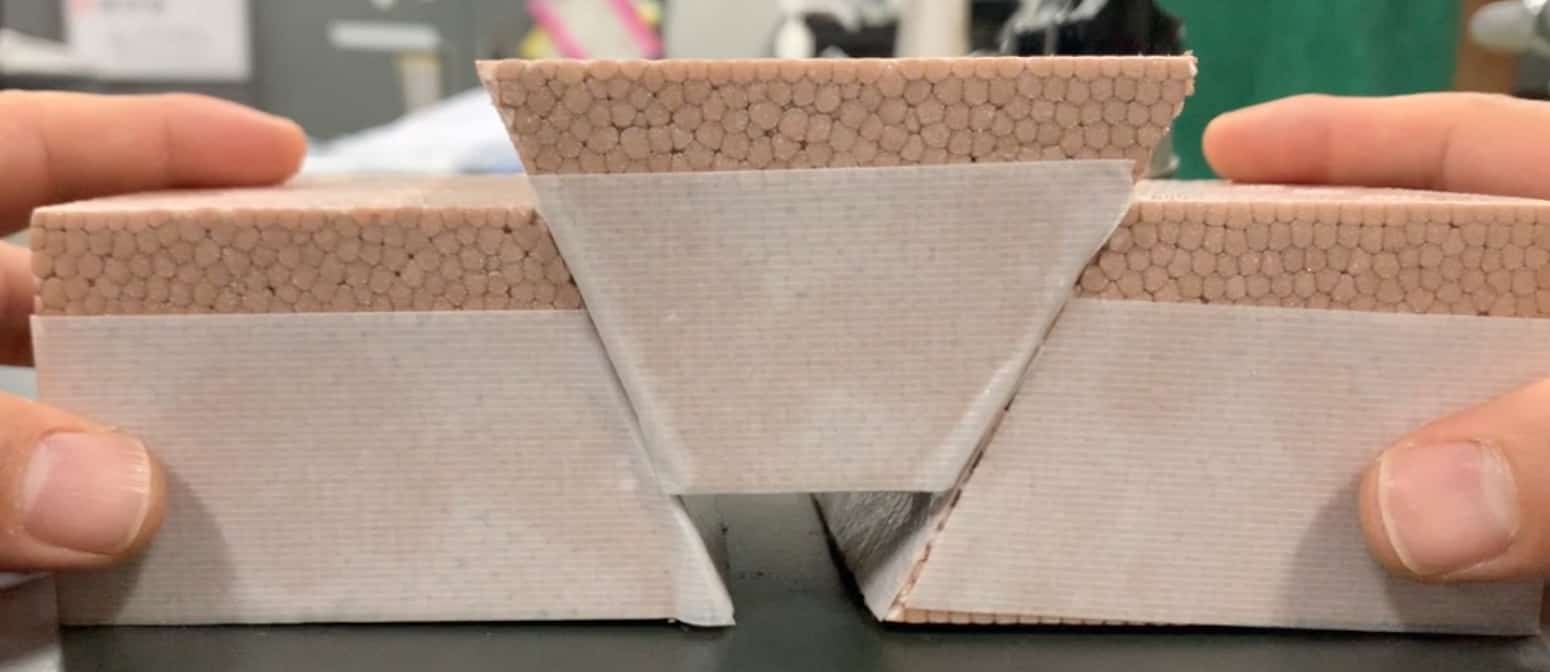
It turns out, this accidental discovery perfectly mirrored a phenomenon happening deep within the Earth. Real fault surfaces aren’t just one smooth, slick rock. They are a mixture of portions that are rigidly locked together (“Asperities”) and areas that are relatively easy to slide. Earthquakes occur when these asperities reach their stress limit and rupture (slip) all at once.
In this model, the masking tape played the role of the “easy-sliding portion.” Without this smoothness, the model would have just caught and jammed. This accidental finding also created a fantastic side effect: a visually clear boundary for the layers of rock.
[The Science Recipe] Build Your Own Fault for Just 100 Yen!
The construction is incredibly simple.
- Cut the styrofoam brick diagonally using a sharp utility knife.
- Attach masking tape to the boundary surface (cut surface) of the lower block. Applying this tape reduced the friction slightly, allowing it to move more easily.
With just these steps, your experimental model capable of realistically reproducing both normal and reverse faults is complete!
[The Experiment] Move the Fault and Feel the Earth’s Power!
Now, let’s use the finished model to recreate the ground’s movement.
📌 Experiment 1: Normal Fault [The Tearing Earth]
Hold the top and bottom of the model and slowly apply a pulling force, or “Tension,” to both sides. The upper block should slide down along the fault line. This is a “Normal Fault.”
This phenomenon is seen where the Earth’s crust is being pulled apart. Examples include “Mid-Ocean Ridges,” where new tectonic plates are born and spread apart, and the “East African Rift Valley,” where a continent is actively being torn in two.
📌 Experiment 2: Reverse Fault [The Compressed Earth]
Conversely, apply a “Compression” force by pushing the model together from both sides. You will see the upper block get thrust upwards, overriding the lower block. This is a “Reverse Fault.”
Many of the earthquakes that occur in Japan are of this reverse fault type. They are caused by the Earth’s crust being strongly compressed as the oceanic plate attempts to subduct (slide) beneath the plate carrying the Japanese archipelago. The rugged peaks of mountains like the Japanese Alps are also a testament to this Earthly dynamism—formed over millions of years by the repeated movement and uplift caused by reverse faulting.
The cost is an amazing little more than 100 yen per set. This means every student in a class can have their own “My Fault” model and learn through hands-on activity. This provides an intuitive “Aha! I get it now!” moment that simply cannot be gained from staring at a textbook diagram. Teachers, why not try this as a creative resource for your next class?
Contact and Requests
Bringing the wonder and fun of science closer to you! We compile easy-to-understand fun science experiments you can do at home and provide tips for them. Please feel free to browse through our content!
- For more about the operator, Ken Kuwako, click here.
- For various requests (writing, lectures, science classes, TV supervision/appearances, etc.), click here.
- Updates on articles are available via X!
![]() Experimental videos are available on the Science Idea Channel!
Experimental videos are available on the Science Idea Channel!
6月のイチオシ実験!
レモンやオレンジで風船を割ろう!インパクトが抜群のリモネン風船の実験
テレビ番組監修・イベント等のお知らせ
- 6月3日(水)20:30〜 「
バカリズムのちょっとバカりハカってみた!」(テレビ東京)を科学監修・出演します。テーマは「 そばの出前は何人前まで運べるのか、限界を測ってみた」です。 - 6月4日(木) 7:00〜 「THE突破ファイル」(日本テレビ)について科学監修しました。
- 6月14日(日) 千葉大学インスタレーション「探究」にて講師を務めます
- 6月26日(金) 公開研究会「脱作業化!デジタル化と段階的指導で実現する オームの法則の探究」
- 6月28日(日) ダビンチマスターズ@昭和女子
- 7月18日(土) 教員向け実験講習会「ナリカカサイエンスアカデミー」の講師をします。お会いしましょう。
書籍のお知らせ
- 『大人のための高校物理復習帳』(講談社)…一般向けに日常の物理について公式を元に紐解きました。特設サイトでは実験を多数紹介しています。※増刷がかかり6刷となりました(2026/02/01)

- 『きめる!共通テスト 物理基礎 改訂版』(学研)… 高校物理の参考書です。イラストを多くしてイメージが持てるように描きました。授業についていけない、物理が苦手、そんな生徒におすすめです。特設サイトはこちら。

各種SNS(更新情報をお届け!)
X(Twitter)/instagram/Facebook(日本語)
Explore
- 楽しい実験…お子さんと一緒に夢中になれるイチオシの科学実験を多数紹介しています。また、高校物理の理解を深めるための動画教材も用意しました。
- 理科の教材… 理科教師をバックアップ!授業の質を高め、準備を効率化するための選りすぐりの教材を紹介しています。
- Youtube…科学実験等の動画を配信しています。
- 科学ラジオ …科学トピックをほぼ毎日配信中!AI技術を駆使して作成した「耳で楽しむ科学」をお届けします。
- 講演 …全国各地で実験講習会・サイエンスショー等を行っています。
- About …「科学のネタ帳」のコンセプトや、運営者である桑子研のプロフィール・想いをまとめています。
- お問い合わせ …実験教室のご依頼、執筆・講演の相談、科学監修等はこちらのフォームからお寄せください。