Recreate a 200-Year-Old Scientific Breakthrough with Paper Cups! See Proof That Light Is a Wave at Home (Young’s Experiment)
This is Kuwako Lab, your science trainer. Every day is an experiment.
【You can also listen to this article as a radio episode!】
“Light travels in straight lines.”
Sunlight, flashlight beams… it certainly looks that way, doesn’t it?
But here’s a bigger question:
Is light made of particles? Or is it actually a wave?
This mystery sparked one of the greatest scientific debates of all time between Newton and Huygens back in the 17th century. And believe it or not, you can explore the answer yourself at home using nothing more than a paper cup, a utility knife, and a cheap laser pointer.
Today’s experiment lets you actually see proof that light behaves like a wave through a phenomenon called “interference.” It may sound advanced, but it’s simple enough to enjoy with elementary school kids and perfect for helping students experience what waves really are.
Let’s dive in!
Why Does This Prove Light Is a Wave?
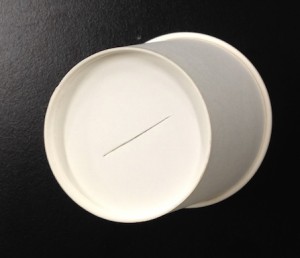
The heart of this experiment is a single thin slit cut into a paper cup.
Waves have a special property: when they pass through a narrow opening, they spread out behind it. This phenomenon is called diffraction.
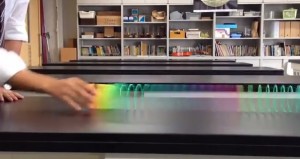
You may have seen ocean waves fan out after passing through a gap in a breakwater. Light does the exact same thing.
What’s even more interesting is that the tiny cut in the paper cup actually behaves like two extremely close slits rather than one. The thickness of the blade and the roughness of the paper edges create this effect naturally.
The light waves spreading from these two tiny openings overlap when they hit the wall.
When wave peaks line up with other peaks, the light becomes brighter.
When peaks meet valleys, they cancel each other out and become darker.
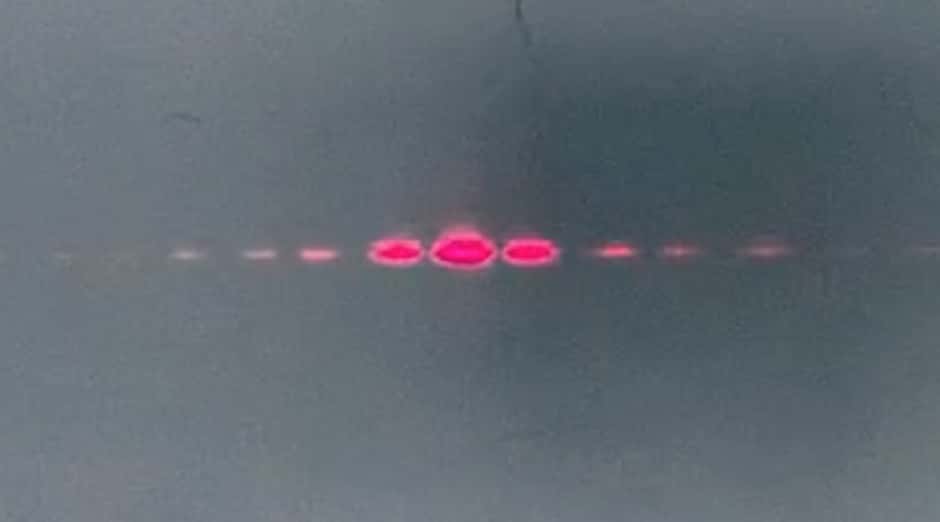
That alternating bright-and-dark stripe pattern is called an interference pattern.
If light were only particles, you’d simply see the shape of the slit projected onto the wall. The appearance of stripes is direct evidence that light behaves like a wave.
A Simple Home Experiment: Seeing the “Waves” of Light
What You’ll Need
- A laser pointer (presentation lasers work perfectly fine — inexpensive ones around $15 are enough)
- A paper cup
- A utility knife or box cutter
Laser chalk line tools are actually excellent for this kind of experiment.
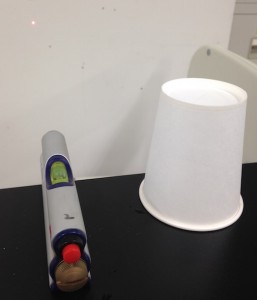
Steps
- Cut one straight slit into the bottom of the paper cup using the utility knife. (This acts as the experimental slit.)
- Darken the room and shine the laser from inside the cup toward the slit.
- Observe the light pattern projected onto a wall.
(A distance of about 50 cm to 1 meter between the cup and the wall works well.)
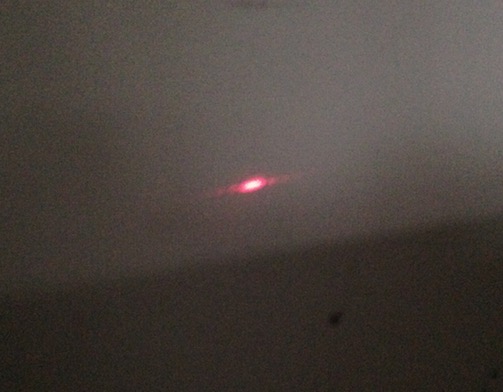
So… What Did You See?
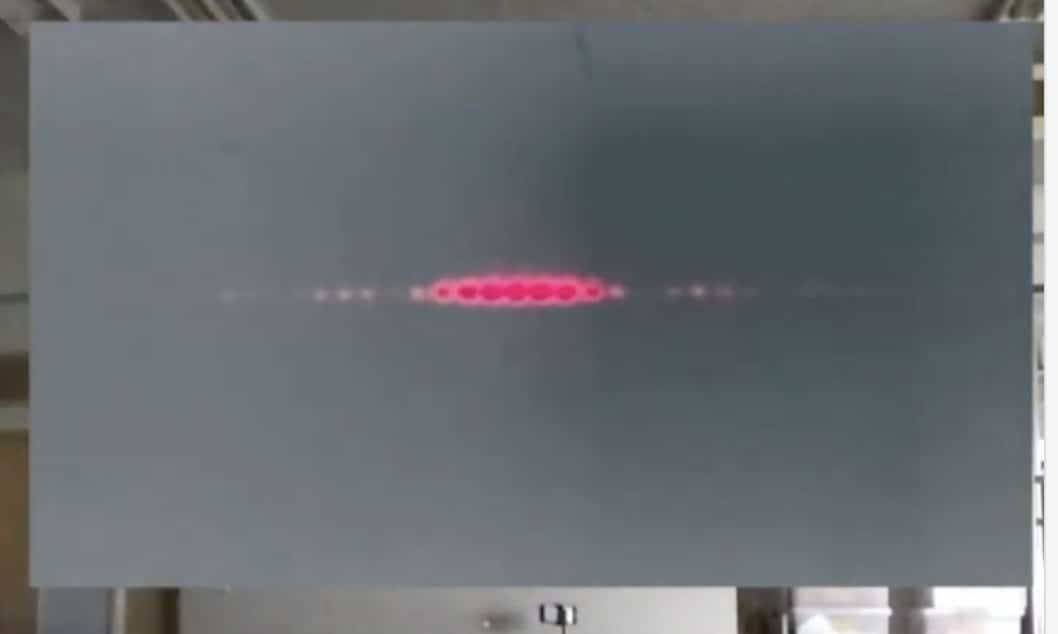
Instead of a simple laser dot, you should see the light spreading sideways into a fuzzy pattern of alternating bright and dark stripes.
Congratulations!
That pattern is the interference pattern — clear evidence that light behaves as a wave.
This experiment is fundamentally the same as the famous “Young’s Double-Slit Experiment” performed over 200 years ago by the British scientist Thomas Young.
Yes — you just recreated one of the most important experiments in physics using a paper cup.
At the time, Young’s claim that “light is a wave” shocked the scientific world. Many scientists simply couldn’t accept it. The idea went completely against human intuition.
Try moving the wall farther away from the paper cup. What happens to the spacing between the stripes?
You’ll probably notice the stripes spread farther apart and become easier to see.
And here’s the really amazing part: if you measure the stripe spacing and the distance to the wall, you can actually calculate the wavelength of light itself.
Most Important Safety Rule
This experiment is fascinating, but safety comes first.
Never look directly into the laser beam or shine it into anyone’s eyes. Laser light is extremely powerful and can seriously damage vision.
Only observe the reflected light on the wall.
Calculating the Wavelength of Light from the Stripes
Pretty amazing, right?
In this setup, the spacing between the stripes is 1.5 cm, and the distance to the screen is 5.863 meters.
Using these values, you can calculate the wavelength of the laser light.
For a red laser pointer, the wavelength is usually around 600–700 nanometers.
(One nanometer is one-millionth of a millimeter.)
It’s incredible to think that such precise information is hidden inside those tiny light stripes.
I also created an interactive Scratch simulation to help people explore Young’s experiment hands-on.
Try the Scratch simulation here
Here’s the accompanying video:
I also made a full video lesson explaining Young’s experiment in greater detail. If you’d like to go deeper into the science, check it out below.
Today we explored how to observe light interference patterns using nothing more than a paper cup and a laser pointer.
The strange idea that “light is both a particle and a wave” opens the door to the fascinating world of modern physics. Give it a try at home or in the classroom and experience the mystery for yourself.
In schools, it’s also fun to use proper slits and educational lasers to calculate the wavelength of light more accurately from the stripe spacing.
Another great extension is to compare this with sound interference. For example, when two speakers play the same sound, there are places where the sound becomes louder or quieter. Showing both experiments together helps students understand the shared properties of waves much more deeply.
Contact & Requests
Let’s bring the wonder of science closer to everyday life!
This site is packed with fun science experiments you can do at home, along with practical tips and easy-to-understand explanations. Feel free to explore!
・The “Science Idea Notebook” blog series has been published as a book. Learn more here
・Learn more about Kuwako Lab here
・For writing, lectures, science workshops, TV consulting, appearances, and other requests, click here
・Follow updates on new articles on X!
![]() Science Idea Channel features experiment videos regularly!
Science Idea Channel features experiment videos regularly!
Suggested Catchy Title:
See Light Turn Into Waves: The Amazing Paper Cup Laser Experiment
NEW 分解問題集 理科
- 7月21日発売!『高校入試 分解問題集 理科』(学研)…難しい問題も小さな問題に分解することで、問題を解くことができます。そんな分解の技術が身につくように深く関わりを持って作りました。
7月のイチオシ実験!
夏でプシュッと爽やか実験!

テレビ番組監修・イベント等のお知らせ
- 7月18日(土)「TIF presents ONE SONG FES. 」(フジテレビ)
- 7月18日(土) 教員向け実験講習会「ナリカカサイエンスアカデミー」
- 7月23日(木)科学監修 19:00〜 THE突破ファイル(日本テレビ)
- 7月30日(水) 監修したテレビ番組放送予定
- 12月26日(土) ナリカサイエンスアカデミー(教員向け実験講習会)開催
書籍のお知らせ
- 『大人のための高校物理復習帳』(講談社)…一般向けに日常の物理について公式を元に紐解きました。特設サイトでは実験を多数紹介しています。※増刷がかかり6刷となりました(2026/02/01)

- 『きめる!共通テスト 物理基礎 改訂版』(学研)… 高校物理の参考書です。イラストを多くしてイメージが持てるように描きました。授業についていけない、物理が苦手、そんな生徒におすすめです。特設サイトはこちら。

各種SNS(更新情報をお届け!)
【日本語】X(Twitter)/instagram/Facebook 【英語】BlueSky/Threads
Explore
- 楽しい実験…お子さんと一緒に夢中になれるイチオシの科学実験を多数紹介しています。また、高校物理の理解を深めるための動画教材も用意しました。
- 理科の教材… 理科教師をバックアップ!授業の質を高め、準備を効率化するための選りすぐりの教材を紹介しています。
- Youtube…科学実験等の動画を配信しています。
- 科学ラジオ …科学トピックをほぼ毎日配信中!AI技術を駆使して作成した「耳で楽しむ科学」をお届けします。
- 講演 …全国各地で実験講習会・サイエンスショー等を行っています。
- About …「科学のネタ帳」のコンセプトや、運営者である桑子研のプロフィール・想いをまとめています。
- お問い合わせ …実験教室のご依頼、執筆・講演の相談、科学監修等はこちらのフォームからお寄せください。