From Red Wine to Blue Flame: The Science of Distillation and How to Do It Safely
I’m Ken Kuwako, your Science Trainer. Every day is an experiment!
Imagine extracting a clear liquid from wine and setting it ablaze with a vibrant blue flame… It sounds like something out of alchemy, but this slightly sophisticated experiment is actually a scientific technique called “Distillation,” typically taught in middle school science class.
Today, we’re diving into the fascinating properties of matter—how a liquid transforms into a gas and then back into a liquid—through a distillation experiment using red wine. This technique is fundamental to critical processes that support our lives, such as the production of spirits, perfumes, and even oil refining.
While this experiment involves potential hazards, by following the correct procedures and safety guidelines, you’ll be able to fully appreciate the excitement of science. We’ve meticulously detailed safety precautions to be easily understood by first-time instructors, so please use this as your guide. Now, let’s embark together on a journey into the world of scientific magic!
Experiment Preparation: Gathering Your Magic Tools!
First, let’s introduce the tools we’ll be using for this experiment.
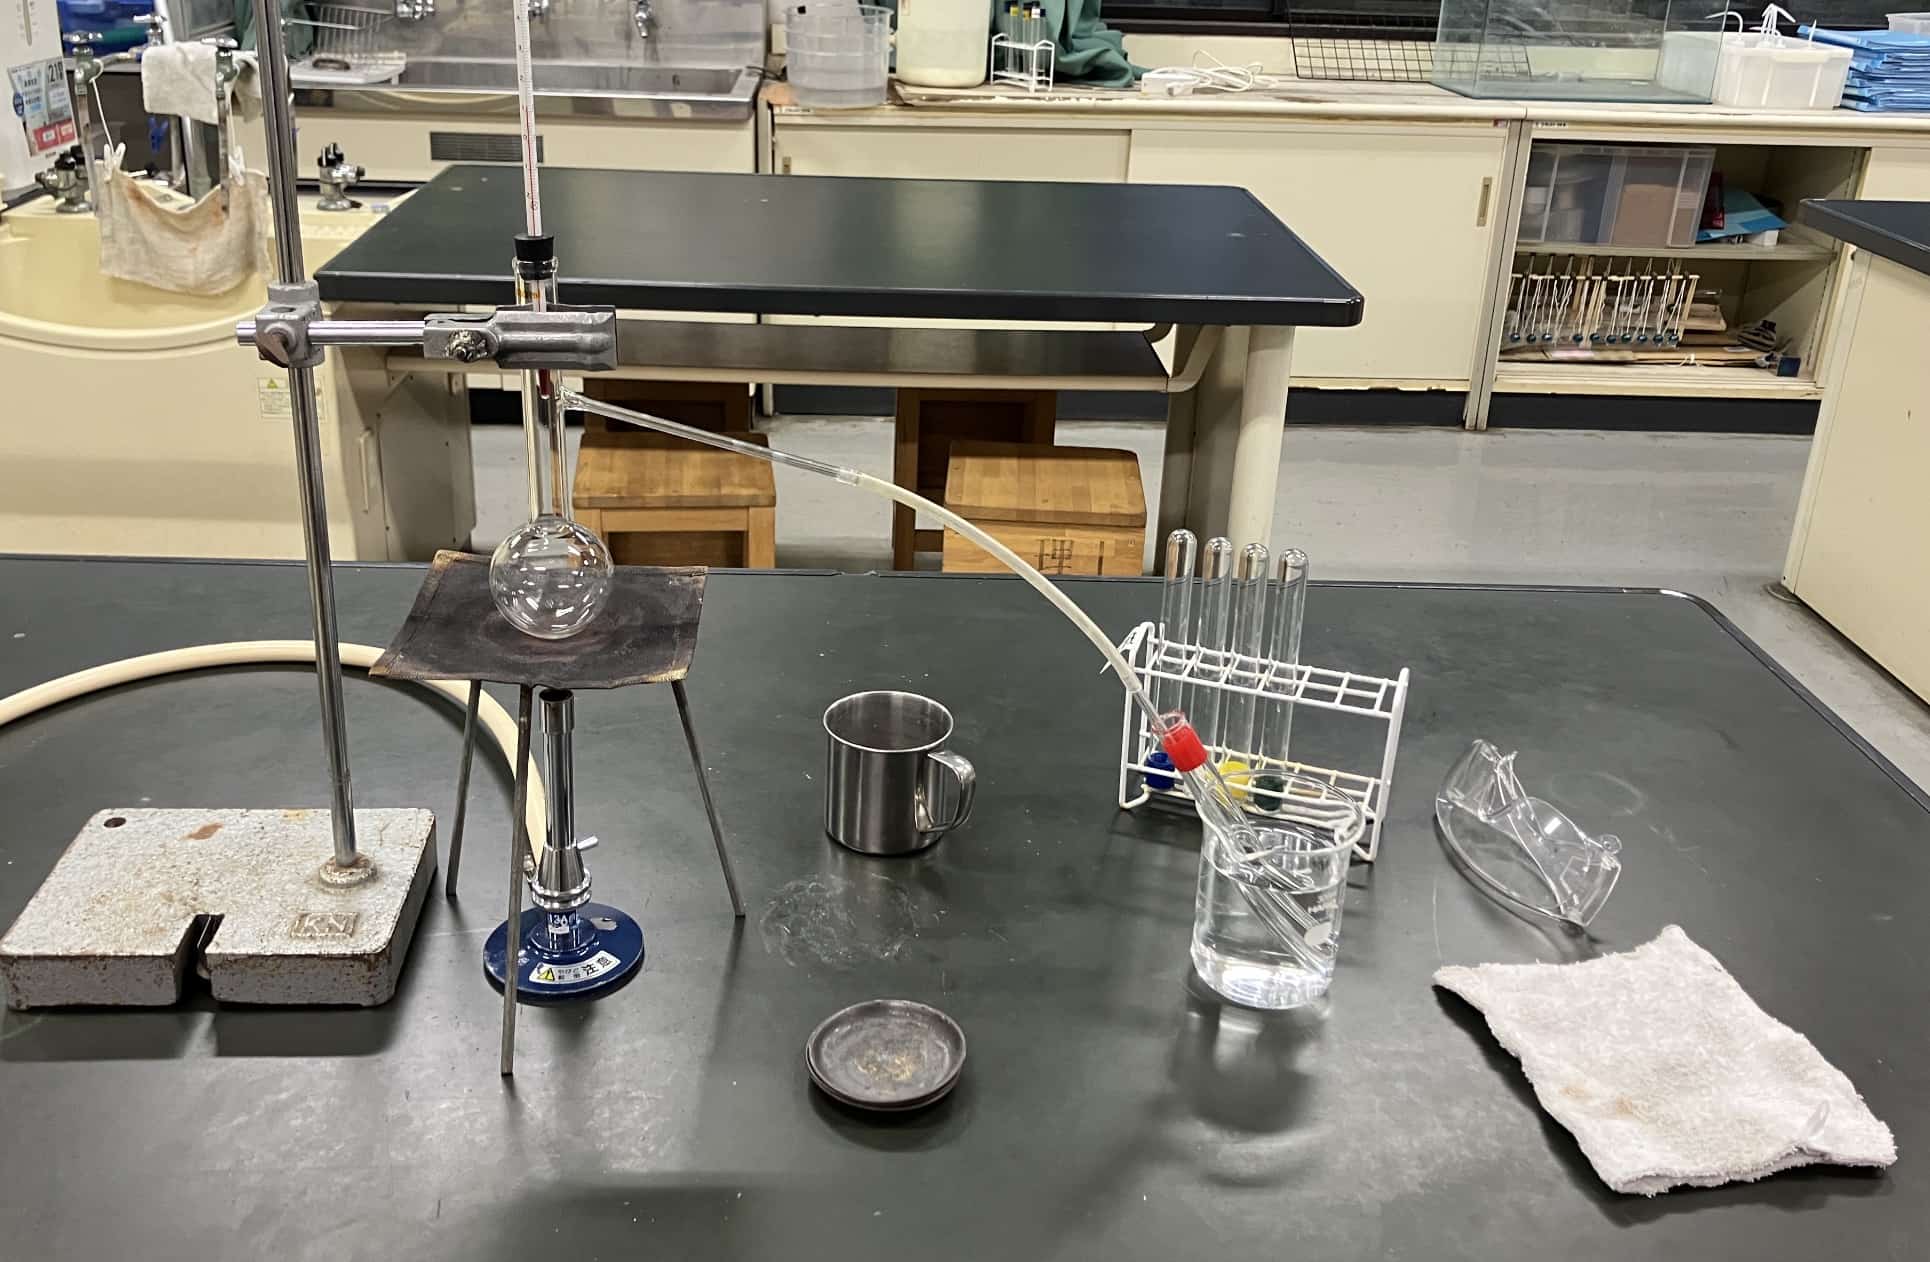
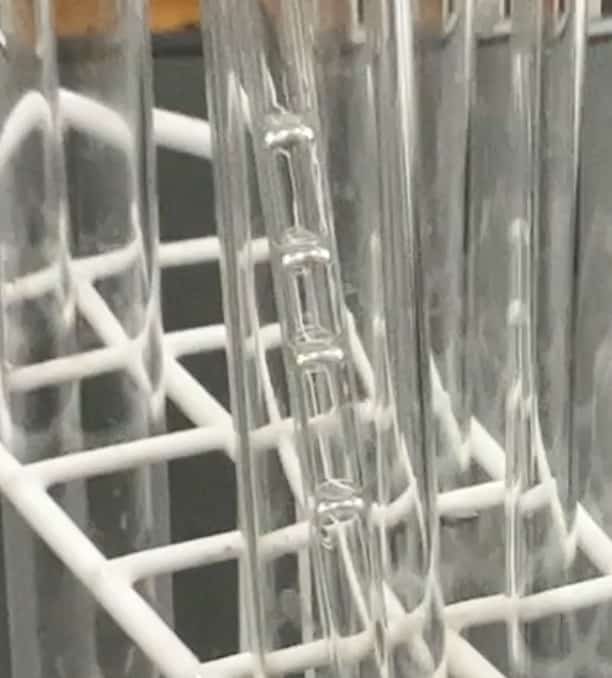
Side-arm distilling flask (or round-bottom flask with a side arm), three test tubes, beaker, stand, gas burner, tripod, wire gauze, thermometer with rubber stopper, wine, matches, heat-resistant container (for burnt materials), wet cloth, work gloves, safety goggles.
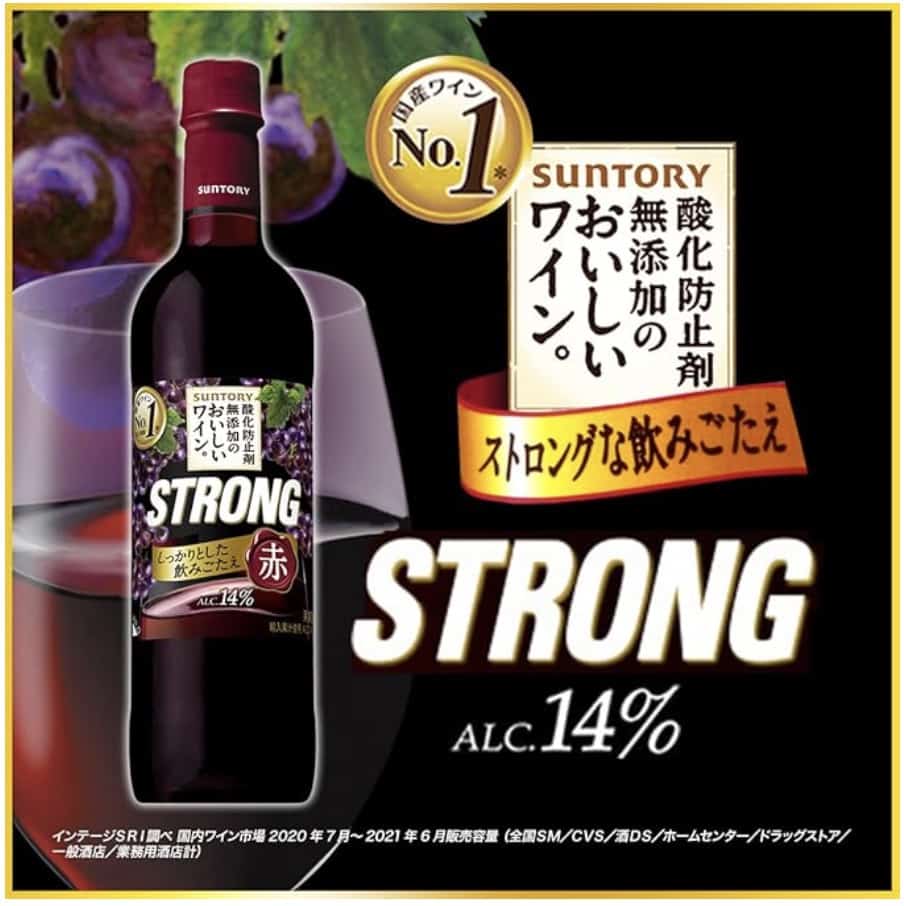
The wine we’re using is shown here. The key to a successful experiment lies in the alcohol content. We’ve prepared a wine with 14 percent alcohol by volume (ABV) (Amazon link). This concentration will be important later on!
The Most Important Step: Essential Safety Rules for the Experiment
Safety measures are our top priority. Since this experiment has a high risk of accidents, especially burns, please proceed with the utmost caution. We are sharing the slides that you can use in class; please use them to check the precautions while looking at the photos. ▶Click here for the class slides
Time to Distill! The Steps to Extracting the Treasure from Wine
Step 1: Prep Work and Mindset
Divide the wine into 10 mL portions for each test tube and distribute them to the groups. Work gloves and safety goggles are mandatory! Set up the experimental apparatus. Since this experiment has many important precautions and a risk of burns, it is highly recommended that the instructor demonstrates the procedure (demonstration experiment) beforehand. Pre-dividing the wine into 10 mL portions in test tubes will ensure a smoother start to the day’s class. There is a reason for the 10 mL amount. If you were using a wine with a slightly lower ABV, say 11 percent, you might want to use about 13 mL per tube. We’ll show the calculation later.
Step 2: Pouring the Wine into the Flask
Point the side arm of the distilling flask upwards and pour the wine carefully so it doesn’t enter the side arm. Set the thermometer so that its tip is positioned near the base of the side arm. Why this specific position for the thermometer? It’s to accurately measure the temperature of the vapor that has just turned from liquid to gas.
This experiment is a race against the clock—it’s quite time-sensitive. You’ll need to employ strategies like dividing the preparation and cleanup tasks between classes. Work gloves are useful for preventing burns when handling hot rubber tubing or other hot equipment.
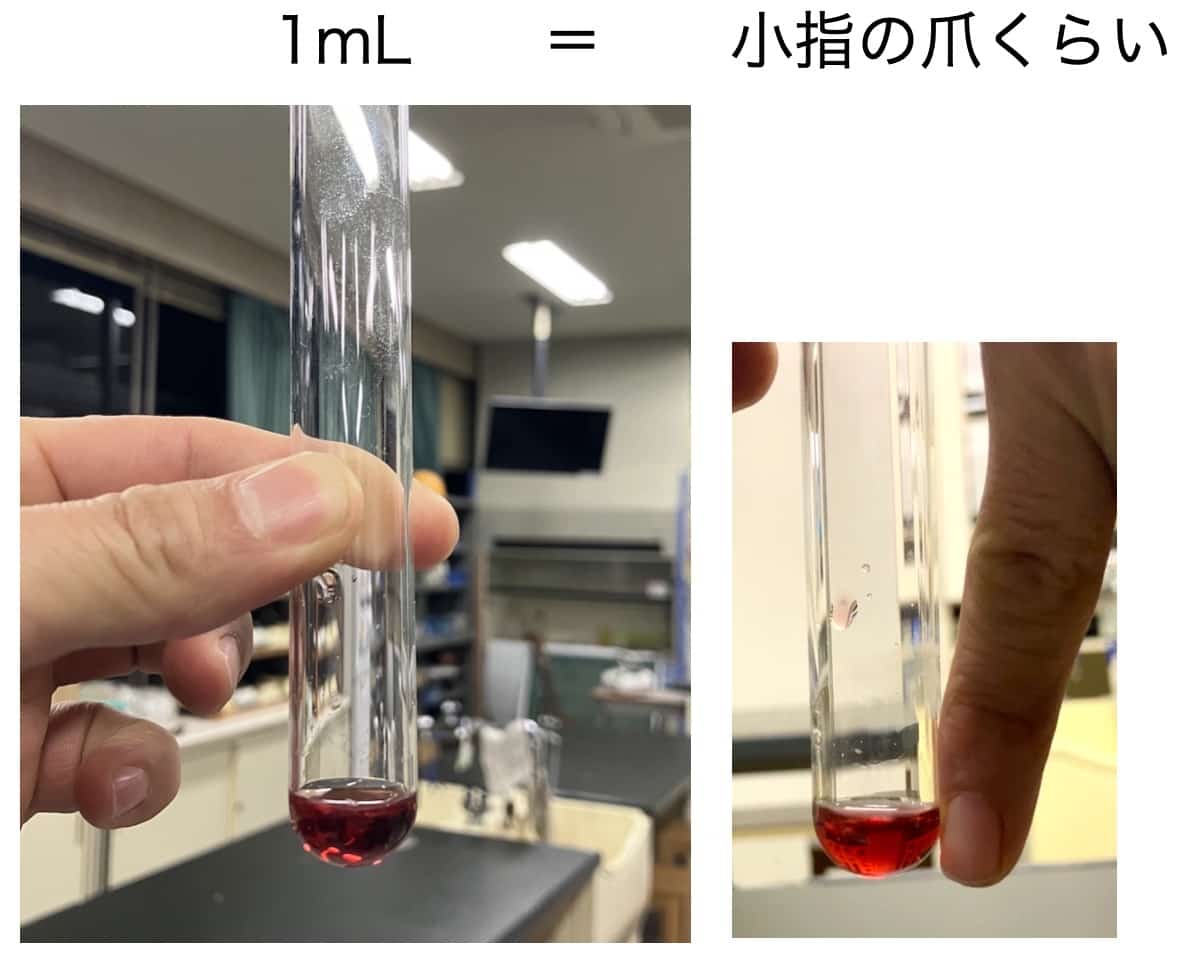
We aim to collect about 1 mL of liquid, but for this experiment, we instructed students to collect about 0.5 cm from the bottom of the test tube (the length of a pinky fingernail). Using red wine is recommended because the collection of the clear, colorless liquid is easily visible, making the change clear to the students. A key point is to secure the flask arm “above” the branch point of the side arm. Holding it lower will cause the alcohol vapor to cool prematurely and condense back into liquid, which reduces efficiency.
Step 3: Time to Heat!
Don’t forget to add a “boiling chip”! Always place the flask on a wire gauze to prevent the flame from concentrating on a single spot. Adjust the gas burner’s heat while observing the temperature change.
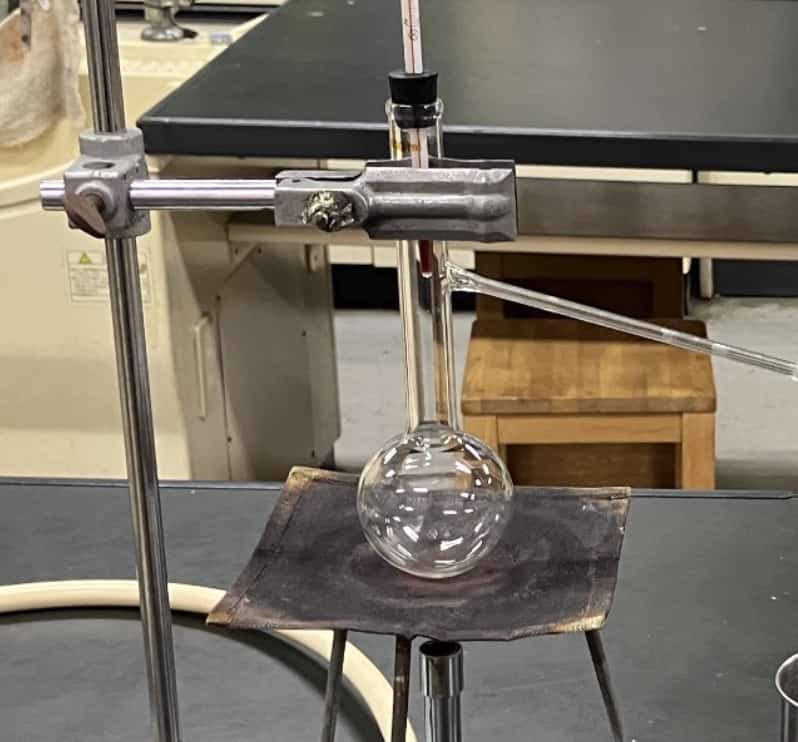
Set the collection test tube about 1 cm away from the rubber tube’s tip so they don’t touch. Make sure the rubber tube isn’t kinked, as this can be dangerous—keep it straight.
The “boiling chip” (or boiling stone) is a safeguard to prevent bumping—a phenomenon where the liquid suddenly and violently boils (like an explosion). The tiny nooks and crannies on the chip’s surface help the bubbles form gently. You can learn more about the phenomenon of #bumping in this video.
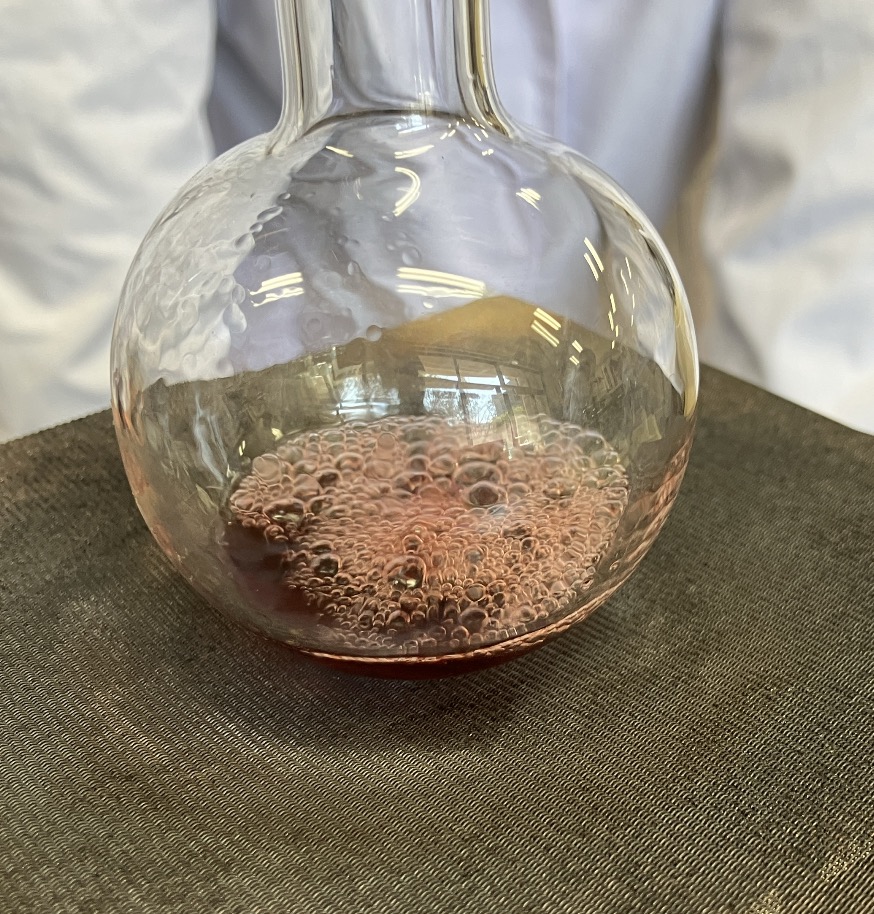
Even after starting the heating, the thermometer reading won’t immediately rise. Because you are measuring the temperature of the vapor, the thermometer won’t react immediately just by heating the liquid. However, once boiling begins, the temperature will shoot up instantly! This is the moment you can’t miss.
Step 4: Collecting the Liquid
Once the temperature exceeds 70°C, liquid will start to condense on the side arm. Collect three test tubes, each with approximately 1 mL of liquid. To swap out the test tubes smoothly, move the entire beaker assembly.
Why does the alcohol turn into gas and escape before the water? This is due to the difference in boiling points—the temperature at which a substance changes from liquid to gas. Water’s boiling point is 100°C, while alcohol’s (ethanol) is about 78°C. Think of it like a hot bath endurance test, where the “Alcohol Guy” gives up first and jumps out!
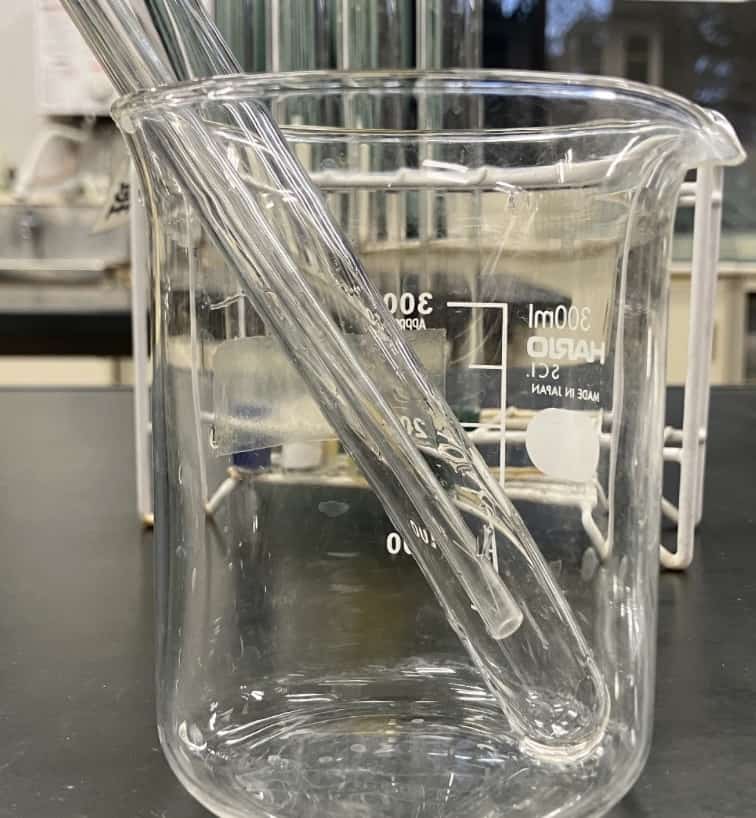
When the temperature exceeds 70°C, the alcohol vapor that has escaped first is cooled by the side arm and drips back down as liquid. Collecting this liquid is what distillation is all about. Once the first test tube is full, quickly swap it out along with the beaker. Since the tube can be hot at this point, wearing work gloves is reassuring.
Step 5: Experiment Over! The Most Dangerous Moment
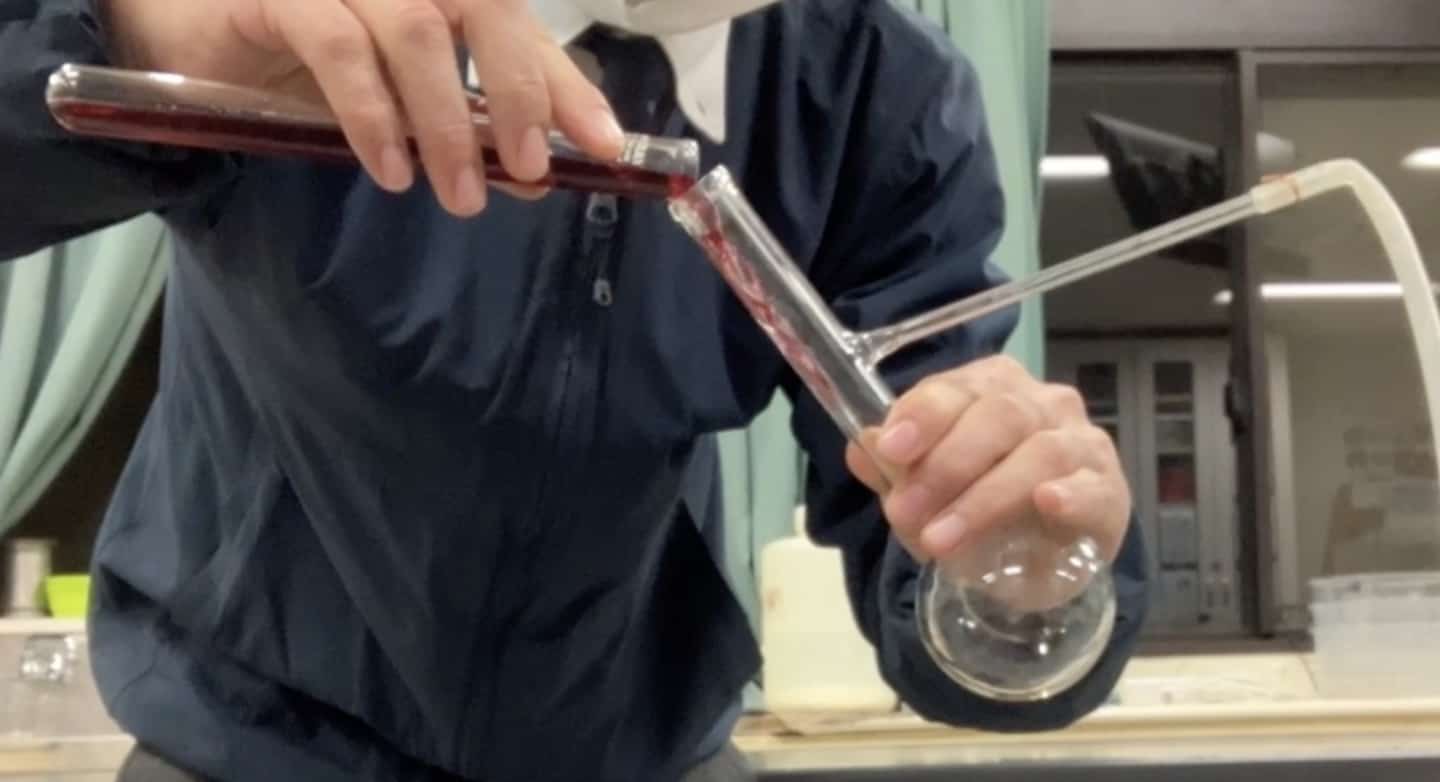
Immediately before or right after turning off the heat, you must remove the rubber tube from the test tube. Do not place the hot rubber tube in the beaker of water; place it on the wet cloth. This is an absolute rule! If you turn off the heat while the rubber tube is still attached, the gas inside the flask will cool rapidly and contract, creating a vacuum that sucks in the surrounding liquid—a phenomenon called suck-back (or back-siphonage). If cold liquid flows into the hot flask, the temperature difference can cause the glass to crack, creating a highly dangerous situation.
Here is a video demonstrating the danger of #suckback.
The flask sucks up the liquid.
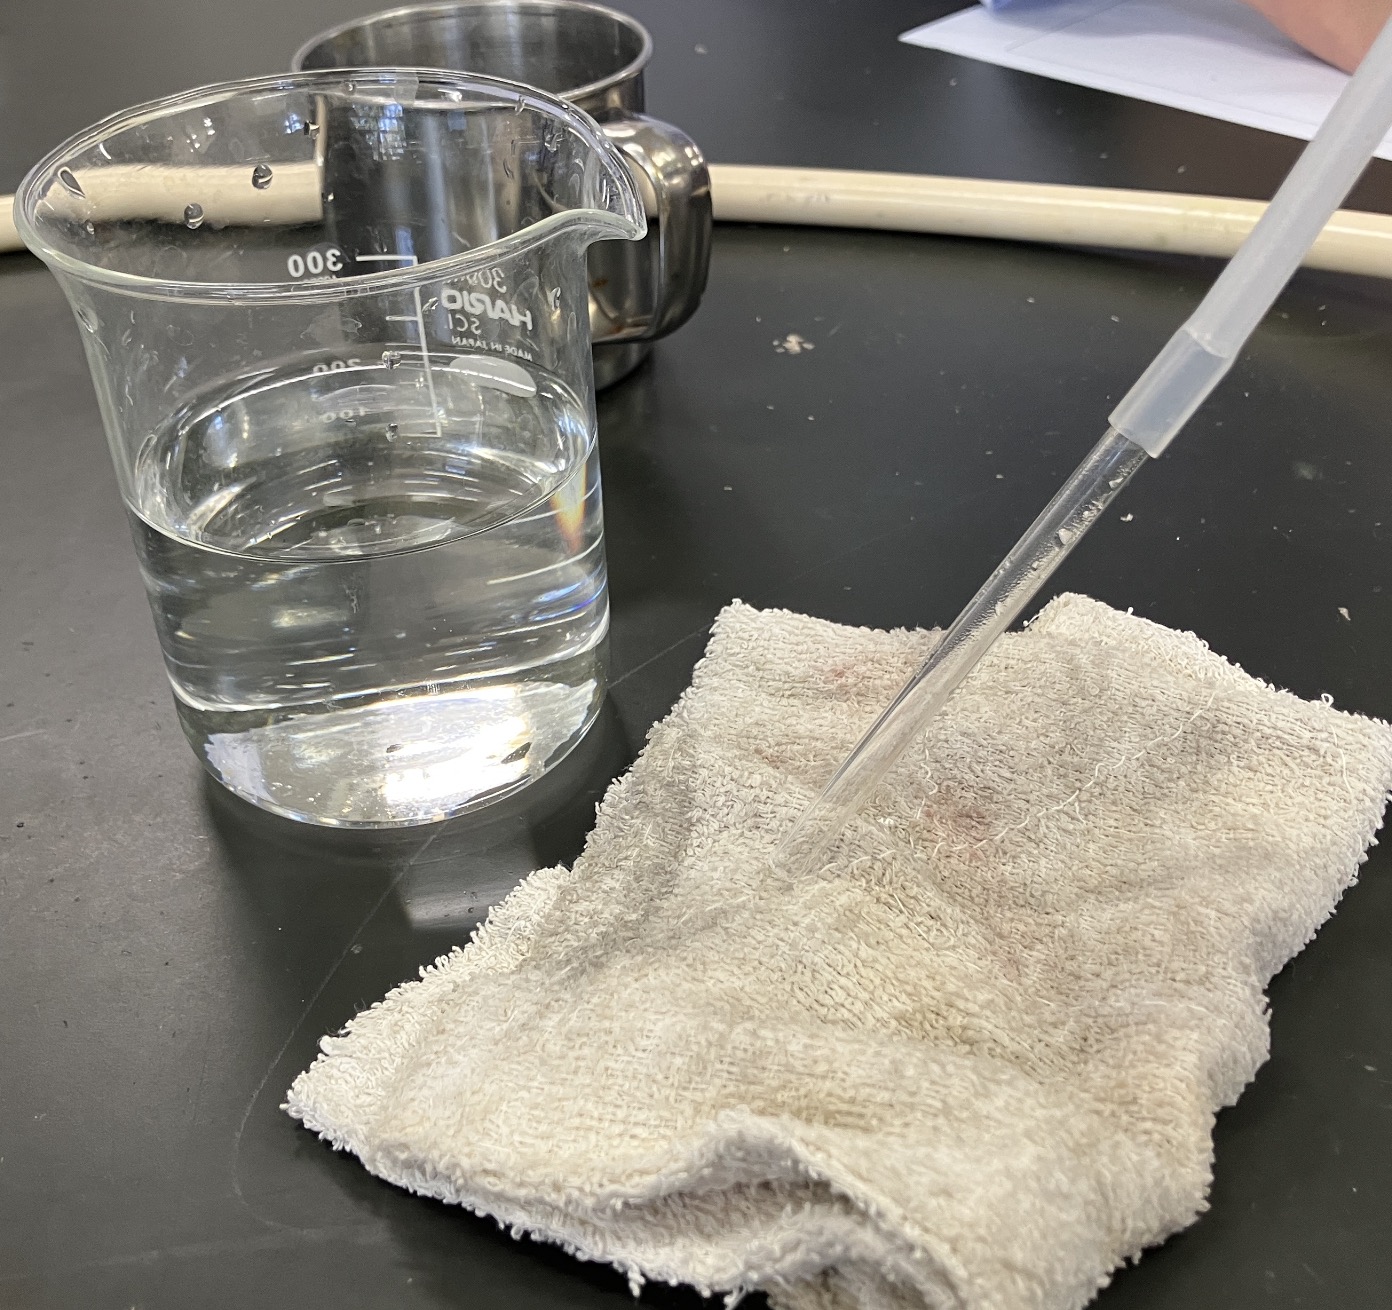
Students sometimes mistakenly place the hot rubber tube into the water, which is also dangerous. Placing it on the wet cloth allows it to cool safely.
The Amazing Results! What Is the Collected Liquid?
Now, let’s examine the three collected liquids.
Combustion Test: Take the liquid from the first and second test tubes onto an evaporation dish, and bring a match flame close… Poof! A blue flame ignites! This confirms the presence of alcohol.
Cooling Effect: Drip a little onto your finger and you’ll feel an instant chill. This is the phenomenon of latent heat of vaporization, where the liquid draws heat from your skin as it evaporates. It’s the same principle that makes sprinkling water on the ground (Uchimizu) cooling in the summer.
Scent Change: Within the pungent, antiseptic smell of alcohol, a subtle sweet aroma of wine remains. This means that some of the volatile aroma components were also distilled along with the alcohol.

Since the wine we used had a 14% ABV, the 10 mL we distributed contained about 1.4 mL of alcohol. Therefore, the results should be: the first tube, which contains the most of the low-boiling-point alcohol, is mostly alcohol; the second tube is a mix of alcohol and water; and the third tube, which is predominantly the high-boiling-point water, will not easily catch fire. If you were to use an 11% ABV wine, you should start with about 14 mL of wine.
14*0.11=1.54mL
In this case (14mL of 11% ABV), you would have 1.54 mL of alcohol. Collecting 1 mL portions would give you: alcohol only, a 50/50 mix of alcohol and water, and mostly water. This works out perfectly! The distillation of wine is an excellent opportunity to learn the fundamental scientific concept of separating mixtures based on differences in boiling points. At the same time, phenomena like suck-back and bumping teach the students about the rigorous nature of science and the importance of safety management. Please be sure to prioritize safety and enjoy this wonderful experience that satisfies intellectual curiosity.
Inquiries and Service Requests
Want to bring the wonder and fun of science closer to you? We’ve compiled easy-to-understand guides for fun science experiments you can do at home, along with tips and tricks. Feel free to search around!
・The contents of this Science Notebook have been published as a book. Find out more here
・About the operator, Ken Kuwako, click here
・For various requests (writing, lectures, experimental classes, TV supervision/appearances, etc.), click here
・Article updates are posted on X!
![]() Experiment videos are streamed on the Science Idea Channel!
Experiment videos are streamed on the Science Idea Channel!
NEW 分解問題集 理科
- 7月21日発売!『高校入試 分解問題集 理科』(学研)…難しい問題も小さな問題に分解することで、問題を解くことができます。そんな分解の技術が身につくように深く関わりを持って作りました。
7月のイチオシ実験!
夏でプシュッと爽やか実験!

テレビ番組監修・イベント等のお知らせ
- 7月18日(土)「TIF presents ONE SONG FES. 」(フジテレビ)
- 7月18日(土) 教員向け実験講習会「ナリカカサイエンスアカデミー」
- 7月23日(木)科学監修 19:00〜 THE突破ファイル(日本テレビ)
- 7月30日(水) 監修したテレビ番組放送予定
- 12月26日(土) ナリカサイエンスアカデミー(教員向け実験講習会)開催
書籍のお知らせ
- 『大人のための高校物理復習帳』(講談社)…一般向けに日常の物理について公式を元に紐解きました。特設サイトでは実験を多数紹介しています。※増刷がかかり6刷となりました(2026/02/01)

- 『きめる!共通テスト 物理基礎 改訂版』(学研)… 高校物理の参考書です。イラストを多くしてイメージが持てるように描きました。授業についていけない、物理が苦手、そんな生徒におすすめです。特設サイトはこちら。

各種SNS(更新情報をお届け!)
【日本語】X(Twitter)/instagram/Facebook 【英語】BlueSky/Threads
Explore
- 楽しい実験…お子さんと一緒に夢中になれるイチオシの科学実験を多数紹介しています。また、高校物理の理解を深めるための動画教材も用意しました。
- 理科の教材… 理科教師をバックアップ!授業の質を高め、準備を効率化するための選りすぐりの教材を紹介しています。
- Youtube…科学実験等の動画を配信しています。
- 科学ラジオ …科学トピックをほぼ毎日配信中!AI技術を駆使して作成した「耳で楽しむ科学」をお届けします。
- 講演 …全国各地で実験講習会・サイエンスショー等を行っています。
- About …「科学のネタ帳」のコンセプトや、運営者である桑子研のプロフィール・想いをまとめています。
- お問い合わせ …実験教室のご依頼、執筆・講演の相談、科学監修等はこちらのフォームからお寄せください。