
Textbooks Can’t Show This! A Cheap and Realistic Way to See Normal and Reverse Faults in Action
I’m Ken Kuwako, your Science Trainer. Every day is an experiment!
You’ve probably heard the word “fault” on the news after an earthquake. It’s always in textbooks, but just looking at a picture or a diagram, it’s hard to really grasp the immense energy at play beneath the ground, isn’t it?
I thought, “If students could experience this dynamic ‘ground shifting’ with their own hands, right on their desks, their understanding and enjoyment would surely skyrocket!”
That’s how this project began. The goal? To create a simple experimental model using only materials from a 100-yen shop (dollar store). This is the story of how a small experiment was developed to help us feel the epic scale of Earth’s movements up close.
【Development Secrets】An Epiphany and the Savior Masking Tape
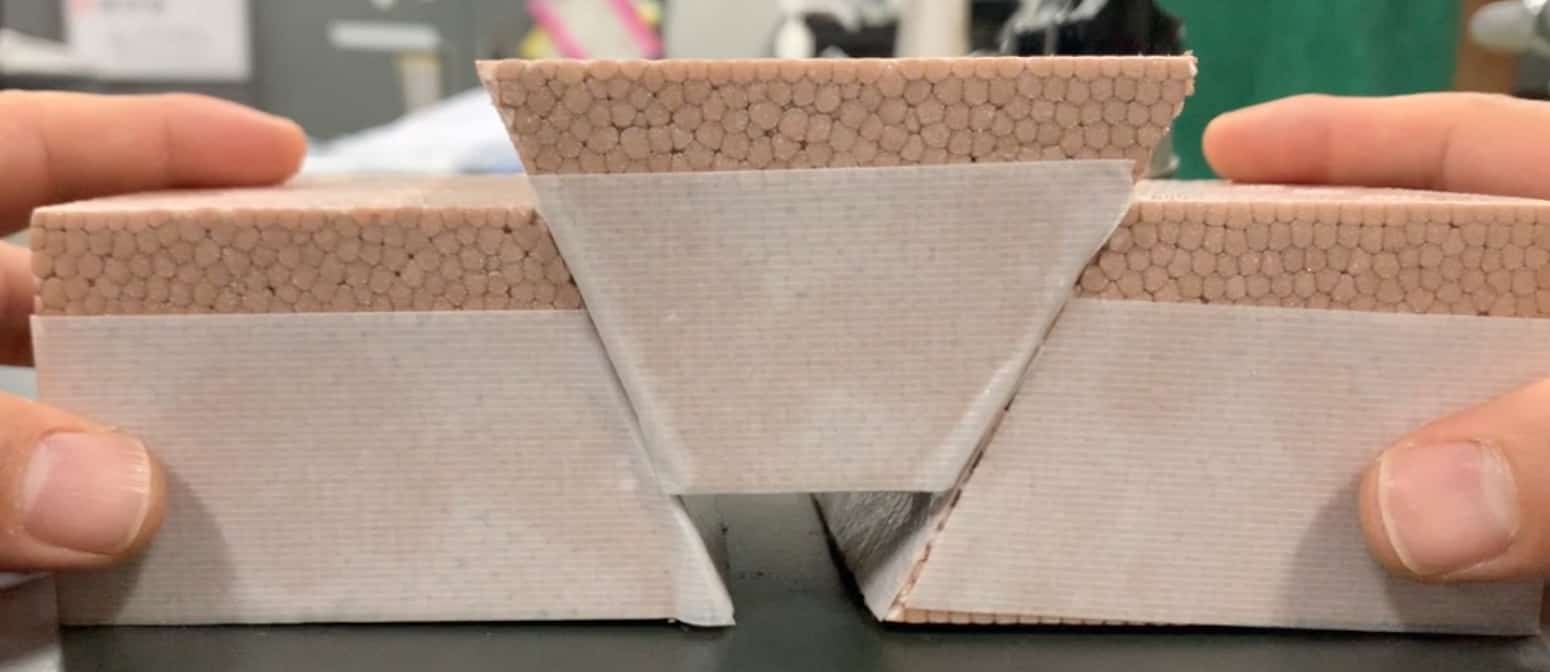
My first stop was the wellspring of ideas: the 100-yen shop. There, I found these polystyrene foam bricks (from Daiso). They were light, easy to work with, and perfect for representing layers of the earth!
I cut one diagonally to mimic a fault line. The shape was there, but a problem emerged: the friction between the foam pieces was too strong, preventing the layers from sliding smoothly. This was especially a problem for a “reverse fault” where one layer is pushed up—it would just get stuck with a grating sound.
“This isn’t realistic… what should I do?”
Lost in thought, my eyes fell on some masking tape. I tried sticking it along the fault line surface, and to my surprise, it moved incredibly smoothly!
The slick surface of the tape mimicked the parts of tectonic plates that slide smoothly, known as “asperities” or locked zones. It was a lucky find, and as an added bonus, the tape also made the fault line visually clearer.
【Science Recipe】Make Your Own Fault for a Buck!
The instructions are super simple.
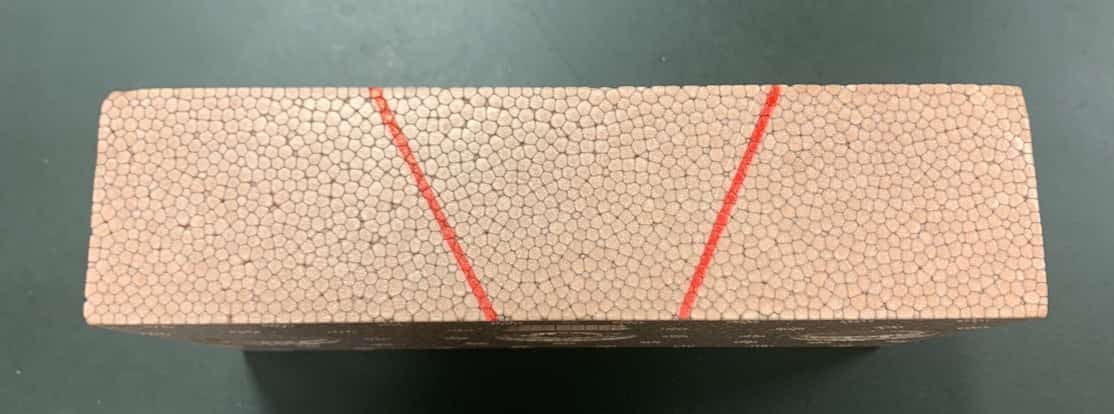
Cut the polystyrene foam brick diagonally with a sharp cutter.
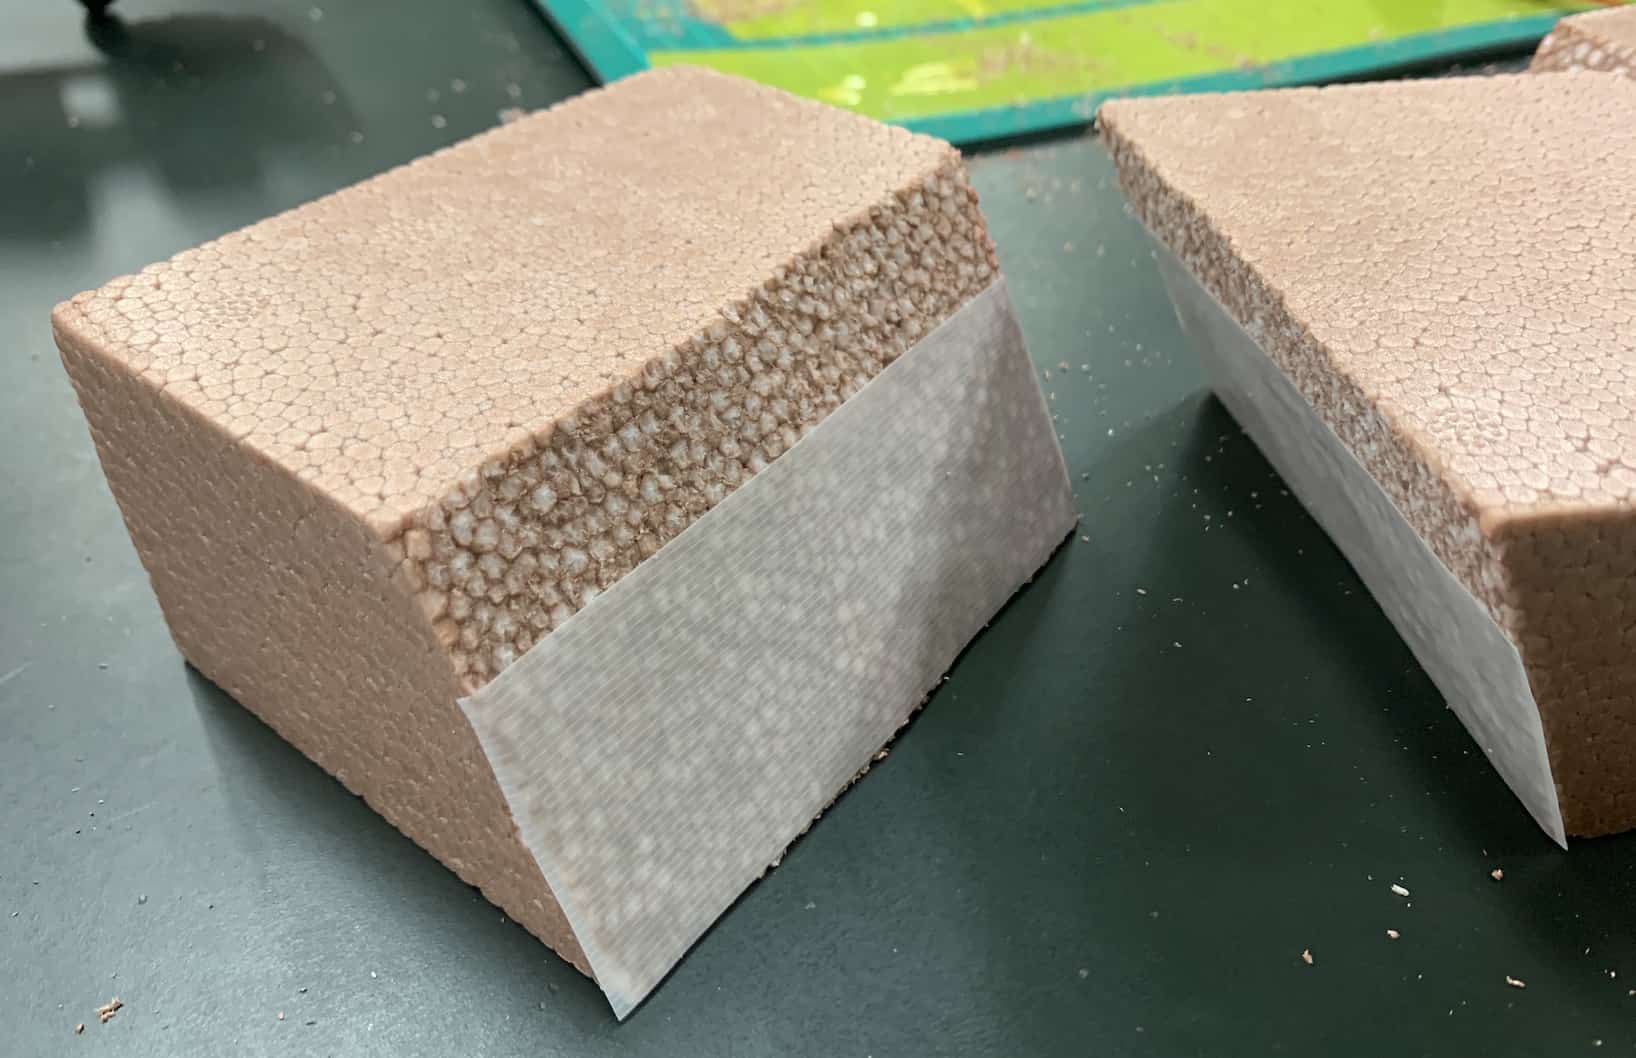
Stick masking tape along the cut surface of the bottom block.
That’s it! In just two steps, you have an experimental model that realistically demonstrates normal and reverse faults!
【Experiment】Move the Fault and Feel the Earth’s Power!
Now, let’s use the finished model to recreate the movement of the ground.
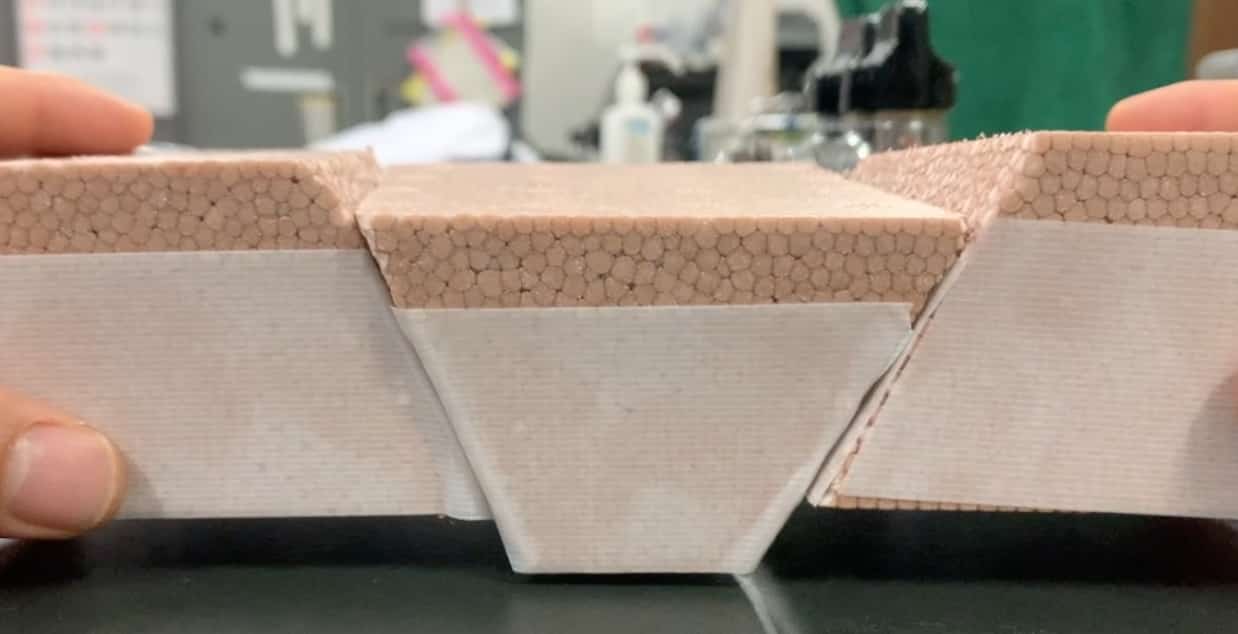
📌 Experiment 1: Normal Fault 【The Stretched Earth】
Hold the top and bottom of the model and slowly pull them apart. The upper block should slide down along the fault line. This is a “normal fault.”
【The Science Connection】
This phenomenon occurs where the Earth’s crust is being pulled apart, such as at the Great Rift Valley in Africa or at mid-ocean ridges where new seafloor is created.
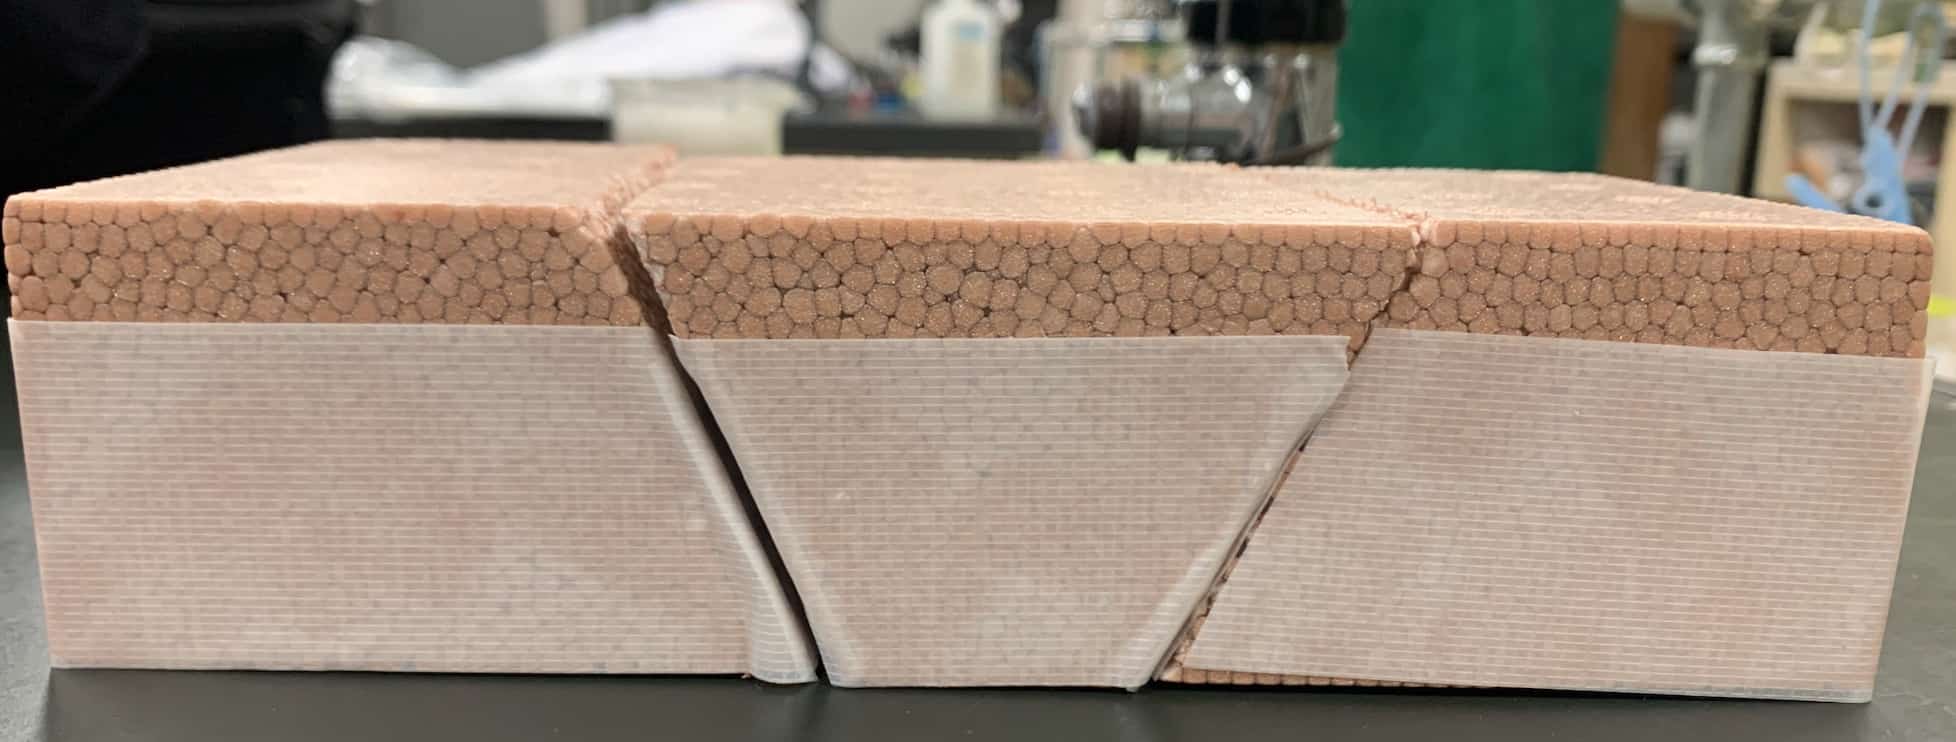
📌 Experiment 2: Reverse Fault 【The Compressed Earth】
Now, do the opposite: push the sides of the model together. The upper block will be thrust up and over the lower block. This is a “reverse fault.”
【The Science Connection】
Many earthquakes in Japan are of this reverse fault type. They happen when plates collide, compressing the land. Even rugged mountains like the Japanese Alps are a testament to Earth’s dynamism, formed by millions of years of repeated reverse fault movements.
The cost is an amazing little more than 100 yen per set. This low price allows every student in the class to have their own “personal fault” and learn by doing. It provides an intuitive understanding that you can’t get just by looking at a textbook diagram. Teachers, why not try this as your next classroom “gimmick”?
Contact & Inquiries
Let’s make science fun and accessible! I’ve put together easy-to-understand tips and fun science experiments you can do at home. Feel free to search around!
・About the creator, Ken Kuwako, please click here
・For various requests (writing, lectures, experimental classes, TV supervision, appearances, etc.), please click here
・Article updates are posted on X!
![]() The Science Channel is posting experiment videos!
The Science Channel is posting experiment videos!