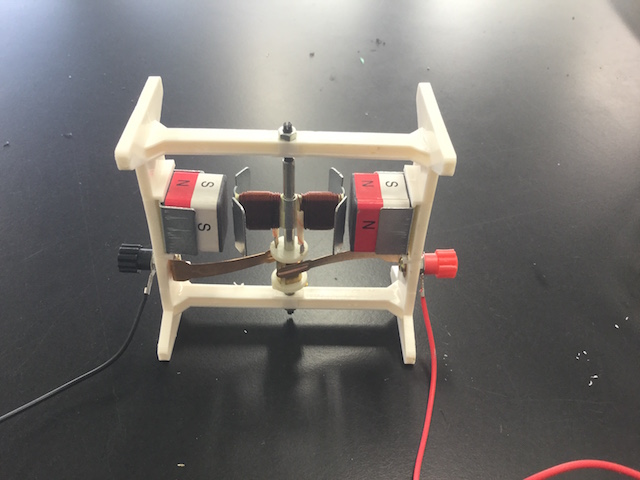
Everyone Succeeds in Class! Tips for Making a Paperclip Motor (A Practical Method Using Plastic Cardboard)
I’m Ken Kuwako, your Science Trainer. Every day is an experiment!
Return to the “Otobutsu” Special Page
Have you ever heard of a clip motor? It is an incredibly simple motor made using a dry cell battery, enameled wire, and paper clips. You might have seen one in a science class or as a popular science fair project. Watching the coil start spinning the moment the current flows feels like true science magic! However, there is a common pitfall: while it looks easy to build, it can be surprisingly tricky to actually get it running.
Have you ever spent ages building one, only for it to sit there completely still? You’re not alone! The trickiest part is usually the coil. If the coil isn’t a perfect circle or if the two side axes aren’t perfectly aligned, the interaction with the magnet won’t work correctly, and it simply won’t spin.
Today, I’m going to share a game-changing secret to solve these common frustrations. By using a simple piece of plastic corrugated board (Pladan), anyone can build a clip motor that spins perfectly every single time! This “eye-opening” method was taught to me by Mr. Eiji Komori. Are you ready to experience the wonders of science with your own hands?
Understanding How a Clip Motor Works
A clip motor is a brilliant example of electromagnetic induction in action, converting electrical energy into kinetic energy (motion).
Current and Magnetic Fields: When electricity from the battery flows through the coil made of enameled wire, a magnetic field is generated around the coil.
Interaction with the Magnet: This magnetic field from the coil interacts with the magnetic field of the permanent magnet placed nearby. The resulting force is what pushes the coil to spin.
Fleming’s Left-Hand Rule: There is a specific relationship between the direction of the current, the magnetic field, and the resulting force. This is known as Fleming’s Left-Hand Rule. The force generated by the current and the magnet pushes the coil, creating rotational motion.
Shutterstock
The Key to Success: Why Traditional Methods Fail
Usually, people make the coil by wrapping enameled wire directly around a battery. However, more than half of the people who try this fail! Even adults find it quite difficult. There are two main reasons for this:
The axes aren’t straight: If the two wires sticking out from the sides aren’t perfectly aligned in a straight line, the rotation won’t be smooth. Even a tiny bend causes an imbalance that stops the spin.
It’s hard to make a perfect circle: To create a uniform magnetic field, the coil needs to be a clean circle. Making this by hand is tougher than it looks!
Plastic Corrugated Board: The Ultimate Savior!
This is where the plastic corrugated board (Pladan) comes in! By using a small piece of this board as a support frame, we can solve these problems instantly.

Using plastic board offers several advantages:
Perfectly shaped coils: The board acts as a guide, so anyone can make a neat circular coil easily.
Cost-effective: Since the design is compact, you use less enameled wire, saving on materials.
Easy axis alignment: The thickness and structure of the board make it much easier to keep the side axes perfectly straight.
For this project, I used about 45cm of enameled wire with a diameter of 0.5mm. This thickness provides enough structural integrity for a sturdy motor.
Let’s Get Building!
Use about 45cm of enameled wire with a diameter of 0.5mm. This thickness ensures your motor is nice and solid.

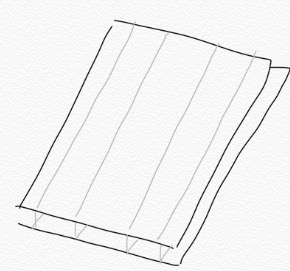
First, let’s look at the winding. Cut the plastic corrugated board as shown.
I’ve summarized the building process in this video:
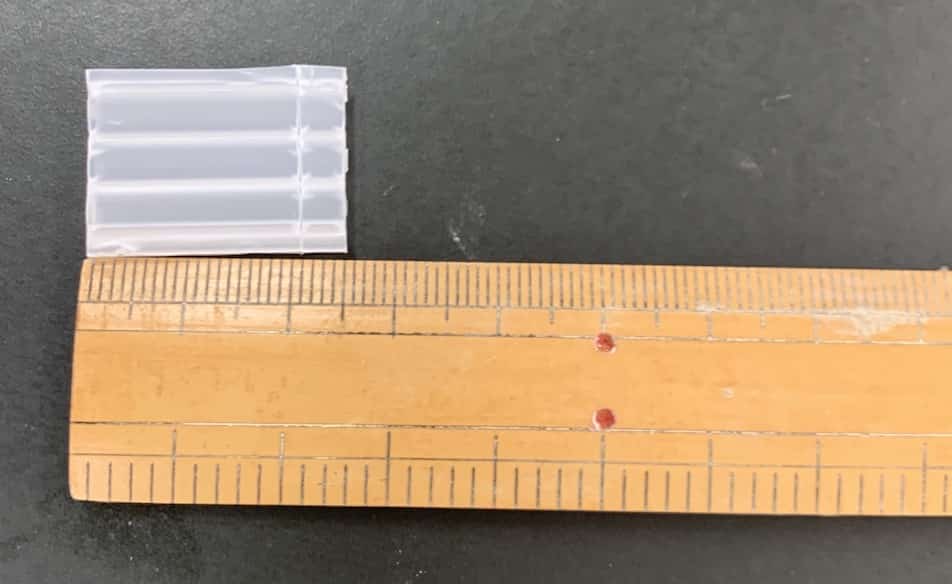
Cut the board to a length of 2.5cm, ensuring there are three holes visible from the side. Thread the wire through the center first, leaving about 5cm sticking out.
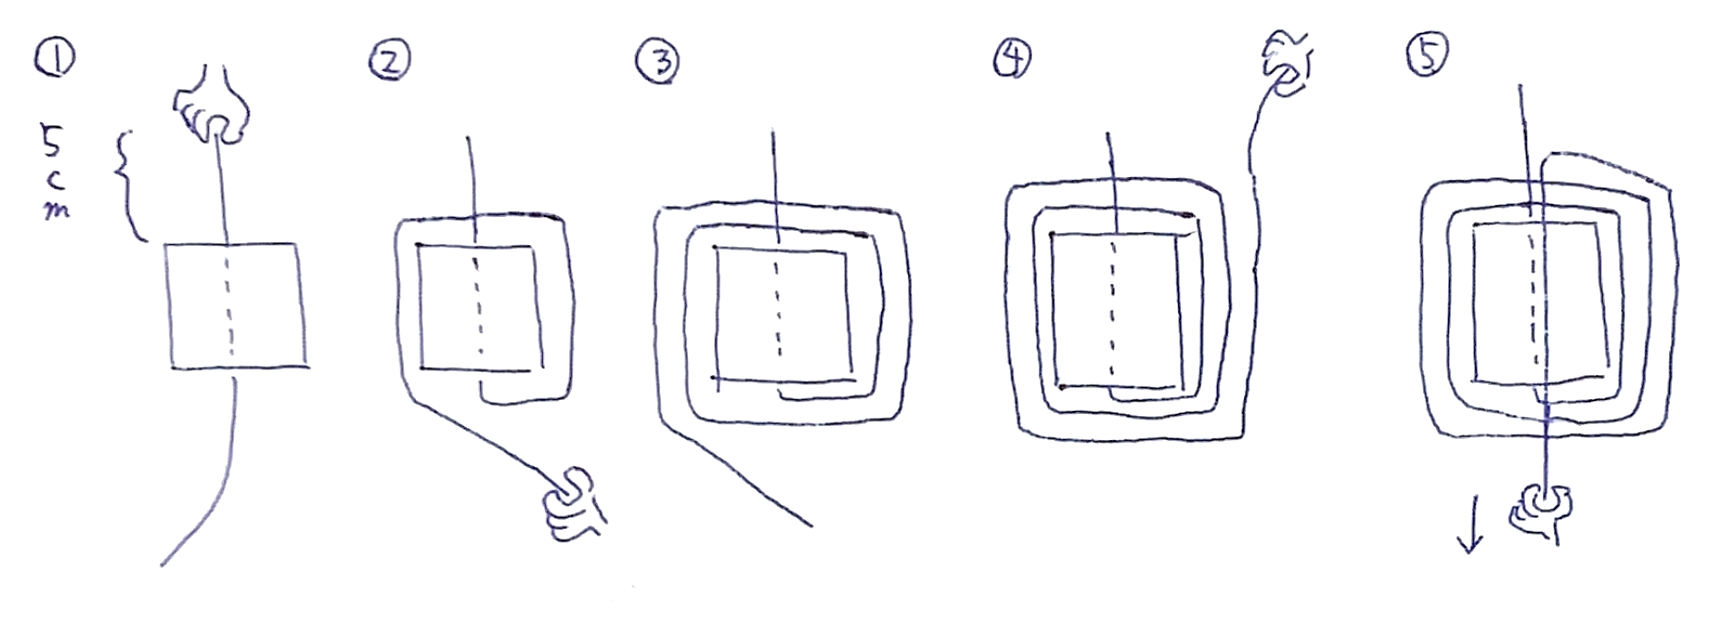
Then, follow the diagram to thread it through. Finally, pull it slightly to tighten the shape and trim any excess wire.

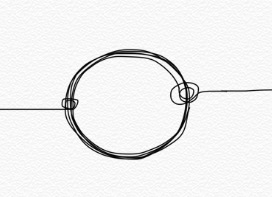
Now for the insulation: Use sandpaper to strip the enamel off the wire. On one side, strip the enamel off completely. On the other side, strip only the top half of the wire. Make sure you strip it all the way to the base.
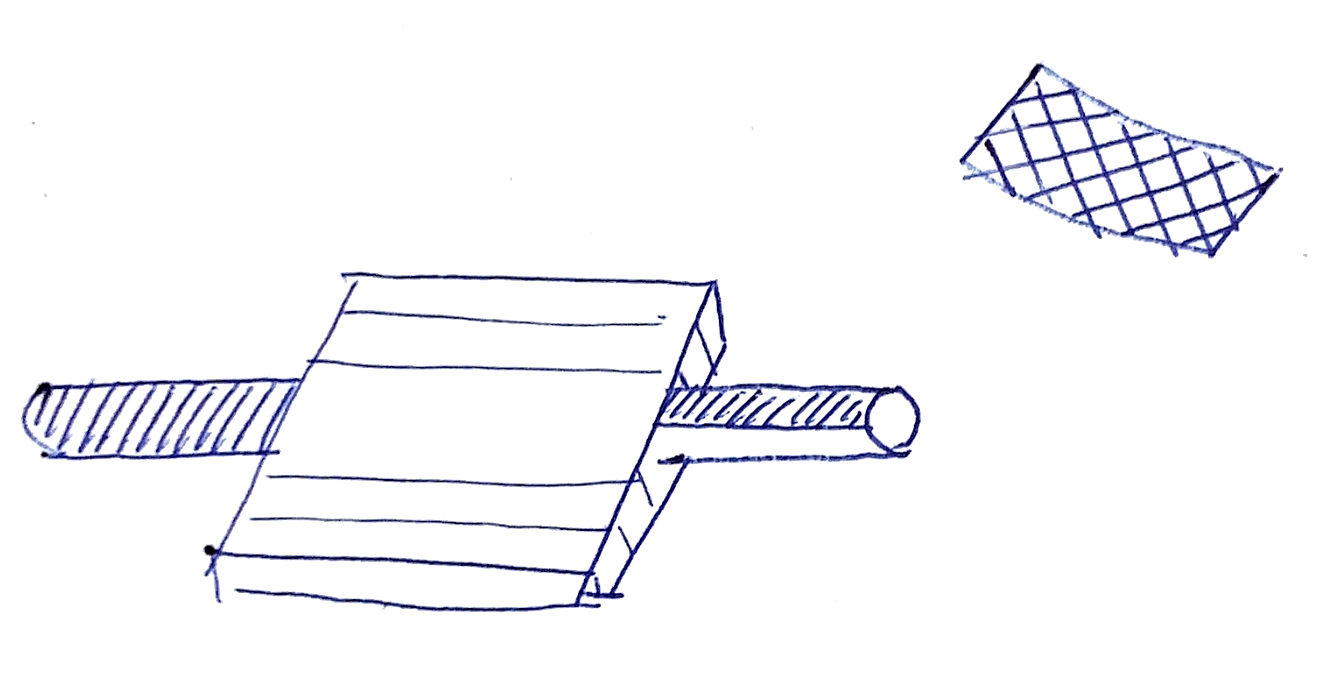
In the diagram, the gray areas represent the stripped parts. Next, bend the paper clips like this:
Attach them to the battery in this configuration:
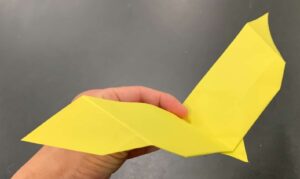
Stick the magnet onto the battery, and you’re done! Place the coil on the clips like this:
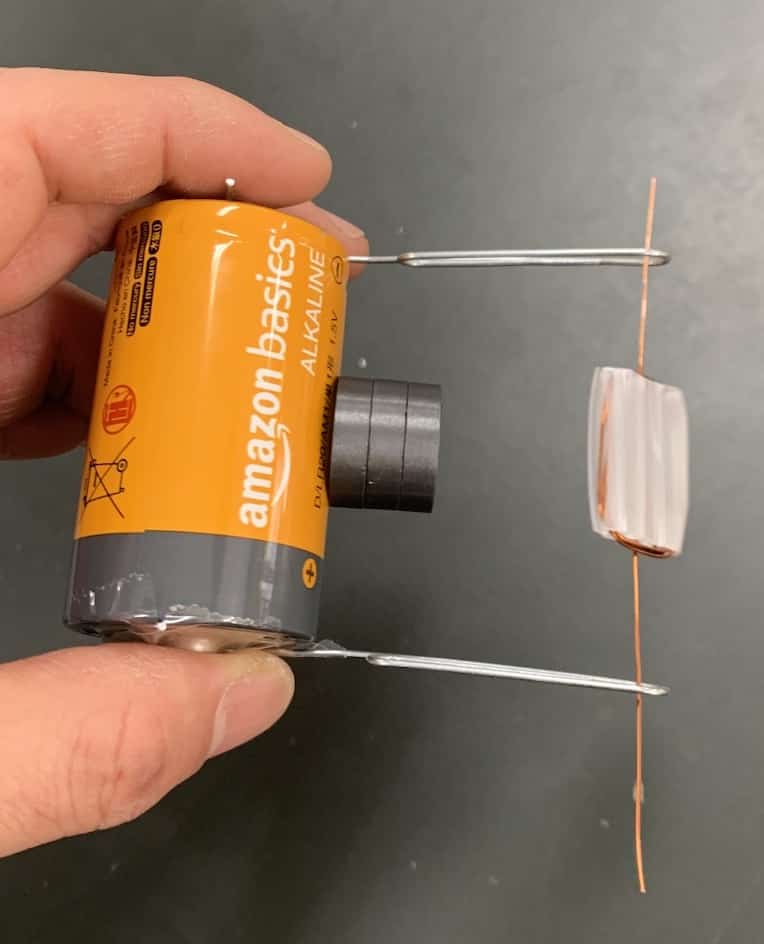
Give it a little nudge, and it will start spinning like crazy!

Pretty cool, right? Give it a try at home!
What Happens if You Strip All the Enamel?
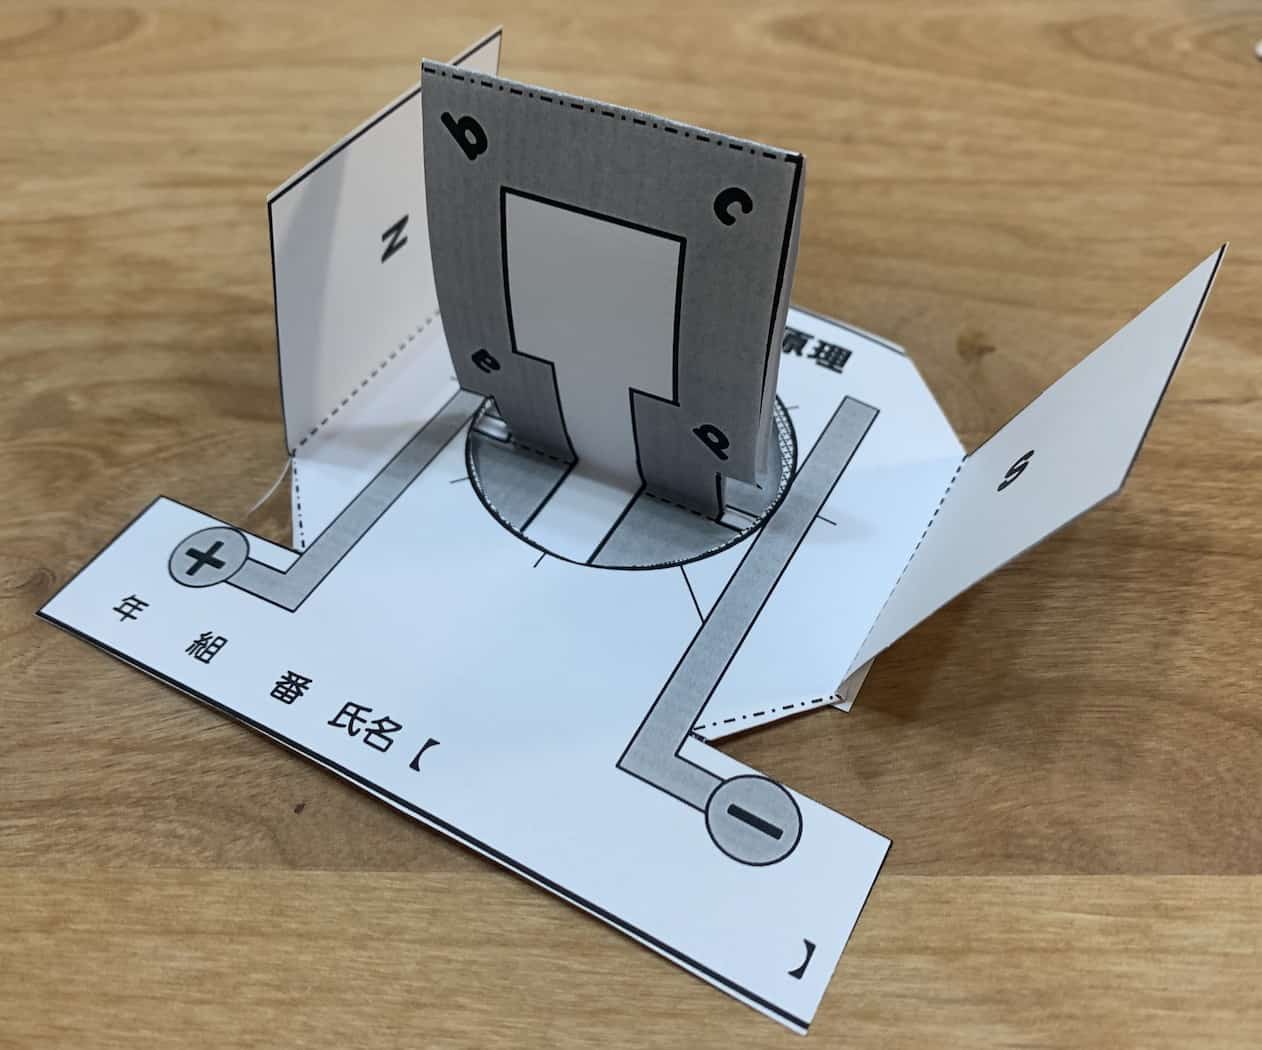
Before reading this explanation, I recommend building a paper craft motor model first to get a feel for it. Check out this article:
なぜモーターは回り続ける? ペーパークラフトとデジタルで解き明かす「フレミングの法則」と「整流子の秘密」(Geogebra)
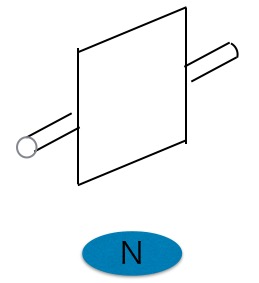
The following explanation is 3D, so if it’s a bit confusing, the paper craft above is a great starting point. Here is how it works:
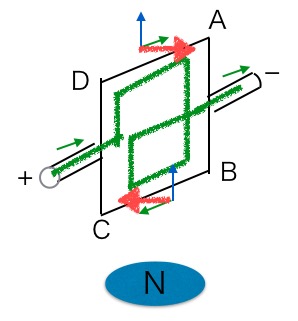
When the coil’s tilt matches the magnetic field (at 0°), the interaction between the current and the magnetic field creates a force. This makes the coil rotate counter-clockwise.
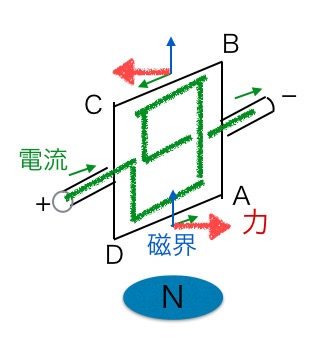
Note: The Pladan motor has more wraps, but this diagram shows one wrap for clarity.
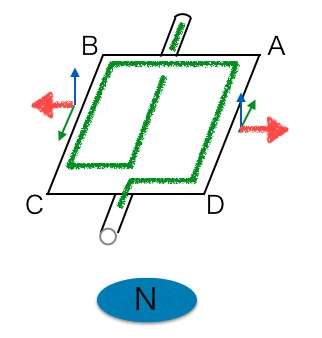
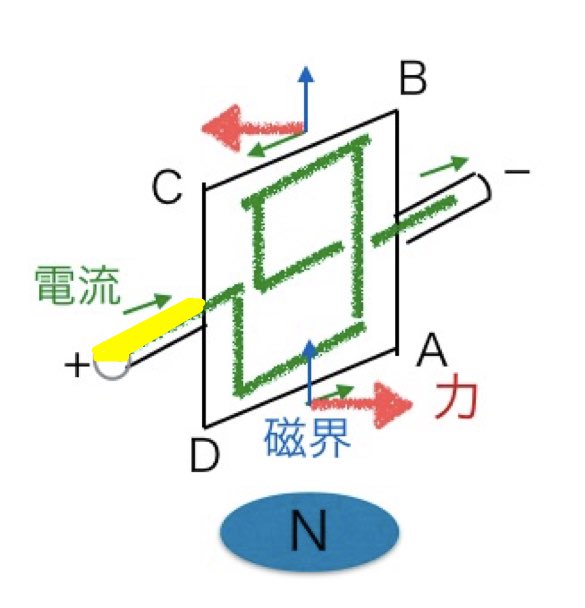
When it rotates to 90°, the forces on both ends pull outward, which doesn’t contribute to the rotation.
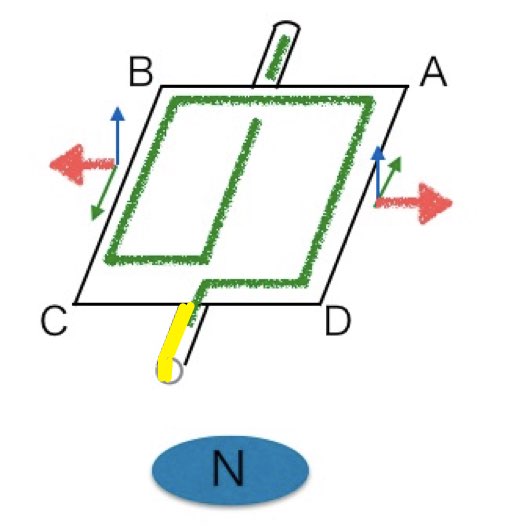
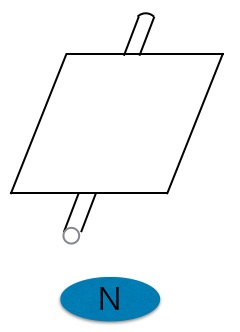
At 180°, if there is no commutator (the stripped enamel trick), the relationship with the current direction creates a clockwise force. This cancels out the motion, and the motor won’t spin.
How Creating a Commutator Changes Everything
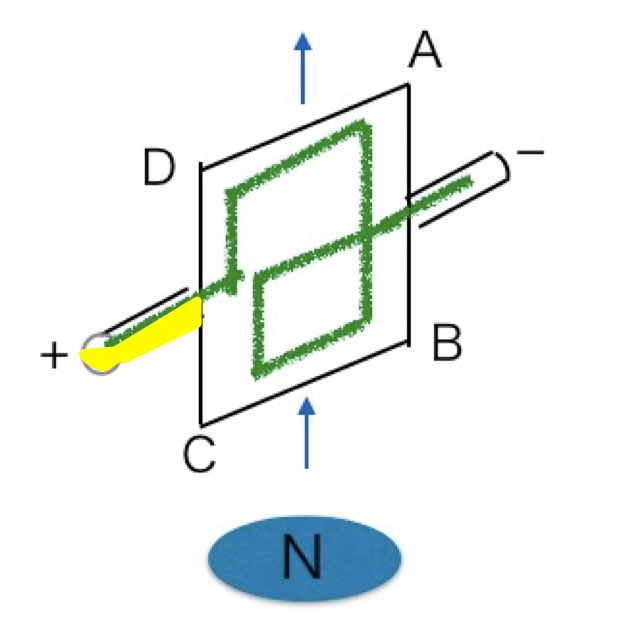
By leaving the enamel on the top half of one wire (shown in yellow in the next diagram), we create a simple commutator.
1′. At 0°, the current flows through the stripped bottom part touching the clip.
2′. Even at 90°, the current continues to flow because the stripped part is still in contact with the clip.
3′. Once it hits 180°, the enameled (insulated) part of the wire touches the clip, and the current stops. Momentum carries the coil through this dead spot, allowing it to continue spinning counter-clockwise back to position 1′.
There you have it! The clip motor is a simple device using current and magnetism, but the key to success lies in the coil winding. By using plastic board, you can keep the shape perfect and drastically increase your success rate. Use your science knowledge to enjoy building things!
For more on Fleming’s Left-Hand Rule, check out this article:
I also recommend this motor kit where the commutator is clearly visible:
For teachers, I think it’s a great exercise to provide a handout with just the coil shapes and have students draw the wire segments and the flow of current. Here are some simple materials you can use for that purpose. Feel free to use them!
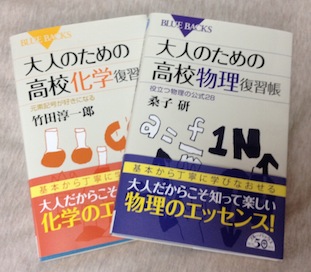
“High School Physics Review for Adults” (Amazon Link)
Inquiries and Requests
Making the wonders of science more accessible! I share tips and fun science experiments you can do at home. Search around for more!
Learn more about Ken Kuwako here.
For requests (writing, lectures, workshops, TV supervision, appearances), click here.
Stay updated via X (Twitter)!
![]() Check out experiment videos on the Science Material Channel!
Check out experiment videos on the Science Material Channel!
NEW 7/21(火)発売! 分解問題集
- 『高校入試 分解問題集 理科』(学研)…難しい問題も小さな問題に分解することで、問題を解くことができます。そんな分解の技術が身につくように深く関わりを持って作りました。

7月のイチオシ実験!
夏でプシュッと爽やか実験!

テレビ番組監修・イベント等のお知らせ
- 7月18日(土)26:20〜27:20 「TIF presents ONE SONG FES. 」(フジテレビ)
- 7月18日(土) 教員向け実験講習会「ナリカカサイエンスアカデミー」の講師をします。お会いしましょう。
- 7月30日(水) 監修したテレビ番組放送予定
- 12月26日(土) ナリカサイエンスアカデミー(教員向け実験講習会)開催
書籍のお知らせ
- 『大人のための高校物理復習帳』(講談社)…一般向けに日常の物理について公式を元に紐解きました。特設サイトでは実験を多数紹介しています。※増刷がかかり6刷となりました(2026/02/01)

- 『きめる!共通テスト 物理基礎 改訂版』(学研)… 高校物理の参考書です。イラストを多くしてイメージが持てるように描きました。授業についていけない、物理が苦手、そんな生徒におすすめです。特設サイトはこちら。

各種SNS(更新情報をお届け!)
【日本語】X(Twitter)/instagram/Facebook 【英語】BlueSky/Threads
Explore
- 楽しい実験…お子さんと一緒に夢中になれるイチオシの科学実験を多数紹介しています。また、高校物理の理解を深めるための動画教材も用意しました。
- 理科の教材… 理科教師をバックアップ!授業の質を高め、準備を効率化するための選りすぐりの教材を紹介しています。
- Youtube…科学実験等の動画を配信しています。
- 科学ラジオ …科学トピックをほぼ毎日配信中!AI技術を駆使して作成した「耳で楽しむ科学」をお届けします。
- 講演 …全国各地で実験講習会・サイエンスショー等を行っています。
- About …「科学のネタ帳」のコンセプトや、運営者である桑子研のプロフィール・想いをまとめています。
- お問い合わせ …実験教室のご依頼、執筆・講演の相談、科学監修等はこちらのフォームからお寄せください。