Make Your Own Earth Cake: The Fun, Hands-On Strata Experiment!
I’m Ken Kuwako, your Science Trainer. Every day is an experiment!
When we delve into Earth Science, students naturally start asking, “What exactly is a stratum (layer of rock/soil)?” Showing them diagrams and photos from the textbook doesn’t always click. They look unconvinced, asking things like, “Does it really stack up like that?” or “What’s the difference between mud and sand?”
So, I decided to have them try a hands-on experiment: actually “creating and observing layers” themselves.
We modeled the formation of strata using gravel, sand, and mud. By using materials with different colors, we could recreate visually appealing and beautiful geological layers.The moment their eyes lit up—saying things like, “It looks like a cake!” or “Why did the pattern turn out like this?”—I knew I had won the day (laughs).
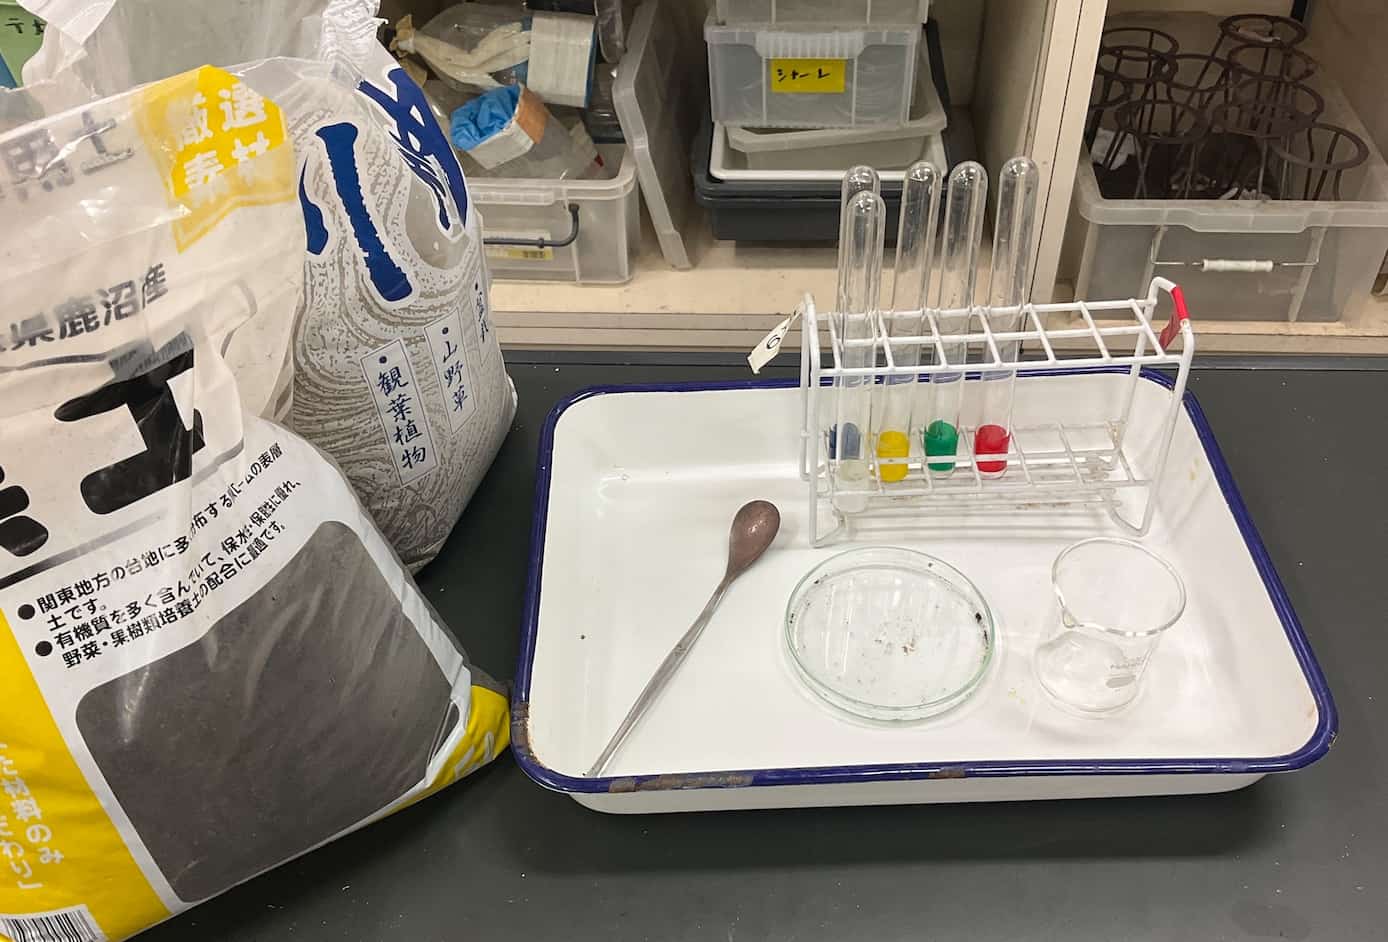
■ Materials Needed
|
Materials/Equipment |
Notes |
|---|---|
|
River Sand |
Substitute for gravel and sand (e.g., Akagi series) |
|
Black Soil (Kurotsuchi) |
Substitute for mud (Gardening soil is fine) |
|
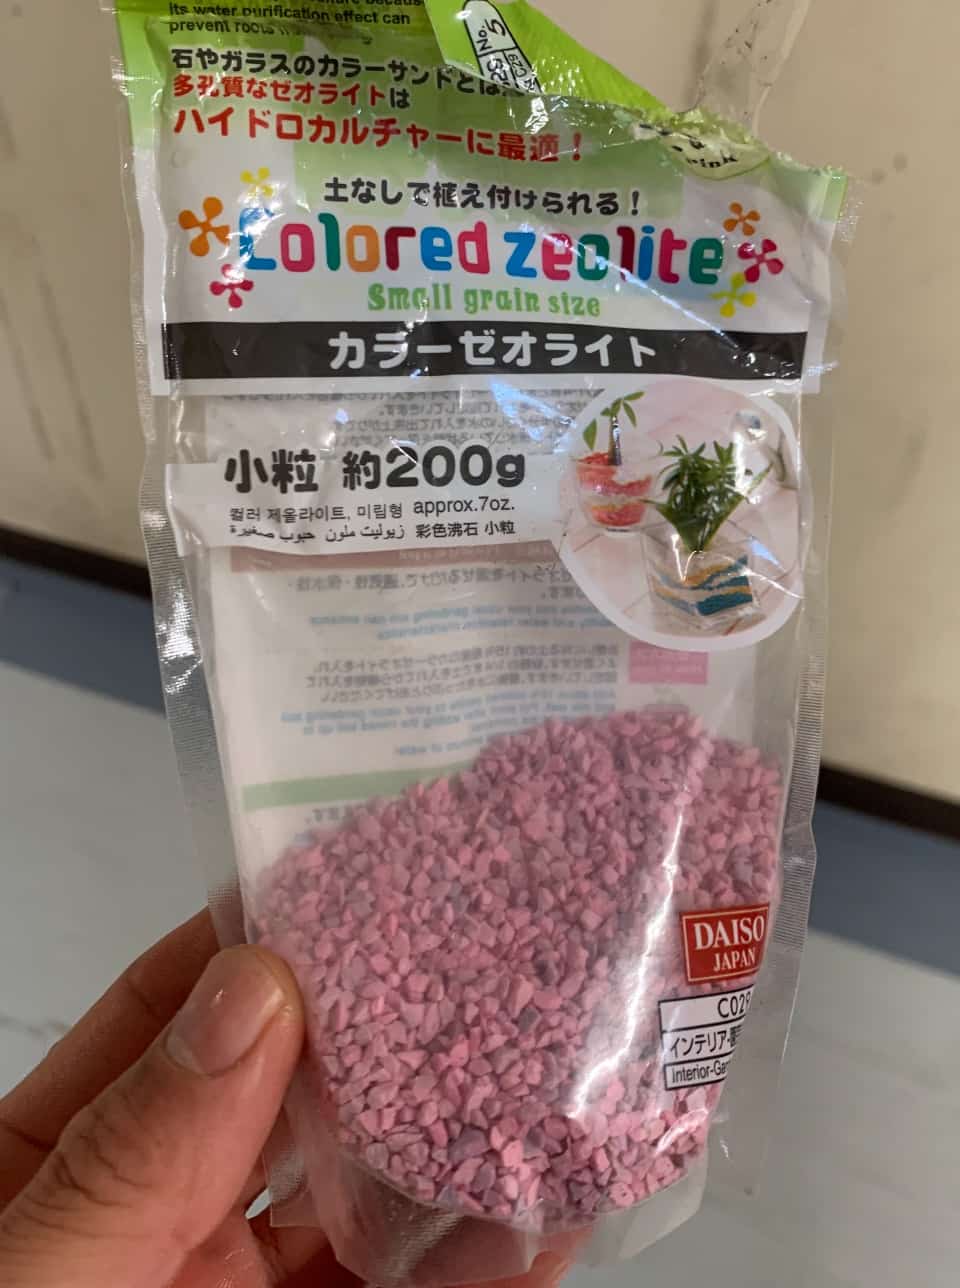
Colored Zeolite (Small-grain, Red) |
Substitute for gravel. Available at 100-yen shops. Vivid color provides excellent visual appeal (◎) |
|
Test Tube (Φ18) |
One per person or per group. Plastic is also acceptable |
|
Test Tube Rack |
Used to let the test tube stand undisturbed |
|
Plastic Cups |
Used for mixing and measuring materials. Can be used in place of Petri dishes |
|
Tray/Container |
Work area for mixing |
|
Spatula/Scoop |
Used for measuring materials (One heaped scoop ≈ about one teaspoon) |
Zeolite
|
|
![[商品価格に関しましては、リンクが作成された時点と現時点で情報が変更されている場合がございます。]](https://hbb.afl.rakuten.co.jp/hgb/2c87aae9.92f4de68.2c87aaea.de587780/?me_id=1211165&item_id=10048640&pc=https%3A%2F%2Fthumbnail.image.rakuten.co.jp%2F%400_mall%2Fchanet%2Fcabinet%2F519%2F51508-2.jpg%3F_ex%3D128x128&s=128x128&t=picttext "[商品価格に関しましては、リンクが作成された時点と現時点で情報が変更されている場合がございます。]")
River Sand
|
|
![[商品価格に関しましては、リンクが作成された時点と現時点で情報が変更されている場合がございます。]](https://hbb.afl.rakuten.co.jp/hgb/2e36e330.9afbcf55.2e36e331.82deb4f1/?me_id=1217146&item_id=10017564&pc=https%3A%2F%2Fthumbnail.image.rakuten.co.jp%2F%400_mall%2Fkumazou%2Fcabinet%2Fkihon3%2F4939091011205.jpg%3F_ex%3D128x128&s=128x128&t=picttext "[商品価格に関しましては、リンクが作成された時点と現時点で情報が変更されている場合がございます。]")
We used Black Soil (Kurotsuchi) for the dirt.
|
|
![[商品価格に関しましては、リンクが作成された時点と現時点で情報が変更されている場合がございます。]](https://hbb.afl.rakuten.co.jp/hgb/2b71acab.9c66f40c.2b71acac.71d48030/?me_id=1216297&item_id=10000037&pc=https%3A%2F%2Fthumbnail.image.rakuten.co.jp%2F%400_mall%2Fheiwa%2Fcabinet%2F00529276%2Fa-83.jpg%3F_ex%3D128x128&s=128x128&t=picttext "[商品価格に関しましては、リンクが作成された時点と現時点で情報が変更されている場合がございます。]")
■ Experiment 1: Let’s Create Strata!
① Take two heaped scoops of soil and two scoops of river sand into a plastic cup. Transfer the materials into a tray/container and mix well using the spatula/scoop.
② Scoop three large amounts of the mixed material from step ① into a test tube.
③ Fill the test tube from step ② with water until it is about 70% full.
④ Cover the opening of the test tube with your thumb and shake it well to mix the water and materials. While still covering it with your thumb, quickly invert the test tube once, return it to the upright position, immediately place it in the test tube rack, and observe it for a while.
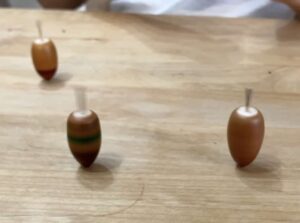
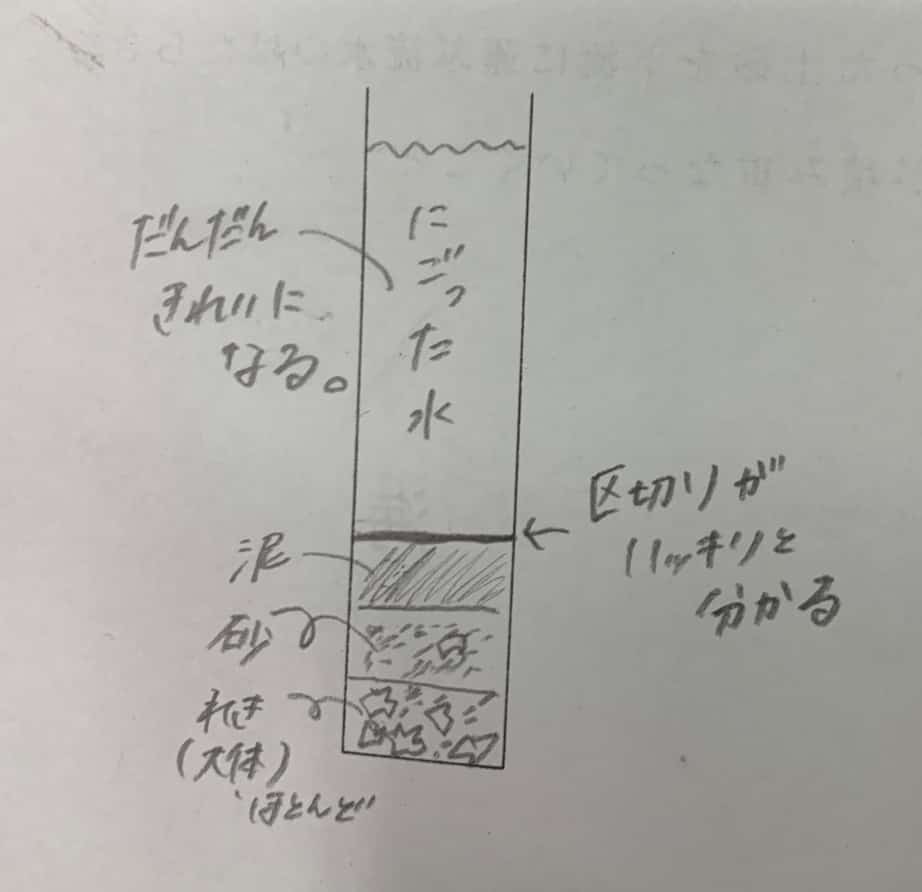
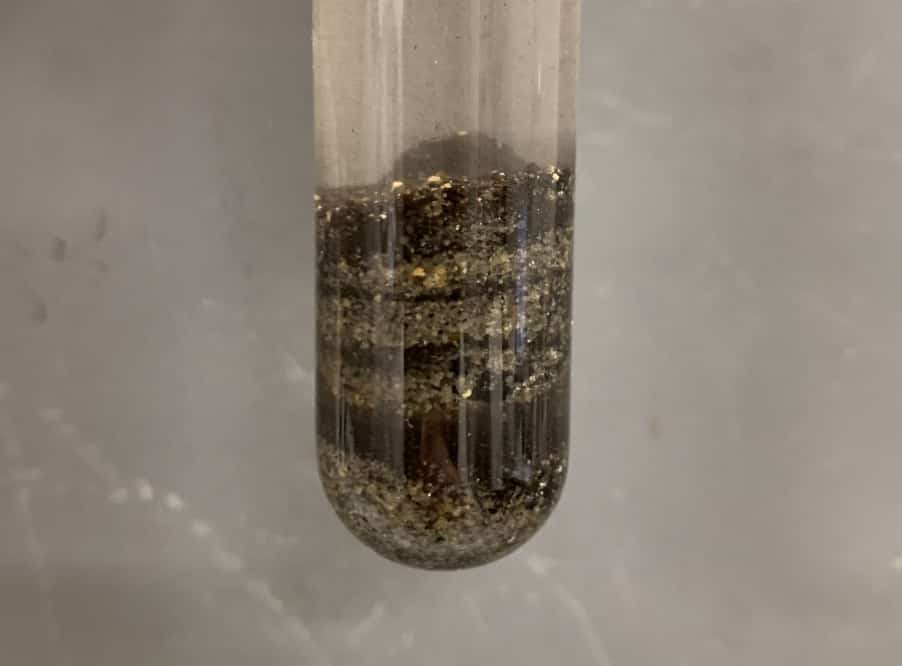
⑤ Sketch your observation and consider why the layers formed as they did. When you actually perform Experiment 1, this is what you get:
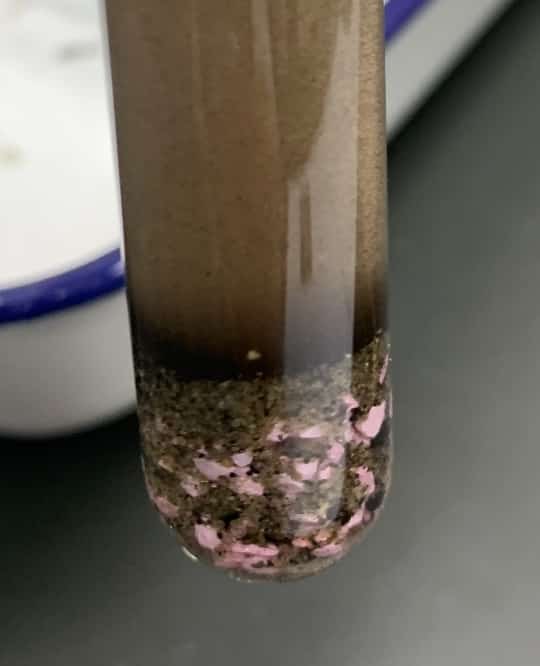
The layers settle in the order of gravel, sand, and mud, don’t they? Here are some sketches from the students:
■ Experiment 2: Replicating Multiple Layers (Strata Stacking)
⑥ Add two scoops of the mixture from step ② to the test tube from step ⑤. Wait a while, then add another two scoops.
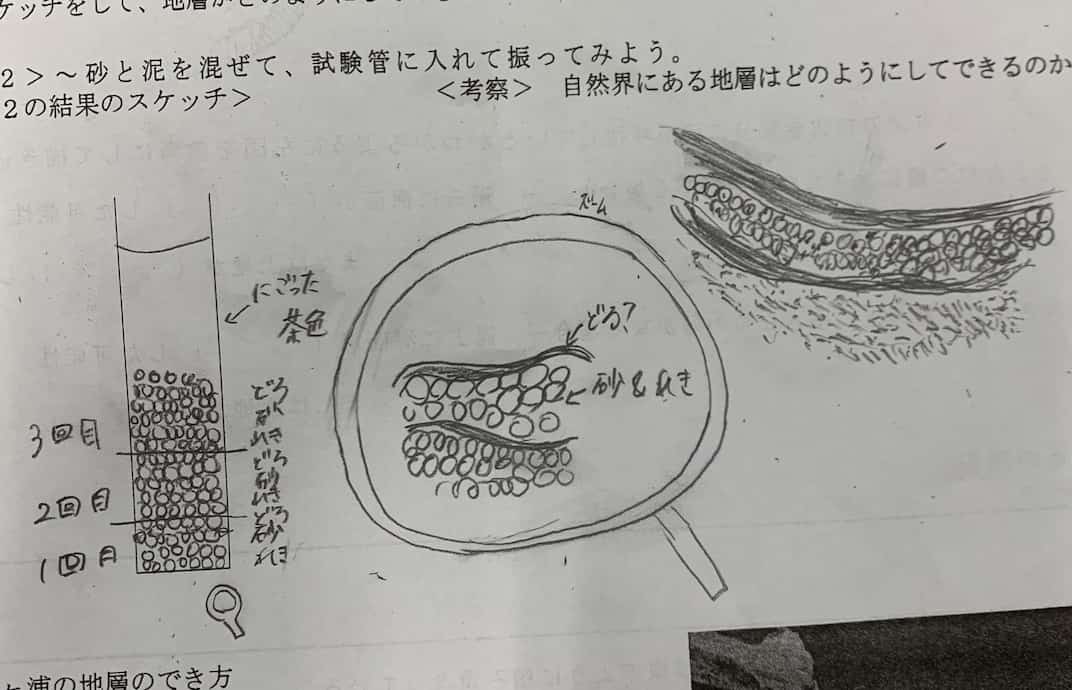
⑦ Sketch your observation and think about how geological layers are formed over time.
Experiment 2 will look like this:
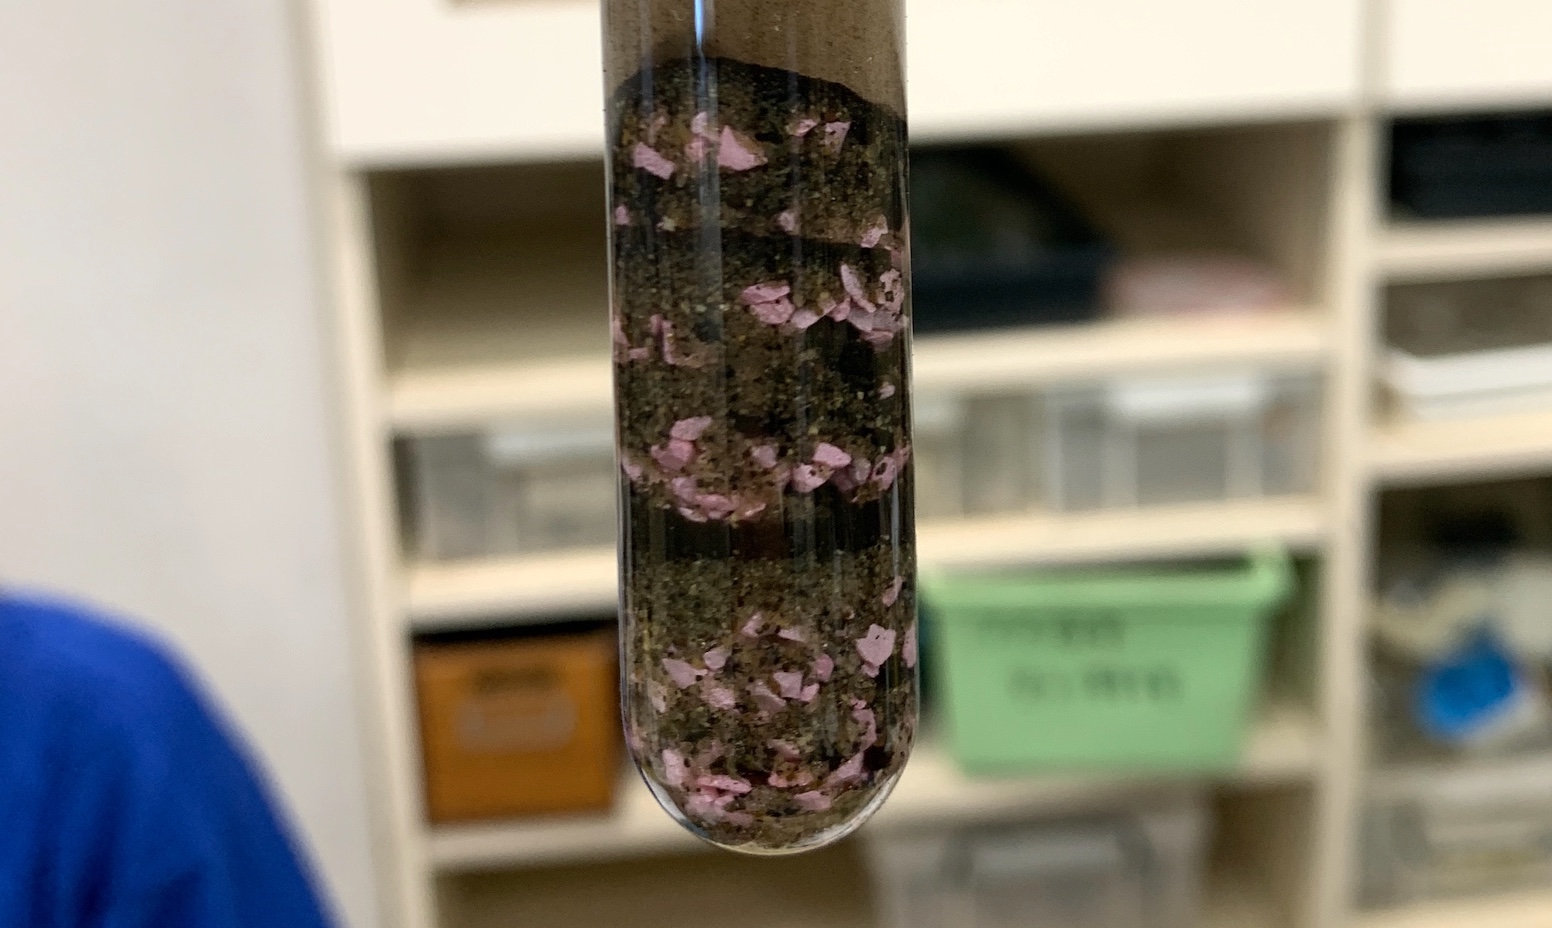
Even without the colored zeolite, you can get great results using just sand and soil, like in this image:
■ Teacher’s Notes & Classroom Tips
• The vibrant red color of the zeolite significantly boosts students’ motivation to sketch their observations.
• Differences in shaking methods and pouring order among groups lead to variations in the patterns, sparking engaging discussions where students ask, “Why?” and “Ours looks different!”
• As sketching accuracy improves, the experiment is highly effective for developing observation skills.
• By having students present on “Why the materials separated as they did” after the observation, concepts like particle size, specific gravity, and the action of water naturally emerge. This is the moment science knowledge truly becomes their own.
Contact & Requests
Make the wonders and fun of science more accessible! We clearly summarize fun science experiments you can do at home and the tips for doing them. Feel free to browse around!
Learn about the administrator, Ken Kuwako, here
For various requests (writing, lectures, science classes, TV supervision, appearances, etc.), click here
– Updates on articles are distributed on X (formerly Twitter)!
![]() We post experiment videos on the Science Idea Channel!
We post experiment videos on the Science Idea Channel!
7月のイチオシ実験!
夏でプシュッと爽やか実験!

テレビ番組監修・イベント等のお知らせ
-
時速200kmで走るランボルギーニが、長さ12mのテーブルクロスを一瞬で引き抜く——そんな常識破りの実験が、ふたたびテレビの世界で大きな話題になりました。しかも今回は「視聴者が選ぶワクワク実験ランキング」で、なんと堂々の第1位を獲得したのです。Tverでまだ見ることができるのでぜひご覧ください。

- 7月18日(土) 教員向け実験講習会「ナリカカサイエンスアカデミー」の講師をします。お会いしましょう。
- 12月26日(土) ナリカサイエンスアカデミー(教員向け実験講習会)開催
書籍のお知らせ
- 7月16日発売 『高校入試 分解問題集 理科』(学研)…難しい問題も小さな問題に分解することで、問題を解くことができます。そんな分解の技術が身につくように深く関わりを持って作りました。
- 『大人のための高校物理復習帳』(講談社)…一般向けに日常の物理について公式を元に紐解きました。特設サイトでは実験を多数紹介しています。※増刷がかかり6刷となりました(2026/02/01)

- 『きめる!共通テスト 物理基礎 改訂版』(学研)… 高校物理の参考書です。イラストを多くしてイメージが持てるように描きました。授業についていけない、物理が苦手、そんな生徒におすすめです。特設サイトはこちら。

各種SNS(更新情報をお届け!)
【日本語】X(Twitter)/instagram/Facebook 【英語】BlueSky/Threads
Explore
- 楽しい実験…お子さんと一緒に夢中になれるイチオシの科学実験を多数紹介しています。また、高校物理の理解を深めるための動画教材も用意しました。
- 理科の教材… 理科教師をバックアップ!授業の質を高め、準備を効率化するための選りすぐりの教材を紹介しています。
- Youtube…科学実験等の動画を配信しています。
- 科学ラジオ …科学トピックをほぼ毎日配信中!AI技術を駆使して作成した「耳で楽しむ科学」をお届けします。
- 講演 …全国各地で実験講習会・サイエンスショー等を行っています。
- About …「科学のネタ帳」のコンセプトや、運営者である桑子研のプロフィール・想いをまとめています。
- お問い合わせ …実験教室のご依頼、執筆・講演の相談、科学監修等はこちらのフォームからお寄せください。
- See the Invisible: The Mysterious Phase Shift Hiding in Coils

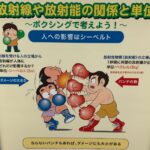
- Punches Aren’t Damage: Understanding Becquerels and Sieverts Through Boxing
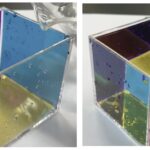
- Pour Water and a Cube Appears! The CMY Water Cube That Reveals the Magic of Color Subtraction
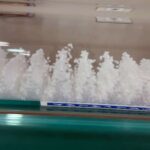
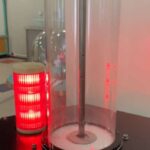
- The Mysterious Device That Makes Styrofoam Float in Midair — Visualizing Sound Waves with a Kundt’s Tube
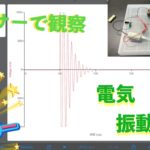
- The Switch Is Off, But It Won’t Stop! Capturing the Mystery of Coil Oscillations with a Sensor (EasySense V-Hub)
- Eddy Currents Launch Metal Rings Into the Air — The Electromagnetic Magic of Tsukuba Expo Center
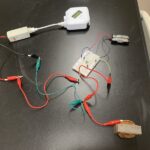
- Caught in the Lab: Does Current Actually Hesitate? A Coil’s 0.0005-Second Story
- Chaos to Harmony: The Secret Behind 15 Pendulums Dancing in Perfect Sync
- It Went Off in Class! How Our “Human Chain Shock” Experiment with a Van de Graaff & Leyden Jar Spectacularly Failed