I’m Ken Kuwako, your science trainer. Every day is an experiment.
The experiment to check “how saliva reacts to starch” is a staple in the 8th-grade science curriculum on digestion. If you’ve ever tried it, you know it can get pretty hectic. You’re trying to do everything with a timer in one hand, and if you don’t cooperate as a group, you’ll really run out of time. And if you’re not precise, the results can be hard to see, which can lead to a disappointing “So, what happened?” kind of moment.
I had the chance to learn how to do this experiment more effectively from my senior colleague, Mr. Y. His method was full of brilliant tips to ensure we get a clear result within the class period. When I tried it, my students were genuinely surprised when the color changed, and they really felt the work of the digestive enzymes.
Here, I’ll share those clever tips along with the step-by-step preparation for the class.
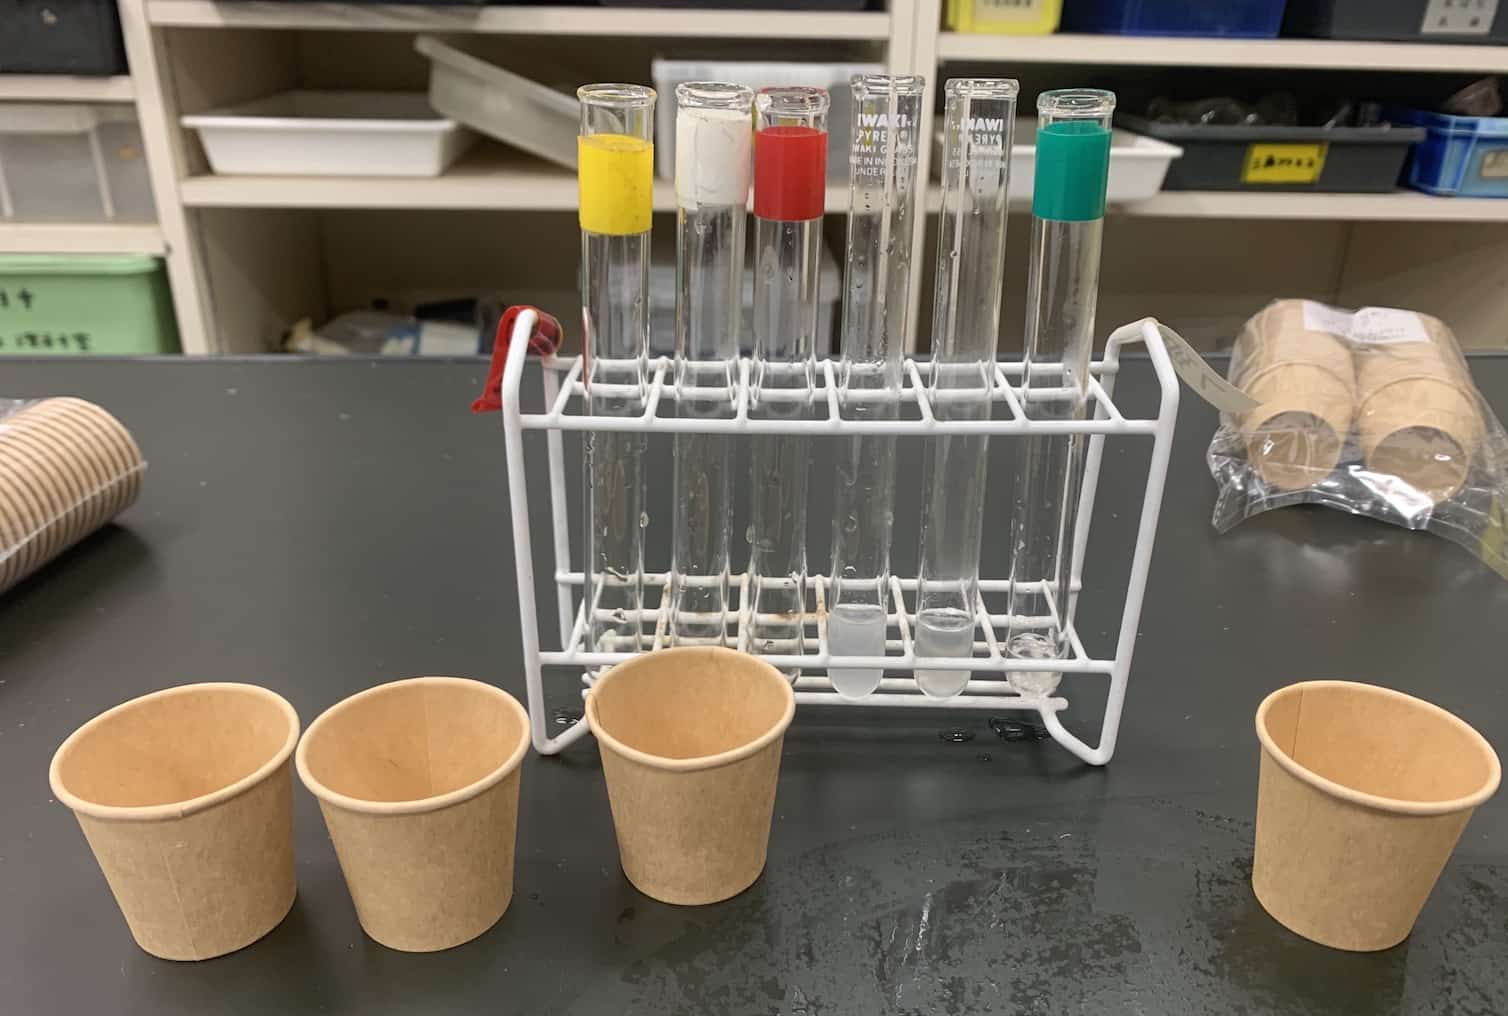
Materials Needed
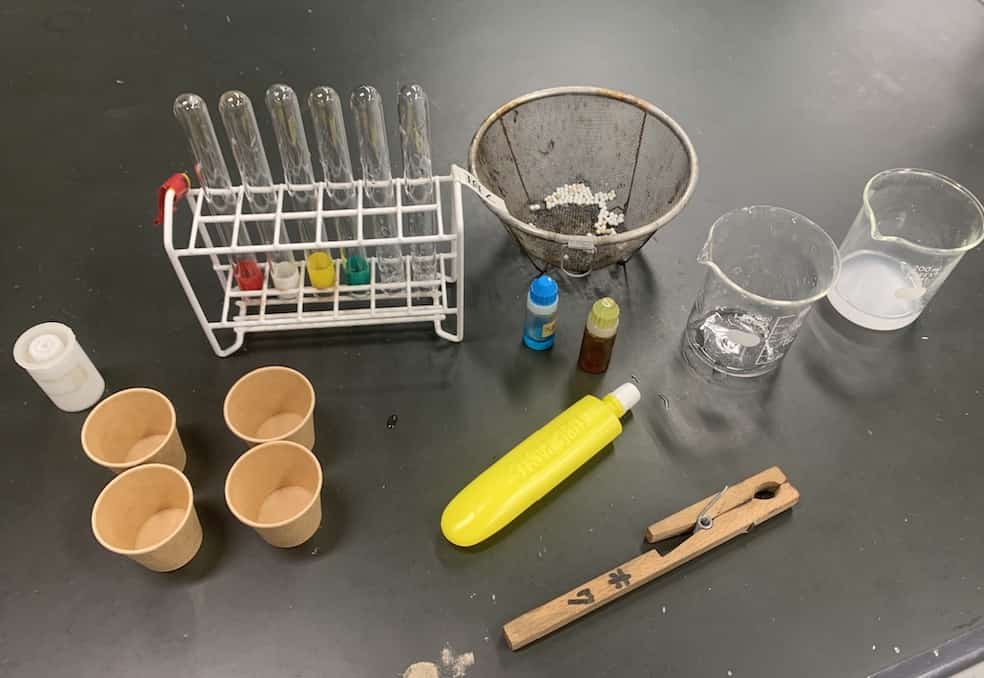
Paper cups (one per person), test tubes (number of groups + 2 per group), beakers, test tube racks, test tube holder (1), heating apparatus, boiling chips, starch solution made from tube glue (prepare just before the experiment, 50mL)
Reagents: Iodine solution, Benedict’s solution
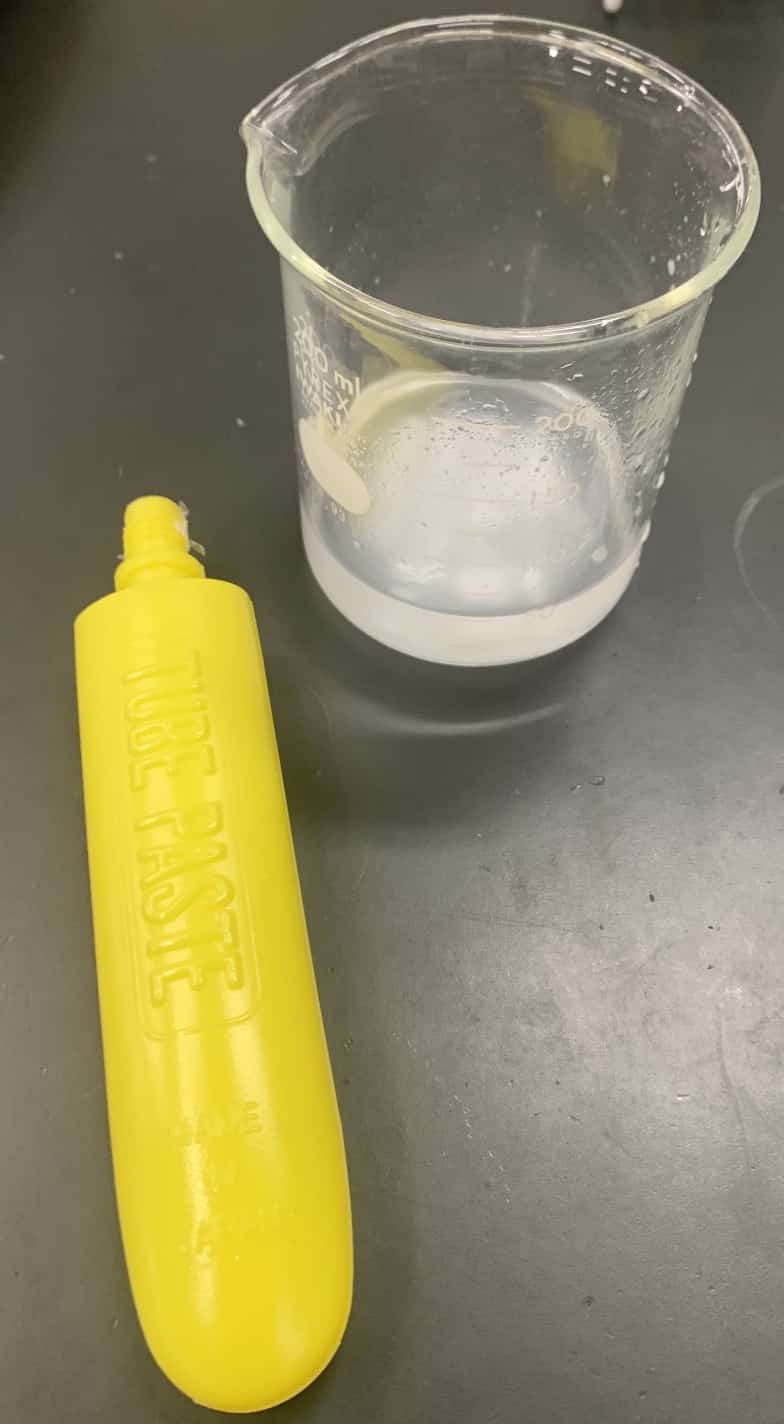
Dissolve the tube glue in water. It’s recommended to do this right before the experiment.
Preparation: Pour about 40mL of starch solution into a 100mL beaker and distribute one to each group (prepare 10). Also, pour about 1/4 of a small paper cup (205mL) with water for each student.
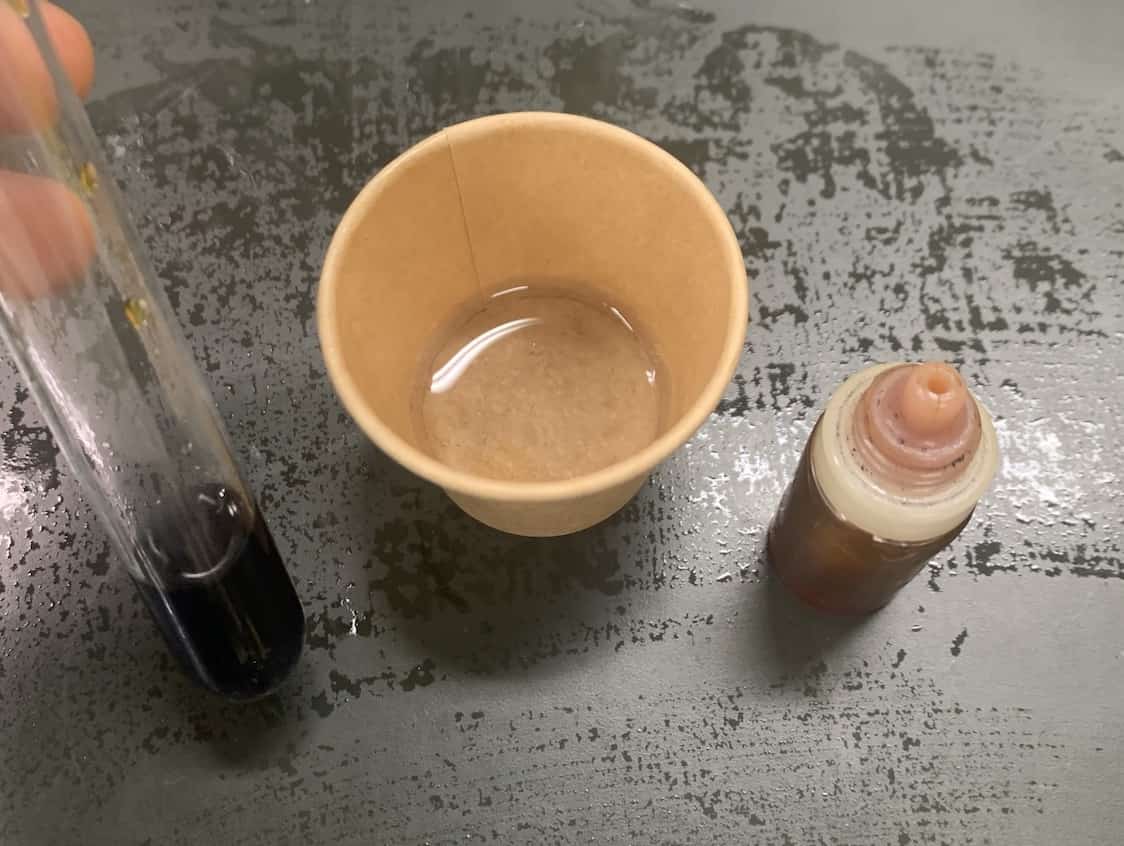
① Take a sip of water from the paper cup, hold it in your mouth for one minute to mix with saliva, and then return the saliva-mixed water to the cup.
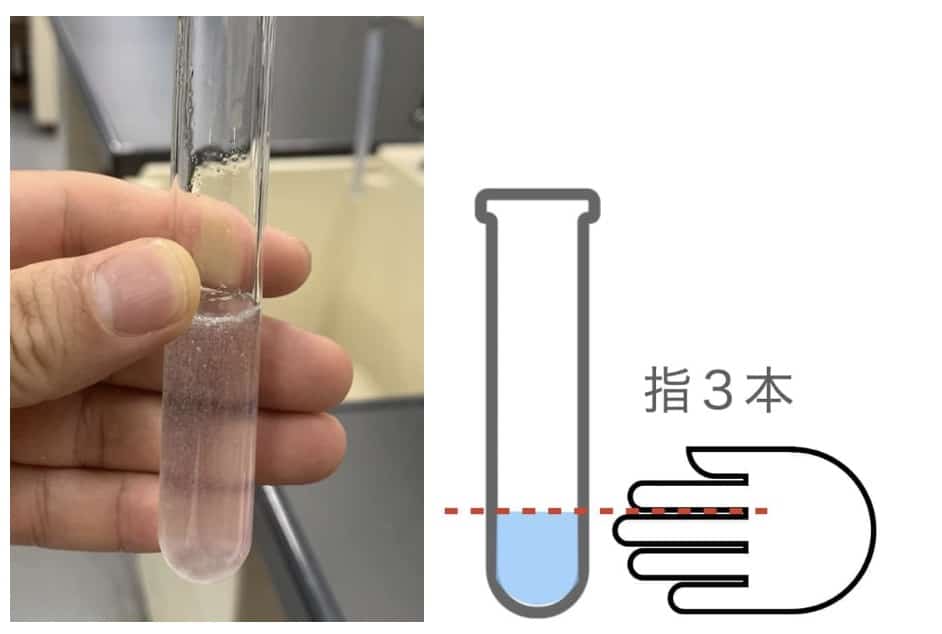
② Pour about 5mL of starch solution into your test tube. This is roughly the amount that comes up to 2.5 finger-widths.
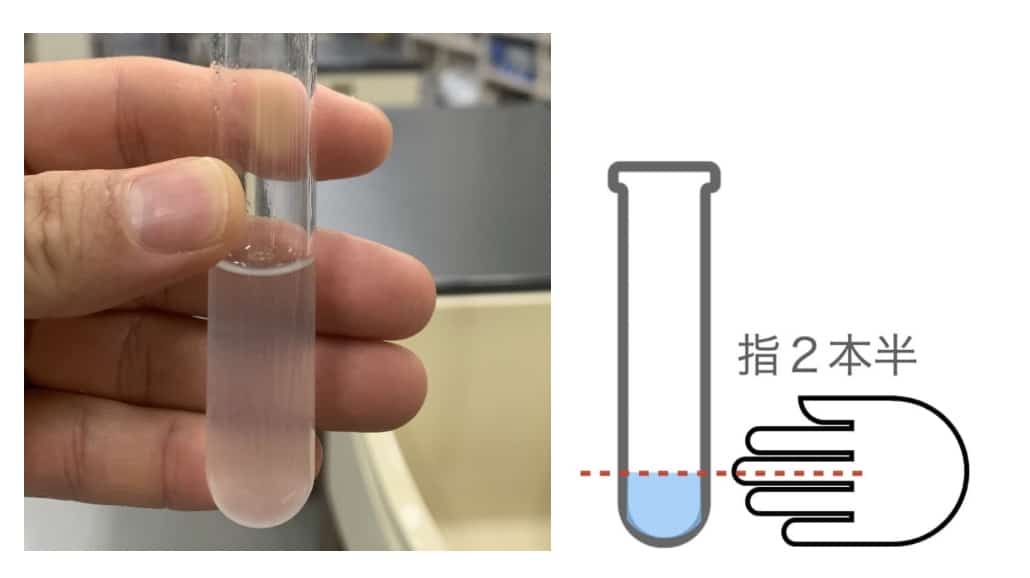
Then add 2mL of saliva. (This is about half a finger-width, so) the total should be about 3 finger-widths. Discard the remaining saliva solution in the paper cup. Do not throw away the paper cup.
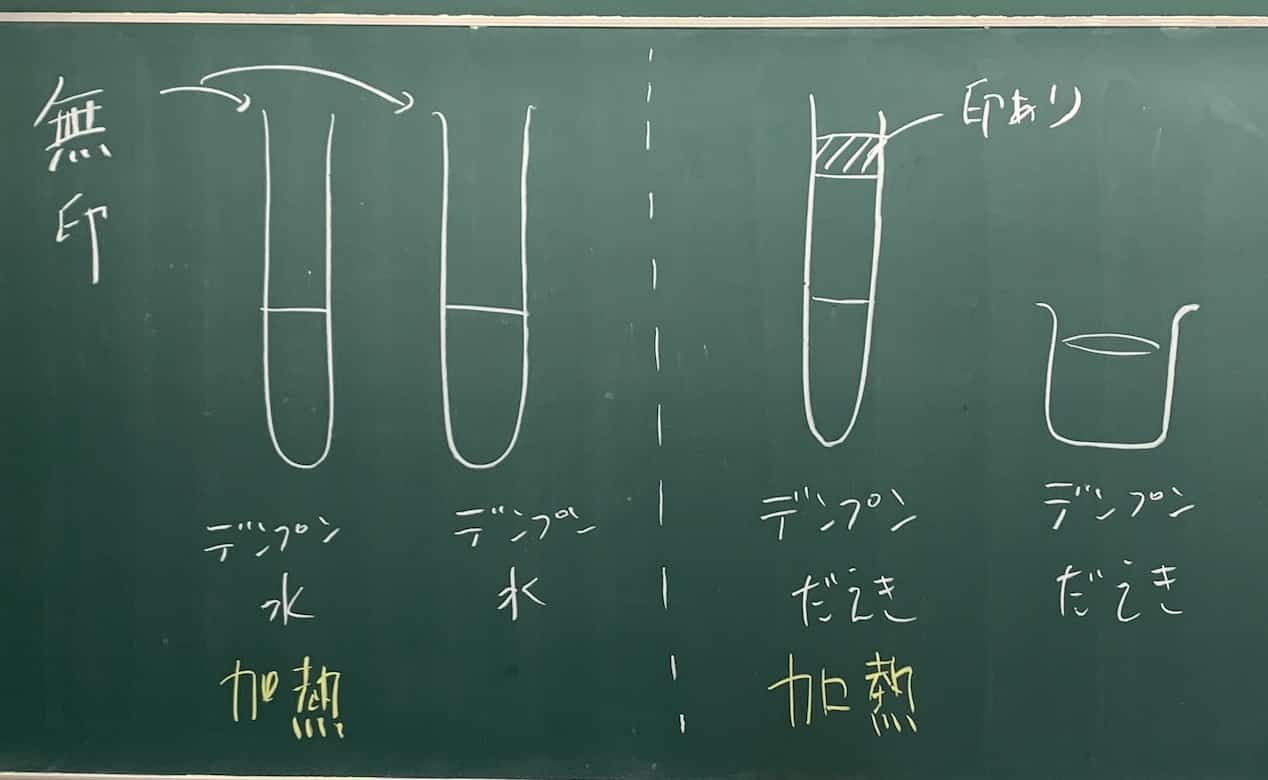
③ For the control experiment, prepare one test tube with 5mL of starch solution (colorless) and add 2mL of water to it.
④ Place the test tubes from ② and ③ (5 tubes) in a water bath of about 40°C (the teacher prepares 10 sets) and leave for 10 minutes (using a gas water heater makes this easy).
After 10 minutes:
⑤ Each student returns half of the solution from their saliva test tube back to their paper cup.
⑥ For the control experiment, pour half of the water solution from the test tube into another test tube (colorless) (one per group).
⑦ For the solution in the paper cup from ④ and one test tube from ⑤, add iodine solution to them.
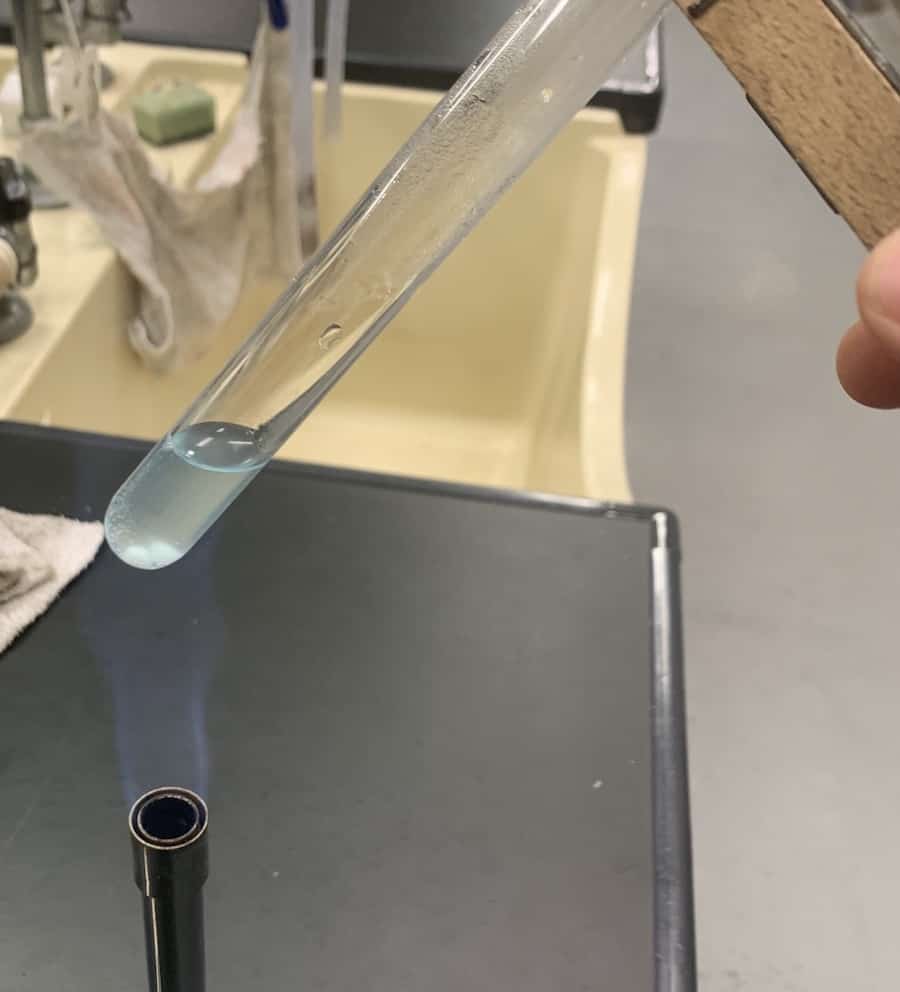
⑧ For one test tube from ④ and one test tube from ⑤, add a small amount of Benedict’s solution (3-4 drops, just enough to see the color change) and 2-3 boiling chips. Be sure to wipe the outside of the test tube dry (to prevent it from cracking). Use a test tube holder to heat it and observe the color change.
Caution when heating
Superheating can cause the liquid to suddenly boil and splash, so always point the mouth of the test tube away from yourself and others. I’ve made a video of what happens if you heat it without boiling chips. Please note that even with boiling chips, hot water can still splash out. Please be careful.

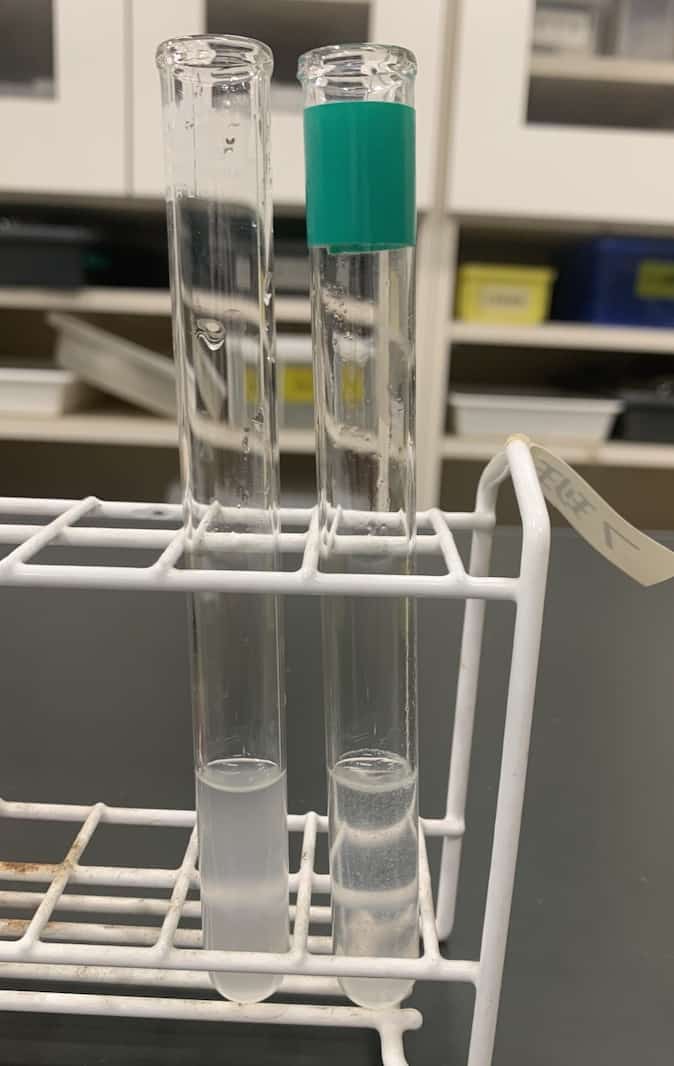
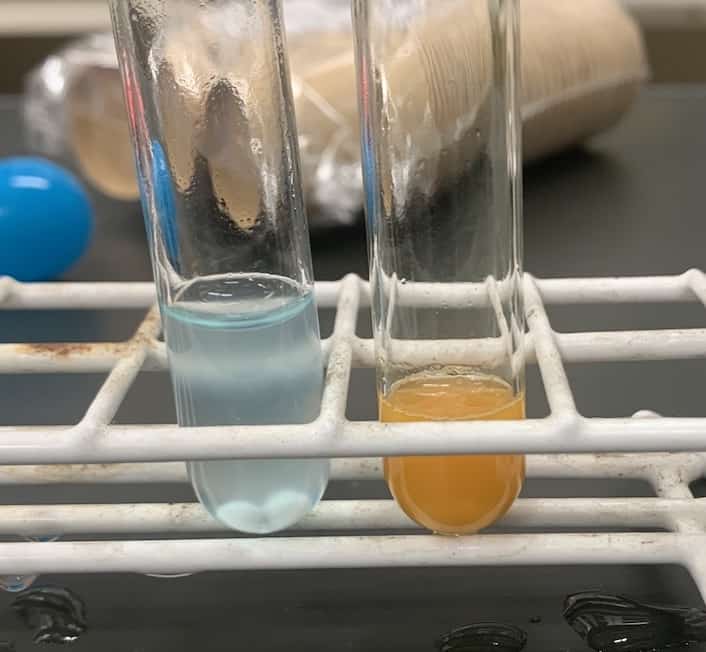
As you heat it up,
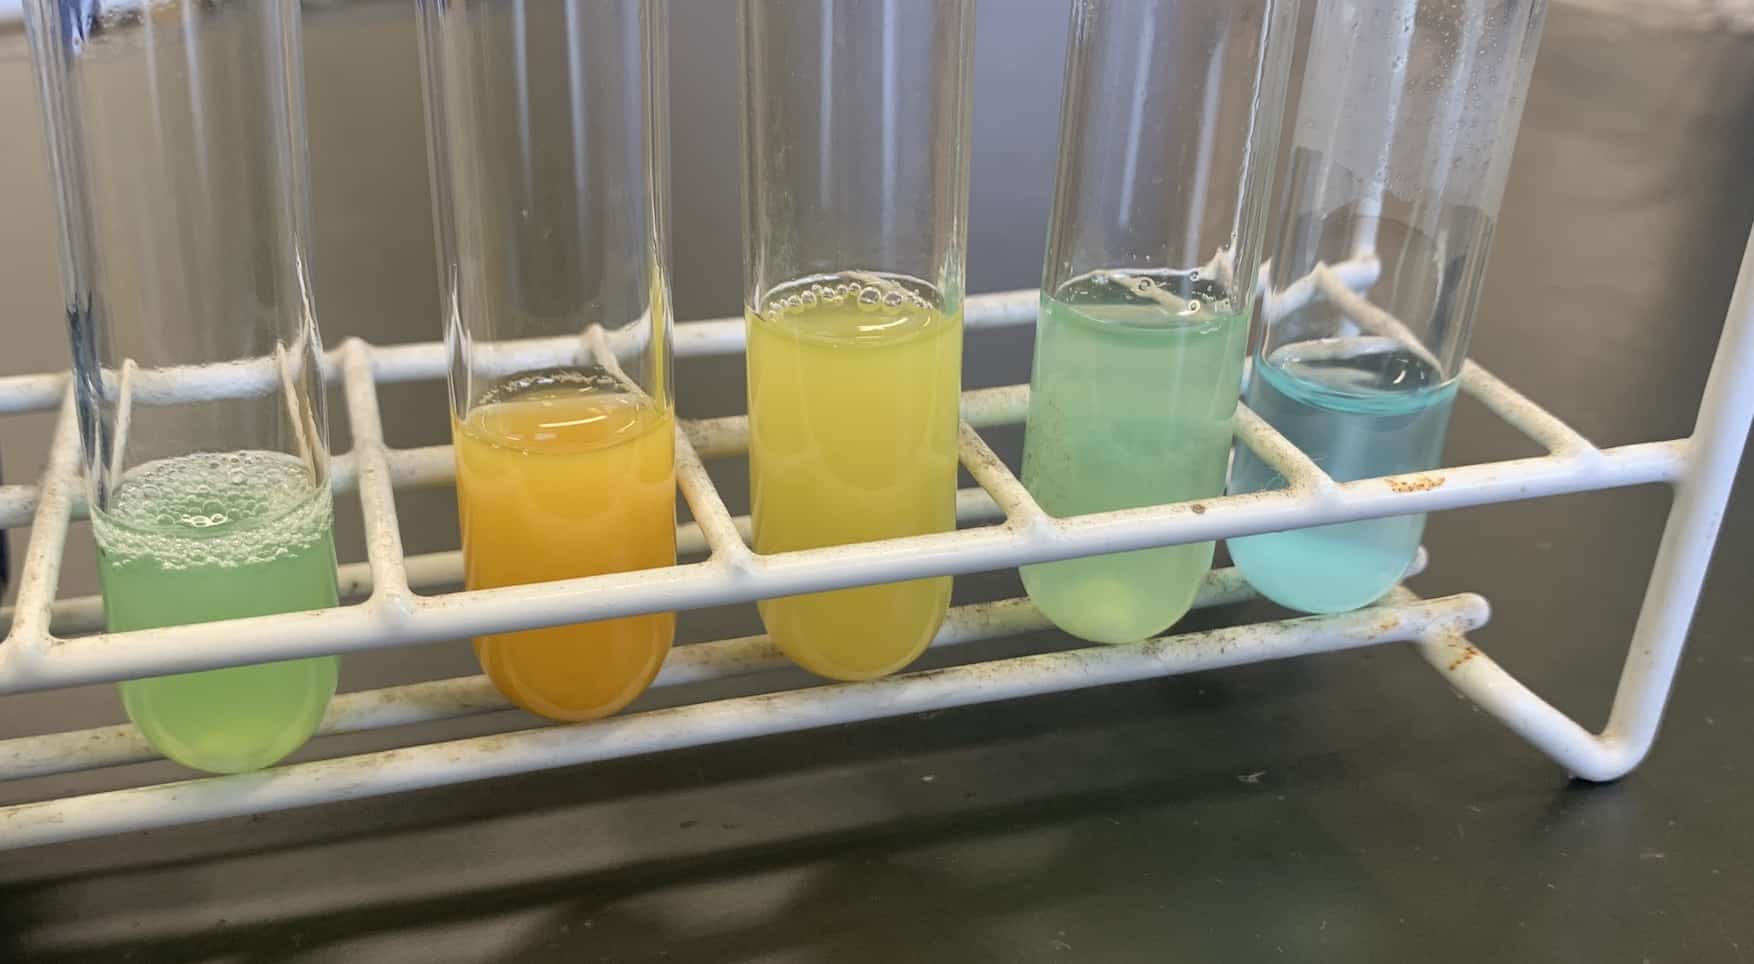
The color will change like this. The left side is the starch + water solution, and the right side is the starch + saliva solution.
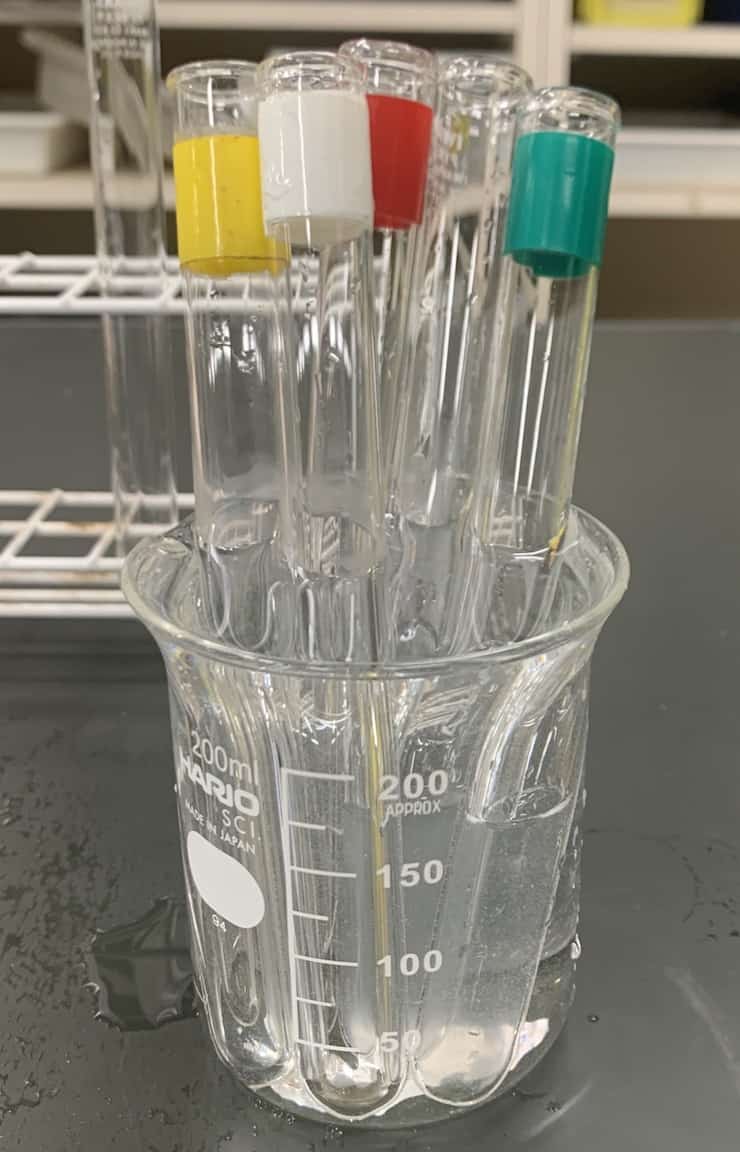
I was allowed to take a picture of a group’s results. The colors turned out differently for each person. The first four tubes from the left are from different students’ saliva, and the tube on the far right is the control experiment.
• If a group doesn’t get a result, ask them, “What do you think was different?” to make them focus on the variables (temperature, time, amount of saliva).
• Confirming that digestive enzymes are destroyed by heat and only work under specific conditions deepens their scientific understanding.
• Having them organize the results in a table and write a conclusion makes it a more inquiry-based lesson.
This experiment is a great way for students to experience that “digestive enzymes are invisible but create real change.” However, the success rate and satisfaction of the class depend heavily on the proper execution. The tips I learned from Mr. Y are all directly related to student understanding, and I would definitely like to continue using them in the future.
Contact and Requests
Make the wonders and fun of science more accessible! I’ve compiled a collection of fun science experiments you can do at home, along with easy-to-understand tips. Feel free to search around!
・To learn about the operator, Ken Kuwako, click here
・For various requests (writing, lectures, experiment workshops, TV supervision, appearances, etc.), click here
・Article updates are delivered on X!
![]() The Science Channel streams experiment videos!
The Science Channel streams experiment videos!